Velvety Vanilla Milkshake Recipe

Dreamy Classic Vanilla Milkshake Recipe for Sweet Sips

Summers sizzle with nostalgia when a classic vanilla milkshake dances across your taste buds.

Cool, creamy, and utterly irresistible, this timeless treat brings instant comfort.

Smooth vanilla ice cream blends into a silky perfection that whispers sweet memories.

Every sip carries the rich, velvety essence of pure indulgence.

Simple ingredients come together in a magical harmony that defines pure refreshment.

The magic lies in the simplicity of quality components and careful mixing.

You’ll fall in love with this effortless blend of sweetness and smooth satisfaction.

Dive into this delightful recipe and let your senses celebrate pure, classic deliciousness.

Quick Recipe Overview

Prep Time: 5 minutes

Cook Time:

Total Time: 5 minutes

Calories: 360 kcal

Servings: 3

Ingredients for Classic Vanilla Milkshake

For Base Ingredients:
  • Vanilla Ice Cream: Creamy foundation that provides rich, smooth texture and classic vanilla flavor; choose high-quality premium brand for best taste.
  • Whole Milk: Adds silky richness and helps achieve perfect milkshake consistency; select fresh, full-fat milk for maximum creaminess.
  • Vanilla Extract: Enhances deep vanilla notes and brings depth to the shake's flavor profile; use pure vanilla extract for authentic taste.
For Garnish Ingredients:
  • Whipped Cream: Adds luxurious cloud-like topping that creates delightful visual and textural contrast; opt for fresh, homemade or high-quality store-bought version.
  • Maraschino Cherry: Provides playful pop of color and sweet accent to finish the milkshake; choose bright, plump cherries for an eye-catching presentation.

Equipment Checklist for Vanilla Milkshake

  • Blender: Powerful kitchen appliance to mix ingredients into smooth, creamy consistency.
  • Tall glass: Classic serving vessel for showing off milkshake's beautiful texture.
  • Measuring cups/spoons: Precise tools for accurately measuring milk and vanilla extract.
  • Spatula or spoon: Handy for scraping down blender sides and ensuring perfect mixing.
  • Optional whipped cream dispenser: Quick way to add fluffy topping to your milkshake.
  • Optional cherry picker or tongs: Helps place maraschino cherry perfectly on top.

Step-by-Step to Make Vanilla Milkshake

  • Creamy Blender Dance

Gather your favorite vanilla ice cream, whole milk, and a splash of vanilla extract. Let them mingle in the blender, ready for a whirl of deliciousness.

  • Smooth Spinning Magic

Blend everything on high speed, watching the ingredients transform into a silky smooth concoction. Give it about 30-60 seconds of powerful spinning.

  • Texture Perfection

Check the consistency. If it’s too thick, splash in a bit more milk. If it’s too thin, add a scoop more ice cream. Blend until it’s just right – not too heavy, not too light.

  • Glass Celebration

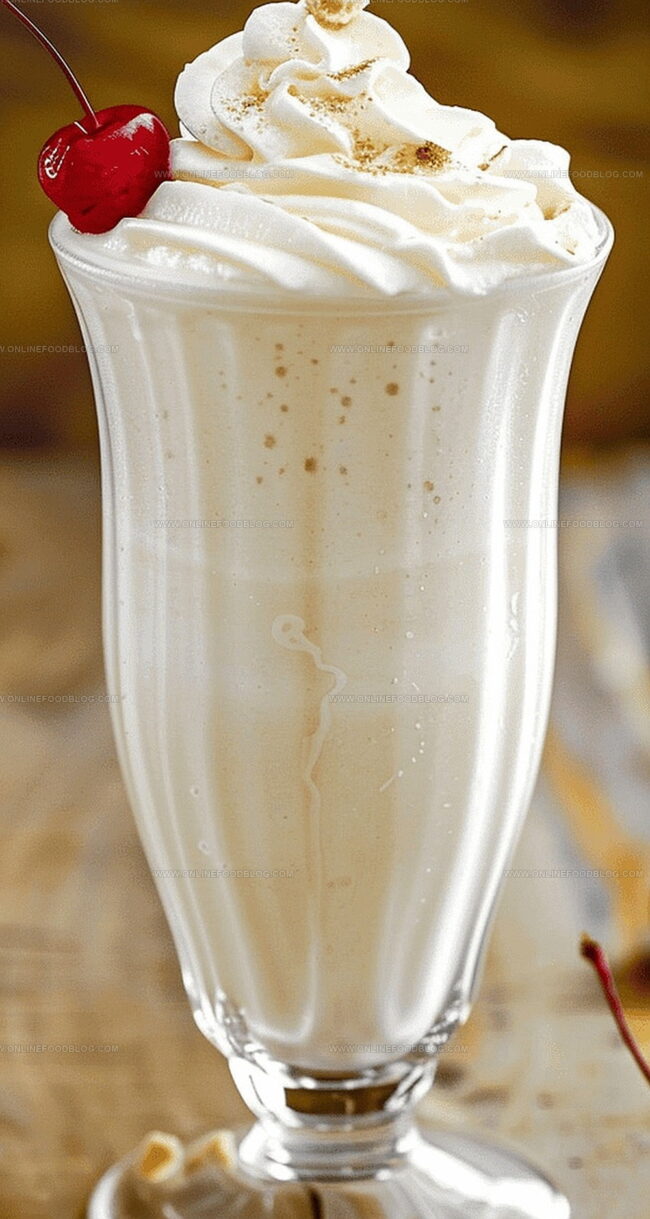
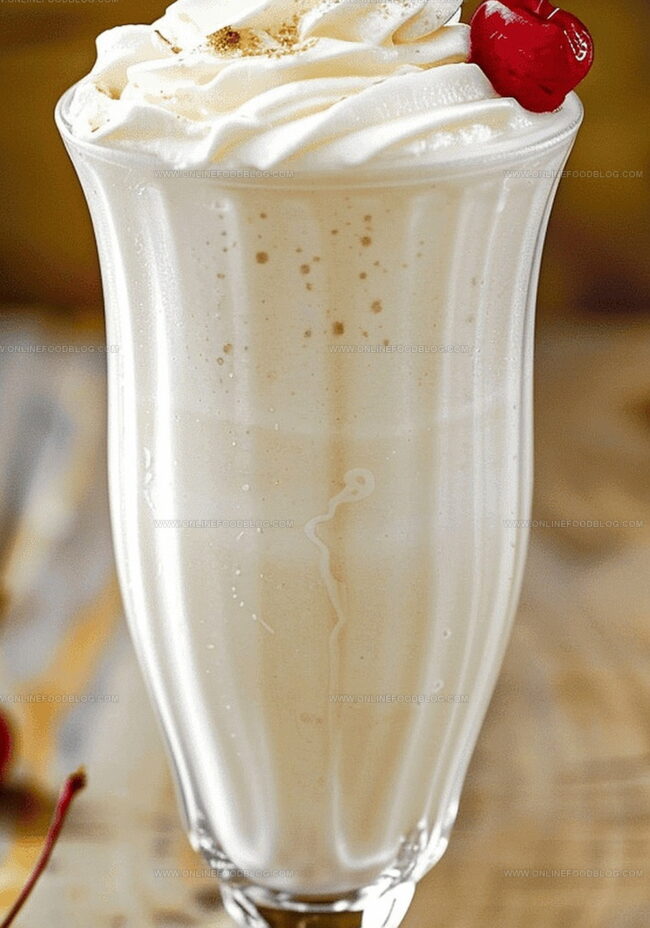
Pour your dreamy creation into a tall, chilled glass. Crown it with a cloud of whipped cream and a playful maraschino cherry if you’re feeling fancy. Grab a straw and enjoy immediately while it’s cold and dreamy.

Tips & Mix-In Ideas for Vanilla Milkshake

  • Swap vanilla extract for other extracts like almond or coconut to create unique taste profiles.
  • Blend in a tablespoon of malted milk powder for a classic diner-style milkshake with deeper flavor complexity.
  • Sprinkle crushed cookies, chocolate shavings, or colorful sprinkles on the whipped cream for extra texture and visual appeal.
  • Chill your glass in the freezer for 10 minutes before serving to keep your milkshake cooler and create a frosty presentation.
  • Fold in fresh berries, chocolate chips, or caramel sauce directly into the blender for an instant flavor transformation.

How to Serve a Vanilla Milkshake

  • Nostalgic Diner Experience: Recreate the classic American soda fountain feel by serving your milkshake in a tall, chilled glass with a striped paper straw, instantly transporting you to a 1950s diner atmosphere.
  • Decadent Topping Paradise: Elevate your milkshake with a generous swirl of homemade whipped cream, then sprinkle chocolate shavings, crushed cookie crumbs, or colorful rainbow sprinkles for extra indulgence and visual appeal.
  • Creative Flavor Companions: Pair your vanilla milkshake with warm chocolate chip cookies, a slice of apple pie, or a crispy waffle to create a delightful dessert combination that complements the smooth, creamy texture of the shake.
  • Summer Cool Down Station: Transform your milkshake into a fun DIY dessert bar by setting out various toppings like chopped nuts, mini marshmallows, caramel sauce, and fresh berries, allowing guests to customize their perfect sweet treat.

Storage Tips for Vanilla Milkshake

  • Chilling Storage Solutions: Transfer any leftover milkshake to an airtight container and refrigerate for up to 2 hours. The texture might change slightly, so give it a quick stir before enjoying.
  • Freezing Friendly Technique: Freeze milkshake in popsicle molds for a delightful frozen treat. These creamy pops make a fantastic summer snack for kids and adults alike.
  • Quick Consistency Rescue: If the milkshake separates or becomes icy in the refrigerator, blend it again briefly to restore its smooth, creamy texture. A quick pulse will bring back its original lusciousness.
  • Temperature Timing Tips: Always serve milkshakes immediately after blending for the best flavor and consistency. Cold ingredients and a chilled glass help maintain that perfect, frosty smoothness that makes milkshakes irresistible.
Print
clock clock iconcutlery cutlery iconflag flag iconfolder folder iconinstagram instagram iconpinterest pinterest iconfacebook facebook iconprint print iconsquares squares iconheart heart iconheart solid heart solid icon
Velvety Vanilla Milkshake Recipe

Velvety Vanilla Milkshake Recipe


5 Stars 4 Stars 3 Stars 2 Stars 1 Star

4.7 from 37 reviews

  • Total Time: 5 minutes
  • Yield: 3 1x

Description

Milky dreams bloom in this classic vanilla milkshake recipe from American diners. Cold creamy goodness blends vanilla, milk, and ice cream into pure nostalgic pleasure for hungry souls.


Ingredients

Scale
  • 2 cups (344 g / 12.1 oz) vanilla ice cream
  • ½ cup (122 g / 4.3 oz) whole milk
  • ½ tsp vanilla extract
  • whipped cream
  • maraschino cherry

Instructions

  1. Preparation: Allow vanilla ice cream to soften at room temperature for effortless blending, ensuring a silky-smooth texture.
  2. Mixing: Transfer softened ice cream into a blender, precisely incorporating whole milk and vanilla extract to craft a harmonious flavor profile.
  3. Blending: Secure the lid and pulse on high speed, transforming ingredients into a velvety concoction, periodically pausing to scrape down the sides and eliminate any unmixed pockets.
  4. Consistency Check: Adjust the milkshake’s thickness by adding milk or ice cream as needed, achieving the ideal drinkable consistency with a uniform color and texture.
  5. Presentation: Select a chilled tall glass, elegantly pouring the creamy mixture to create a visually appealing beverage.
  6. Garnishing: Optionally embellish with a lavish dollop of whipped cream and a vibrant maraschino cherry, elevating the classic milkshake experience.
  7. Serving: Present immediately to savor the milkshake at its optimal temperature and creamy perfection.

Notes

  • Chill Your Glass: Cold glasses keep milkshakes frosty longer and enhance the drinking experience.
  • Master Ice Cream Softening: Let ice cream sit at room temperature for 3-5 minutes to achieve perfect blending consistency without melting completely.
  • Blend with Precision: Pulse blender initially to break down larger ice cream chunks, then blend continuously for a smooth, creamy texture.
  • Customize Thickness Wisely: Add milk or ice cream gradually to control milkshake consistency, preventing a watery or overly thick result.
  • Prep Time: 5 minutes
  • Category: Drinks, Snacks, Desserts
  • Method: Blending
  • Cuisine: American

Nutrition

  • Serving Size: 3
  • Calories: 360
  • Sugar: 34 g
  • Sodium: 80 mg
  • Fat: 16 g
  • Saturated Fat: 10 g
  • Unsaturated Fat: 6 g
  • Trans Fat: 0 g
  • Carbohydrates: 48 g
  • Fiber: 0 g
  • Protein: 6 g
  • Cholesterol: 60 mg
Mia Reynolds

Mia Reynolds

Food Writer & Home Cooking Specialist

Expertise

Easy Home Baking, Recipe Writing and Storytelling, Local and Seasonal Ingredients, Baking for Beginners

Education

New England Culinary Institute (NECI), Montpelier, Vermont

  • Certificate: Baking and Pastry Arts Certificate
  • Focus: Hands-on baking skills, pastry basics, and creating delicious, approachable baked goods.

Community College of Vermont, Winooski, Vermont

  • Degree: Certificate in Food and Beverage Management
  • Focus: Essential knowledge of recipe development, ingredient sourcing, and food business basics.

Mia Reynolds fell in love with baking as a teenager experimenting in her family kitchen. Her passion took her to New England Culinary Institute, where she learned practical pastry techniques, and later to Community College of Vermont to deepen her understanding of food management.

Mia combines clear, simple baking instructions with heartwarming stories, making home baking approachable for everyone.

Leave a Reply

Your email address will not be published. Required fields are marked *

Recipe rating 5 Stars 4 Stars 3 Stars 2 Stars 1 Star