
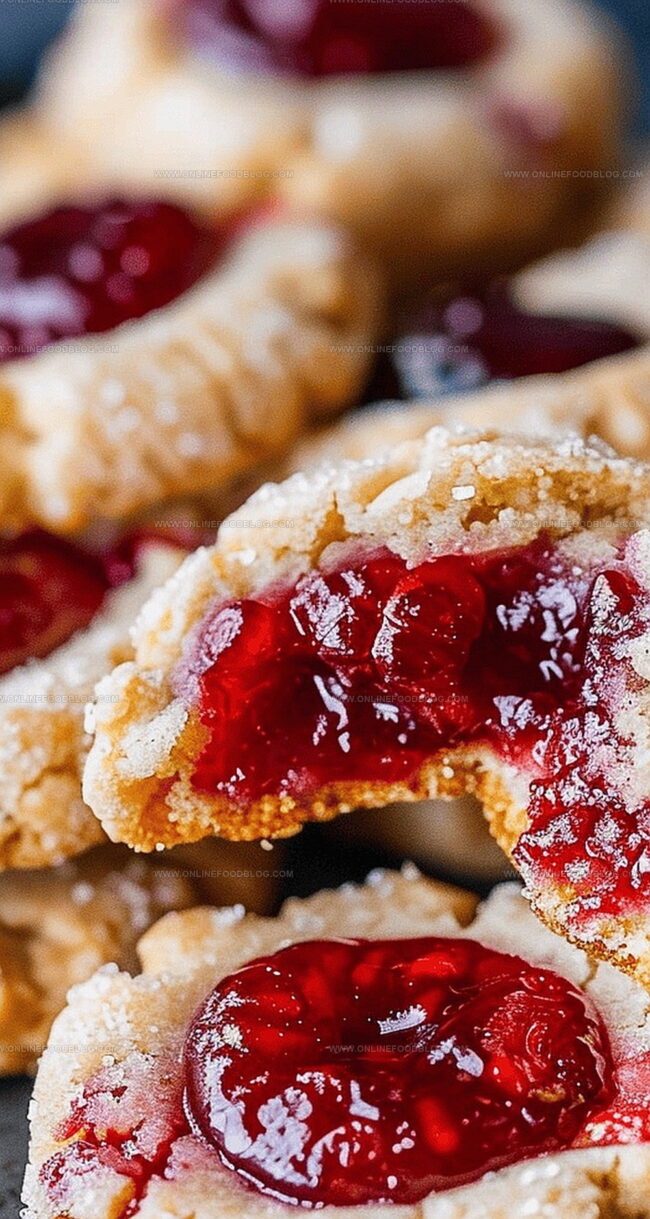
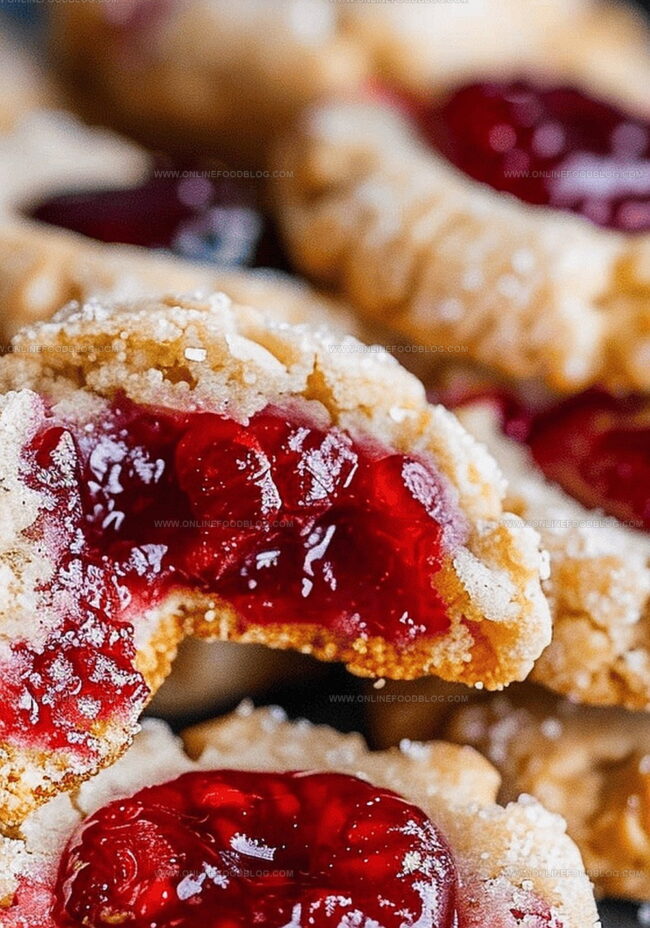
Sweet Berry Bliss: Homemade Raspberry Thumbprint Cookies Recipe
Soft, buttery cookies with a delightful raspberry thumbprint recipe dance with sweet nostalgia and irresistible charm.
These classic treats bring warmth to any kitchen with their golden edges and vibrant jam centers.
Bakers of all skill levels can master these delectable morsels in minutes.
Each cookie offers a perfect balance of crumbly shortbread and fruity brightness.
The simple ingredients blend seamlessly to create a melt-in-your-mouth experience that sparks joy.
Homemade raspberry thumbprint cookies promise to become your new favorite afternoon indulgence.
You’ll fall in love with every tender, jammy bite of these delightful little treasures.
Quick Recipe Overview
Raspberry Thumbprint Cookies Ingredient Rundown
For Cookie Base:For Flavor Enhancers:For Filling and Topping:Tools for Making the Perfect Thumbprints
Instructions for Raspberry Thumbprint Cookies
Clear a clean surface and gather all your baking tools. Make sure your counter is ready for a delightful cookie adventure.
Grab softened butter and sugar, then whip them together until they transform into a creamy, cloud-like mixture. The texture should look smooth and dreamy.
Gently fold in egg yolk and vanilla, creating a rich base that smells wonderfully warm and inviting. The mixture will start to look silky and luxurious.
Blend flour, salt, and chopped pecans into your mixture. The dough will come together, forming a soft, slightly crumbly texture that hints at the deliciousness to come.
Wrap your dough and let it rest in the refrigerator. This quick break helps the flavors meld and makes the dough easier to handle.
Scoop small rounds onto a lined baking sheet. Using your thumb or a spoon, create a cozy little pocket in each cookie.
Fill those adorable pockets with vibrant raspberry jam. Each cookie becomes a tiny treasure waiting to be discovered.
Bake until the edges turn a gorgeous golden brown. The aroma will fill your kitchen with pure happiness.
Thumbprint Variations and Flavor Ideas
How to Serve These Classic Cookies
Storage Tips for Thumbprints to Stay Fresh
Print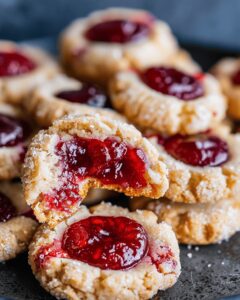
Velvety Raspberry Thumbprint Cookies
- Total Time: 50 minutes
- Yield: 22 1x
Description
Delectable raspberry thumbprint cookies combine sweet butter shortbread with tangy raspberry jam centers. Crisp edges and rich flavor make these classic treats perfect for holiday gatherings and afternoon tea moments.
Ingredients
- 1 ½ cups (340 g / 12 oz) butter, room temperature
- 1 cup (200 g / 7 oz) sugar
- 3 ⅓ cups (420 g / 14.8 oz) flour
- 1 egg yolk
- 1 tsp vanilla
- 1 cup (100 g / 3.5 oz) toasted pecans, finely chopped
- ¼ tsp salt
- Raspberry jam
Instructions
- Preparation: Preheat the oven to 350°F (175°C) with a rack positioned in the center for consistent heat distribution.
- Mixing Base: Cream butter and sugar using an electric mixer until the mixture becomes airy and pale, creating a smooth foundation for the cookies.
- Incorporating Wet Ingredients: Blend in egg yolk and vanilla extract, ensuring a uniform texture that binds the dough together seamlessly.
- Developing Dough: Gently fold flour, salt, and toasted pecans into the mixture, combining until a cohesive dough forms without excessive manipulation.
- Chilling Process: Encase the dough in plastic wrap and refrigerate for 30 minutes, allowing the ingredients to meld and the butter to firm up.
- Shaping Cookies: Arrange evenly sized dough balls on a parchment-lined baking sheet, creating uniform indentations in the center using your thumb or a rounded spoon.
- Filling and Baking: Pipe raspberry jam into the cookie centers with precision, then bake for 25-30 minutes, rotating the tray halfway through to ensure even golden-brown coloration.
- Cooling and Serving: Transfer cookies to a wire rack, allowing them to cool completely and set before presenting these delicate, nutty treats.
Notes
- Chill the Dough: Refrigerating the dough for 30 minutes helps solidify butter, preventing cookies from spreading and creating a more compact, tender texture.
- Create Uniform Indentations: Use the back of a teaspoon or thumb to make consistent, neat wells for jam, ensuring even baking and professional-looking cookies.
- Mind the Jam Placement: Fill jam carefully using a piping bag to prevent overflow and maintain clean, precise centers without messy edges.
- Rotate for Even Baking: Midway through baking, turn the tray to guarantee uniform golden-brown color and prevent uneven browning or burning on one side.
- Prep Time: 15 minutes
- Cook Time: 35 minutes
- Category: Desserts, Snacks
- Method: Baking
- Cuisine: American
Nutrition
- Serving Size: 22
- Calories: 179
- Sugar: 9 g
- Sodium: 36 mg
- Fat: 10 g
- Saturated Fat: 6 g
- Unsaturated Fat: 4 g
- Trans Fat: 0 g
- Carbohydrates: 20 g
- Fiber: 1 g
- Protein: 2 g
- Cholesterol: 34 mg
Mia Reynolds
Food Writer & Home Cooking Specialist
Expertise
Easy Home Baking, Recipe Writing and Storytelling, Local and Seasonal Ingredients, Baking for Beginners
Education
New England Culinary Institute (NECI), Montpelier, Vermont
Community College of Vermont, Winooski, Vermont
Mia Reynolds fell in love with baking as a teenager experimenting in her family kitchen. Her passion took her to New England Culinary Institute, where she learned practical pastry techniques, and later to Community College of Vermont to deepen her understanding of food management.
Mia combines clear, simple baking instructions with heartwarming stories, making home baking approachable for everyone.