
Adorable Cherry Cheesecake Bites Recipe: Sweet Joy in Tiny Form
Decadent and adorably portioned, these mini cherry cheesecakes deliver pure dessert bliss in every single bite.
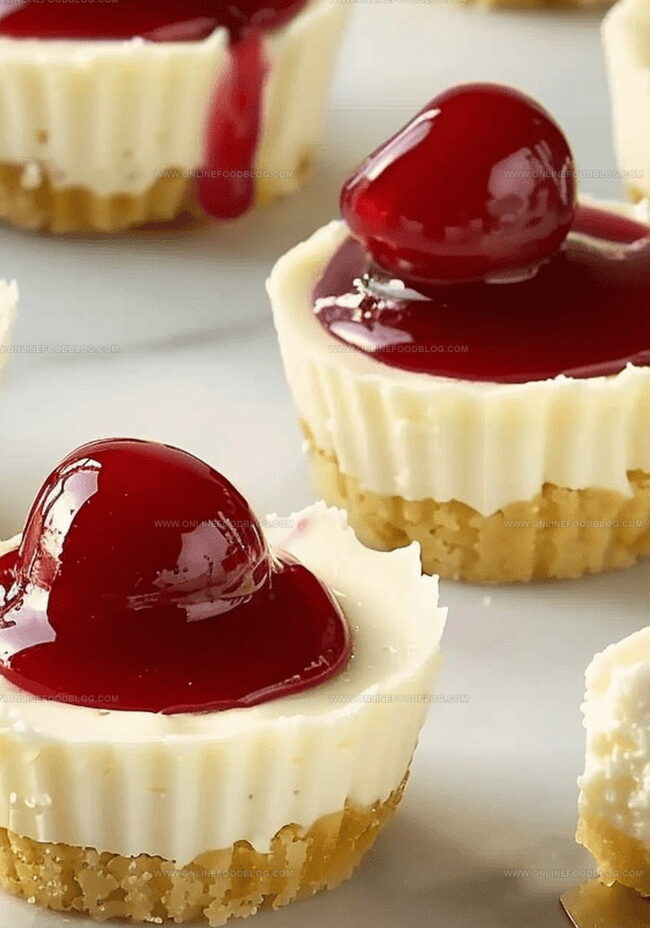
Creamy Philadelphia cream cheese melts seamlessly with sweet graham cracker crusts, creating a delightful base for the vibrant cherry topping.
Each petite cheesecake promises a burst of tangy-sweet flavor that dances across your palate.
No complicated baking skills required – just simple ingredients and straightforward steps.
The miniature size makes these treats perfect for parties, potlucks, or a quiet evening indulgence.
Silky smooth texture and a gorgeous ruby-red cherry crown will have everyone asking for seconds.
You’ll fall in love with how effortlessly elegant these little desserts come together.
Quick Recipe Overview

Ingredients List for Mini Cherry Cheesecakes
For Base:For Cheesecake Filling:For Topping:Tools Needed for Mini Cherry Cheesecakes
Instructions for Making Mini Cherry Cheesecakes
Place a classic Oreo cookie at the bottom of each paper-lined muffin cup, creating a delicious base for your mini cheesecakes.
Soften cream cheese at room temperature, then blend with sugar, eggs, vanilla, and salt until silky smooth, making sure no lumps remain.
Slide the muffin tin into a preheated 300°F oven, allowing the mini cheesecakes to bake until edges are set but centers remain slightly wobbly, typically 15-18 minutes.
Let cheesecakes cool completely at room temperature, then refrigerate for a few hours to help them set and develop rich, tangy flavors.
Just before serving, crown each mini cheesecake with a generous spoonful of vibrant cherry pie filling or a quick cherry jam sauce, adding a burst of fruity sweetness.
Topping Ideas & Adjustments for Mini Cherry Cheesecakes
Serving Tips for Mini Cherry Cheesecakes
Keeping Mini Cherry Cheesecakes Fresh
Print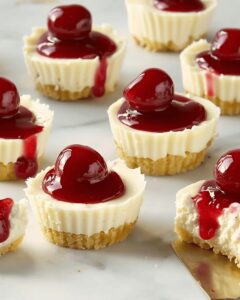
Velvety Mini Cherry Cheesecakes
- Total Time: 2 hours 33 minutes
- Yield: 13 1x
Description
Mini cherry cheesecakes offer a delightful dessert experience with creamy Philadelphia cream cheese and sweet cherry topping. Each bite delivers rich flavor balanced by a buttery graham cracker crust, perfect for satisfying sweet cravings you’ll love.
Ingredients
- 12 Oreo sandwich cookies (Golden Oreo or regular)
- 2 8 oz (226 g) cream cheese, softened
- 2 large eggs
- ⅔ cup (133 g) granulated sugar
- 1 tsp vanilla extract
- ¼ tsp kosher salt
- ¾ cup (180 ml) canned cherry pie filling or ⅔ cup (160 ml) cherry jam mixed with 2 tbsps warm water
- 12 paper muffin liners
Instructions
- Preparation: Soften cream cheese at room temperature or microwave briefly until smooth and pliable. Preheat oven to 300°F with rack positioned in the middle, then line a standard muffin tin with paper liners.
- Base Construction: Position an Oreo cookie at the bottom of each muffin liner, establishing a rich, chocolatey foundation for the mini cheesecakes.
- Batter Creation: Utilize a stand mixer or electric hand mixer to whip cream cheese until completely smooth. Blend in granulated sugar, eggs, vanilla extract, and kosher salt, ensuring a silky, lump-free mixture that incorporates all ingredients evenly.
- Baking Process: Distribute cheesecake batter uniformly among muffin wells, filling each liner to approximately three-quarters capacity. Bake for 15-18 minutes, monitoring for set edges while maintaining a subtle center jiggle.
- Cooling and Setting: Transfer cheesecakes from oven and allow to cool completely on a wire rack, which may result in slight center depression. Refrigerate for a minimum of 2 hours or overnight to intensify flavor and optimize texture.
- Finishing Touches: Carefully remove cheesecakes from muffin tin, optionally peeling away paper liners. Embellish each mini cheesecake with a generous spoonful of cherry pie filling or create a glossy topping by combining cherry jam with warm water for an elegant presentation.
Notes
- Soften Cream Cheese Smartly: Bring to room temperature or microwave briefly to ensure smooth, lump-free texture for perfectly creamy cheesecakes.
- Prevent Overbaking Carefully: Watch closely during the 15-18 minute baking window, aiming for set edges with a slight center jiggle to maintain ultimate creaminess.
- Chill for Maximum Flavor: Refrigerate for at least 2 hours or overnight, allowing flavors to develop and texture to become rich and dense.
- Topping Transformation Tip: Enhance cherry topping by mixing jam with warm water for a glossy, professional-looking finish that elevates the mini cheesecakes.
- Prep Time: 15 minutes
- Cook Time: 18 minutes
- Category: Desserts, Snacks
- Method: Baking
- Cuisine: American
Nutrition
- Serving Size: 13
- Calories: 210
- Sugar: 18g
- Sodium: 200mg
- Fat: 12g
- Saturated Fat: 7g
- Unsaturated Fat: 4g
- Trans Fat: 0g
- Carbohydrates: 24g
- Fiber: <1g
- Protein: 3g
- Cholesterol: 50mg
Mia Reynolds
Food Writer & Home Cooking Specialist
Expertise
Easy Home Baking, Recipe Writing and Storytelling, Local and Seasonal Ingredients, Baking for Beginners
Education
New England Culinary Institute (NECI), Montpelier, Vermont
Community College of Vermont, Winooski, Vermont
Mia Reynolds fell in love with baking as a teenager experimenting in her family kitchen. Her passion took her to New England Culinary Institute, where she learned practical pastry techniques, and later to Community College of Vermont to deepen her understanding of food management.
Mia combines clear, simple baking instructions with heartwarming stories, making home baking approachable for everyone.