
Heavenly Homemade Cheesecake Recipe: Silky & Sublime
Silky smooth cheesecake beckons with its irresistible charm, promising a decadent journey through creamy indulgence.
Layers of rich, velvety texture melt effortlessly on your tongue.
Each carefully crafted bite tells a story of culinary passion and precision.
The classic dessert stands as a testament to elegant simplicity and delightful flavors.
Whispers of vanilla and cream dance harmoniously, creating a symphony of sweetness.
Professional bakers and home cooks alike treasure this timeless recipe.
Let’s dive into a delectable experience that turns ordinary moments into extraordinary memories.
Quick Recipe Overview
Ingredients for Classic Cheesecake
For Crust:For Filling:For Optional Decoration:Tools Every Cheesecake Needs
How to Bake a Silky Cheesecake

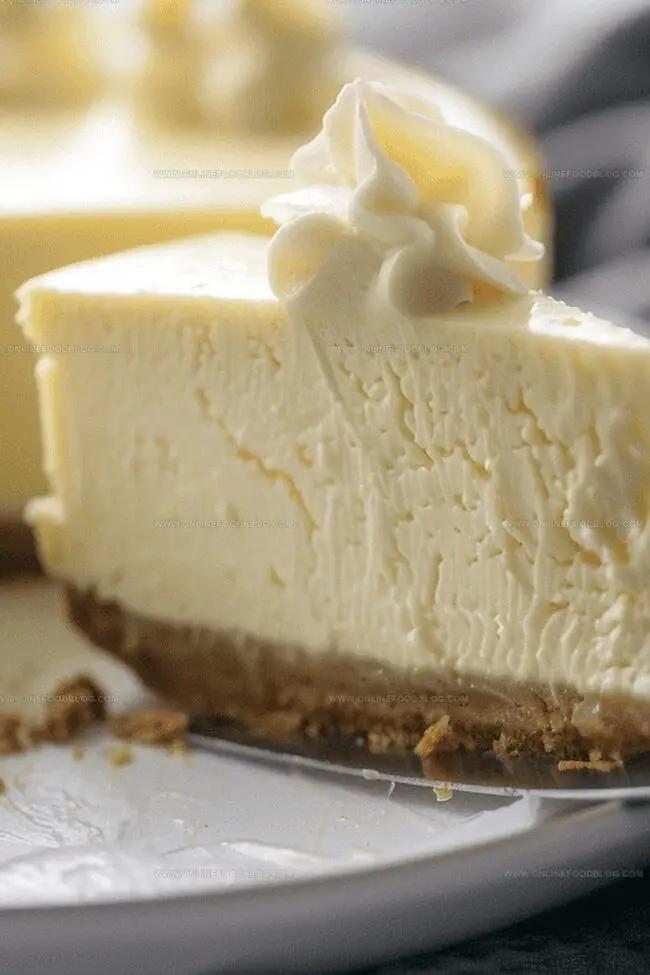
Create a buttery base using crushed graham crackers pressed firmly into a springform pan. This layer provides a delicious crispy foundation for the creamy filling.
Blend cream cheese until silky smooth, incorporating sugar and vanilla with gentle motions. The key is creating a lump-free, velvety texture that will set perfectly.
Carefully introduce eggs into the cream cheese mixture, mixing slowly to maintain the delicate consistency. Avoid aggressive stirring to keep the batter light and airy.
Cook the cheesecake using a unique temperature-reducing method. Start at a higher temperature, then gradually lower the heat to ensure even, gentle cooking without cracking.
Allow the cheesecake to cool slowly inside the oven, then on the counter. This gradual cooling prevents sudden temperature changes that could cause surface cracks.
Refrigerate the cheesecake for several hours to set completely. When ready to serve, run a warm knife between each slice to create clean, beautiful pieces that showcase the creamy texture.
Ideas to Flavor and Decorate Cheesecake
Serving Cheesecake for Dessert Success
Cheesecake Storage and Slicing Tips
Print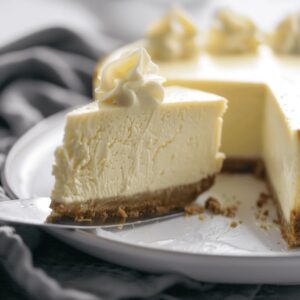
Velvety Cheesecake Recipe
- Total Time: 8 hours
- Yield: 13 1x
Description
Creamy New York-style cheesecake delights with rich cream cheese and graham cracker crust. Silky smooth texture and classic flavor invite you to savor each indulgent slice.
Ingredients
- 40 oz (1.13 kg) cream cheese, at room temperature
- 4 large eggs, at room temperature
- 1 ¼ cups (250 g) granulated sugar
- ½ cup (120 mL) sour cream, at room temperature
- 2 tsps vanilla extract
- 1 ¼ cups graham cracker crumbs
- 5 tbsps (75 mL) melted butter
- 4 tbsps (50 g) granulated sugar
- Desired cheesecake toppings
Instructions
- Crust Preparation: Arrange oven rack in center and heat to 350°F, combining graham cracker crumbs, sugar, and melted butter into a sandy texture, then press firmly into a 9-inch springform pan using a measuring cup’s bottom.
- Initial Baking: Bake crust for 7 minutes, then reduce oven temperature to 325°F and set crust aside.
- Filling Composition: Cream cream cheese until perfectly smooth, incorporating granulated sugar, sour cream, and vanilla extract while thoroughly mixing and scraping bowl’s edges.
- Egg Integration: Whisk eggs separately, then gradually blend into cream cheese mixture on low speed, ensuring complete incorporation without overmixing.
- Texture Refinement: Gently fold mixture to eliminate potential lumps, tapping bowl against counter to release trapped air bubbles.
- Cheesecake Assembly: Pour filling into prepared crust, smoothing surface evenly and creating a uniform appearance.
- Precision Baking: Bake at 325°F for 30 minutes, then reduce temperature to 250°F and continue baking for 45 additional minutes.
- Cooling Protocol: Turn off oven, leaving cheesecake inside without opening door for 30 minutes, then crack door and allow gradual cooling for one hour.
- Temperature Stabilization: Allow cheesecake to reach room temperature on counter for 3-4 hours before refrigerating, covered, for 6-8 hours or overnight.
- Serving Presentation: Remove springform pan’s collar, slice with a hot water-dipped sharp knife, wiping blade between cuts, and decorate as desired.
Notes
- Prevent Cracks: Gentle mixing and gradual temperature changes prevent unsightly surface cracks in your cheesecake.
- Smooth Baking Technique: Tapping the bowl and using low mixing speeds eliminates air bubbles for a silky, professional texture.
- Temperature Control: Precise oven temperature management is crucial for achieving a perfectly creamy, non-burnt cheesecake.
- Patience Matters: Allowing the cheesecake to cool slowly prevents sudden temperature shocks that can cause structural damage.
- Prep Time: 20 minutes
- Cook Time: 1 hour 45 minutes
- Category: Desserts
- Method: Baking
- Cuisine: American
Nutrition
- Serving Size: 13
- Calories: 425
- Sugar: 30 g
- Sodium: 330 mg
- Fat: 28 g
- Saturated Fat: 17 g
- Unsaturated Fat: 9 g
- Trans Fat: 0 g
- Carbohydrates: 36 g
- Fiber: 1 g
- Protein: 7 g
- Cholesterol: 120 mg
Mia Reynolds
Food Writer & Home Cooking Specialist
Expertise
Easy Home Baking, Recipe Writing and Storytelling, Local and Seasonal Ingredients, Baking for Beginners
Education
New England Culinary Institute (NECI), Montpelier, Vermont
Community College of Vermont, Winooski, Vermont
Mia Reynolds fell in love with baking as a teenager experimenting in her family kitchen. Her passion took her to New England Culinary Institute, where she learned practical pastry techniques, and later to Community College of Vermont to deepen her understanding of food management.
Mia combines clear, simple baking instructions with heartwarming stories, making home baking approachable for everyone.