Cornstarch: Magical thickener that prevents soggy bottom and creates a glossy fruit filling.
Sugar: Balances the tartness of rhubarb and enhances fruit’s natural sweetness.
Lemon Juice: Brightens flavors and prevents fruit from browning.
For Finishing Touches:
Almond Powder: Provides a nutty base layer that absorbs fruit juices and adds depth.
Egg Yolk: Creates a beautiful golden, glossy crust when brushed.
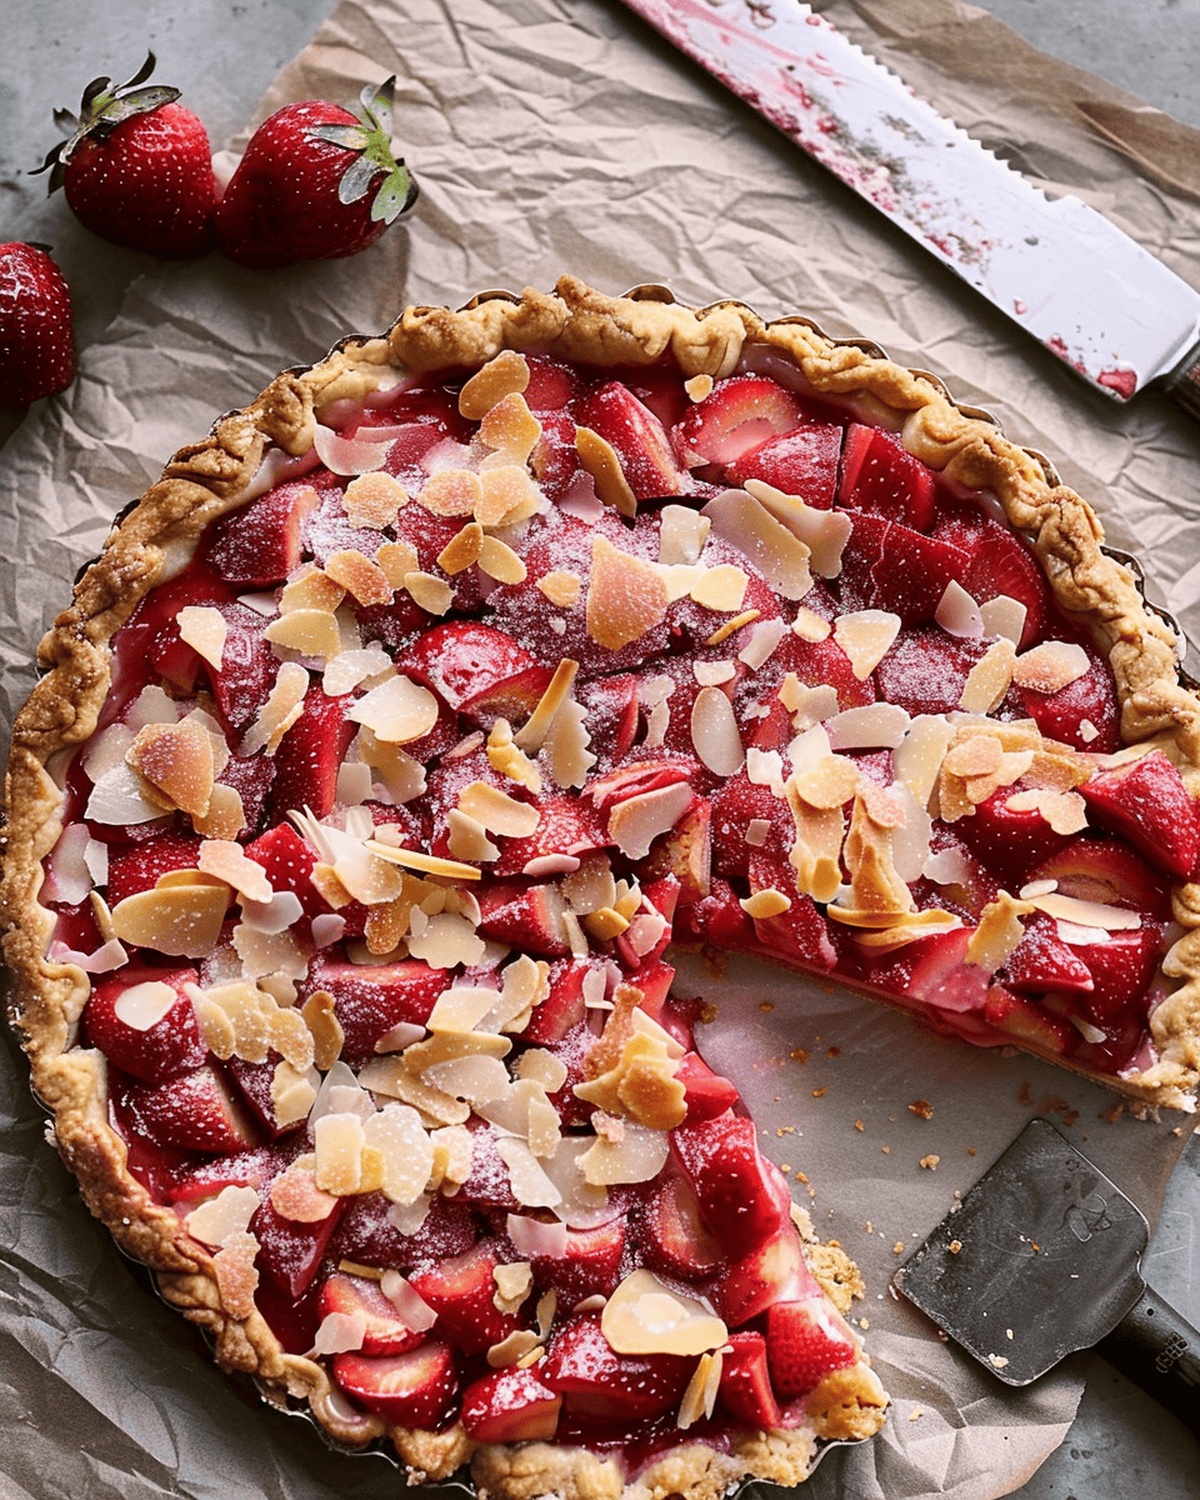
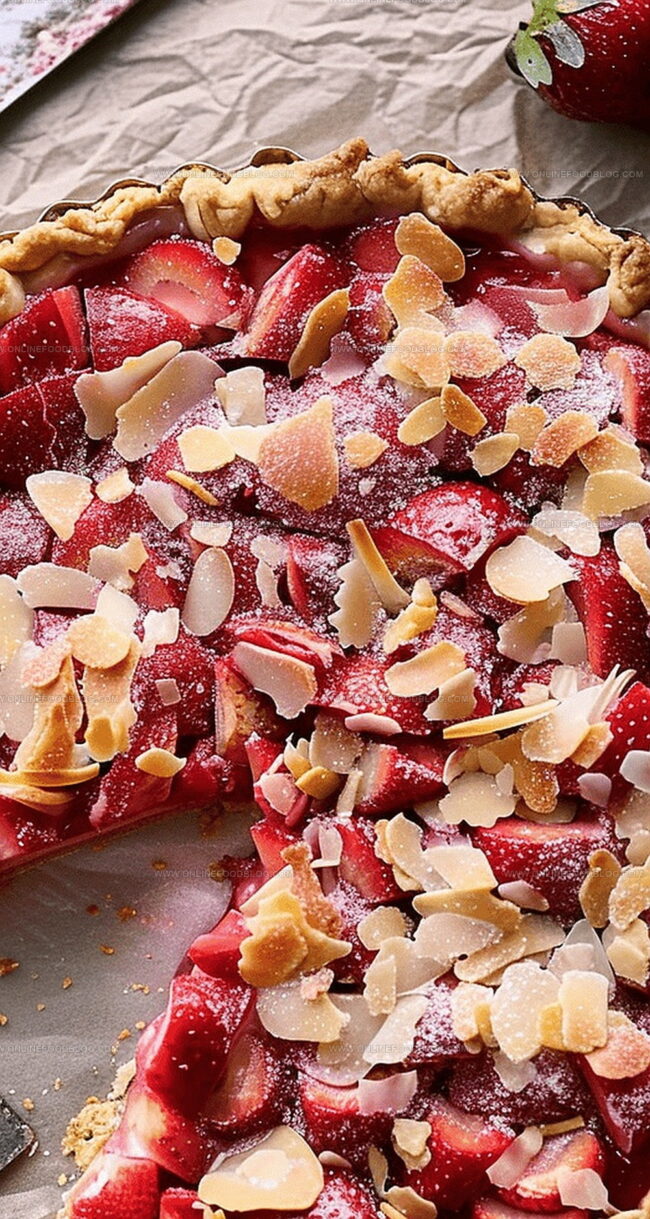
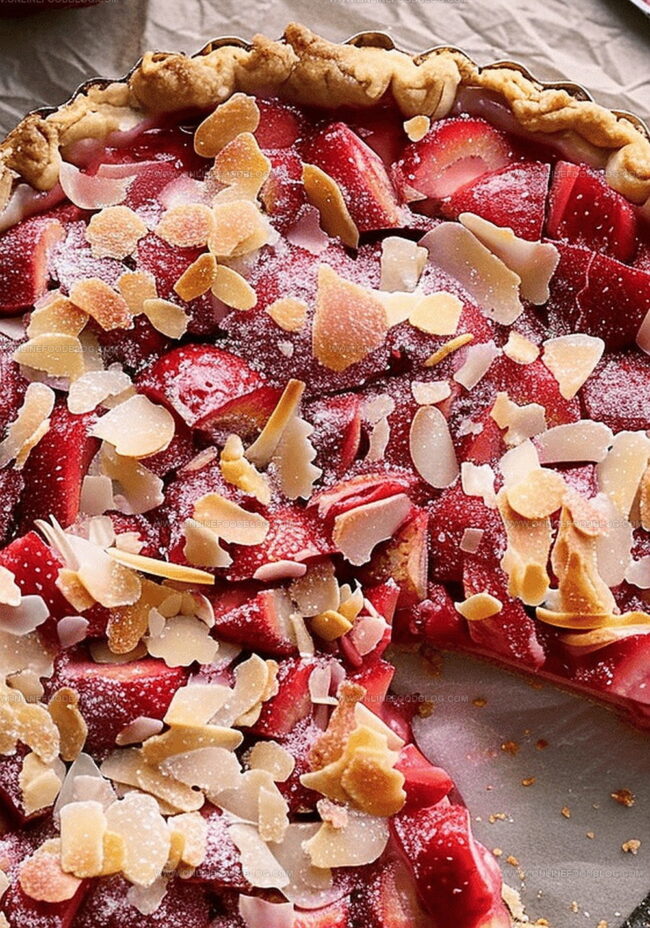
Slivered Almonds: Adds a delightful crunch and elegant visual appeal.
Gear Guide for Baking Your Rhubarb Tart
Mixing bowl: Essential for combining and kneading pastry dough.
Rolling pin: Perfect for rolling out the tart crust evenly.
Knife: Needed to slice strawberries and rhubarb into precise pieces.
Measuring cups and spoons: Critical for accurate ingredient quantities.
Baking sheet or tart pan: Provides a sturdy base for baking the rustic tart.
Pastry brush: Great for applying egg wash to create a golden crust.
Cutting board: Helps with chopping fruits and preparing ingredients.
Instructions to Bake a Rustic Strawberry Rhubarb Tart
Dough Crafting Gathering your flour-dusted ingredients and creating a smooth, tender pastry base that whispers of homemade comfort.
Fruit Symphony Washing and chopping ripe strawberries and tangy rhubarb into delicate pieces that promise a burst of garden-fresh flavor.
Flavor Awakening Gently tossing the colorful fruit with sweet and zesty seasonings that will dance across your taste buds.
Canvas Preparation Rolling out the soft dough into a free-form circle, transforming your kitchen counter into an edible artwork.
Nutty Foundation Sprinkling almond powder as a secret layer that adds richness and depth to your rustic creation.
Artistic Folding Tenderly gathering the edges of the dough, creating beautiful ripples that hint at the deliciousness within.
Golden Transformation Sliding the tart into a warm oven, watching it bloom into a golden masterpiece with crisp edges and juicy center.
Comfort Serving Bringing the tart to the table, inviting friends and family to enjoy a slice of pure, homemade happiness alongside a cool scoop of creamy accompaniment.
Tips to Make Your Rhubarb Tart Truly Shine
Replace rhubarb with other tart fruits like blackberries or sour cherries during different seasons to keep the recipe exciting and fresh throughout the year.
Prepare the dough and chop fruits a day in advance, storing them separately in the refrigerator to streamline your baking process and reduce day-of stress.
Enhance the flavor profile by adding ground cinnamon, cardamom, or a pinch of ginger to the fruit mixture, creating a more complex and warming taste experience.
Store any remaining tart in an airtight container at room temperature for up to two days, or refrigerate for extended freshness, enjoying it cold or gently reheated.
Serving Ideas for Your Rustic Strawberry Tart
Pair with Creamy Companions: Serve this rustic tart alongside a scoop of vanilla ice cream or a dollop of whipped cream to balance the tart’s tangy fruit flavors and add a luxurious, smooth texture.
Artful Plating Technique: Dust the tart with powdered sugar just before serving to create an elegant, professional-looking dessert that highlights the golden-brown crust and vibrant fruit colors.
Seasonal Side Suggestions: Complement the tart with a fresh mint sprig or a small handful of fresh berries to enhance the presentation and provide a burst of additional color and freshness.
Storage Suggestions for Tart Lovers
Refrigerate Wisely: Store the tart in an airtight container in the refrigerator for up to 3 days to maintain its crisp texture and fresh flavor.
Freeze for Future Enjoyment: Wrap the cooled tart tightly in plastic wrap and aluminum foil, then freeze for up to 2 months for a delightful dessert emergency.
Revive and Reheat: Warm the tart in a preheated oven at 160°C for 10-15 minutes to restore its flaky crust and bring out the vibrant fruit flavors.
Slice and Serve Smart: Cut the tart into individual portions before storing to make reheating and serving easier throughout the week.
Grandma’s rustic rhubarb and strawberry tart brings summer’s sweetest memories to life. Fresh seasonal fruits nestle in a buttery, golden crust that crumbles perfectly when you slice into this delightful dessert.
Ingredients
Scale
1 egg
1 egg yolk
500 g (17.64 oz) strawberries
350 g (12.35 oz) rhubarb
200 g (7.05 oz) wheat flour (T45 or T65)
75 g (2.65 oz) cold demi-sel butter
40 g (1.41 oz) sugar (white or brown)
30 g (1.06 oz) sugar (white or brown)
30 g (1.06 oz) almond powder
15 g (0.53 oz) cornstarch (Maïzena)
40 ml (1.35 fl oz) cold water
2 tbsps lemon juice
3 tbsps slivered almonds
Instructions
Dough Preparation: Create a cohesive pastry by thoroughly mixing ingredients in a mixing bowl until smooth. Encase the dough in plastic wrap and refrigerate for 30 minutes to solidify.
Fruit Preparation: Wash strawberries and rhubarb carefully. Slice strawberries into uniform pieces and chop rhubarb into precise segments. Blend fruit with cornstarch, sugar, and lemon juice to create a vibrant filling.
Crust Formation: On a floured surface, roll the chilled dough into a circular shape. Pierce the surface with a fork to prevent excessive rising and sprinkle ground almonds across the dough, maintaining a border around the edges.
Tart Assembly: Strategically distribute the macerated fruit mixture over the almond layer, leaving the decorative border exposed. Fold the dough edges inward, creating an artisanal, pleated appearance.
Finishing Touches: Brush the folded edges with egg yolk and embellish with slivered almonds. Preheat the oven to 375°F (195°C), positioning the tart in the lower third of the oven.
Baking Process: Bake for approximately 35 minutes until the base is thoroughly cooked and the surface transforms into a rich, golden-brown masterpiece.
Serving Suggestion: Allow the tart to cool briefly. Serve warm, optionally accompanied by yogurt, whipped cream, or vanilla ice cream for an exquisite culinary experience.
Notes
Chill Dough Properly: Refrigerate the tart dough for at least 30 minutes to ensure a flaky, tender crust that doesn’t shrink during baking.
Macerate Fruit Carefully: Let fruit sit with sugar and cornstarch to release natural juices and create a thickened, flavorful filling that prevents soggy bottom.
Protect Crust Edges: Folding and brushing edges with egg yolk helps create a beautiful golden-brown color and prevents burning during extended baking.
Mind Oven Placement: Baking in the lower third of the oven ensures even cooking and a perfectly crisp bottom crust without over-browning the top.
Degree: Certificate in Food and Beverage Management
Focus: Essential knowledge of recipe development, ingredient sourcing, and food business basics.
Mia Reynolds fell in love with baking as a teenager experimenting in her family kitchen. Her passion took her to New England Culinary Institute, where she learned practical pastry techniques, and later to Community College of Vermont to deepen her understanding of food management.
Mia combines clear, simple baking instructions with heartwarming stories, making home baking approachable for everyone.

Mia Reynolds
Food Writer & Home Cooking Specialist
Expertise
Easy Home Baking, Recipe Writing and Storytelling, Local and Seasonal Ingredients, Baking for Beginners
Education
New England Culinary Institute (NECI), Montpelier, Vermont
Community College of Vermont, Winooski, Vermont
Mia Reynolds fell in love with baking as a teenager experimenting in her family kitchen. Her passion took her to New England Culinary Institute, where she learned practical pastry techniques, and later to Community College of Vermont to deepen her understanding of food management.
Mia combines clear, simple baking instructions with heartwarming stories, making home baking approachable for everyone.