The Perfect Strawberry Bliss Tart Recipe: Sweet Summer Joy
Strawberry bliss tarts dance between decadent dessert and culinary artwork, capturing summer’s most vibrant essence.
Sweet, tangy berries craft ordinary pastry into an extraordinary experience that tingles taste buds.
Delicate layers of buttery crust create a perfect foundation for luscious fruit fillings.
Creamy textures and bright flavors intertwine, promising a sensory journey that starts with the first delightful bite.
Rich ingredients blend seamlessly, creating a harmonious balance of sweetness and subtle sophistication.
Elegant yet approachable, this dessert speaks to both novice bakers and seasoned professionals alike.
Passionate home cooks will find joy in crafting this irresistible treat.
Strawberry Bliss Tart Bursting with Berry Flavor
Ingredients You’ll Need for Strawberry Bliss Tart
Tart Crust Ingredients:Filling Ingredients:Topping Ingredients:How to Layer and Bake Strawberry Bliss Tart
Step 1: Prepare Tart Crust Mixture
Grab your food processor and toss in:Pulse these ingredients until they’re well combined and looking cozy together.
Step 2: Add Butter and Create Crumbs
Drop in cold cubed butter and pulse quickly until the mixture looks like rough, sandy crumbs. This is where the magic starts happening!
Step 3: Form the Dough
Pour in the beaten egg and pulse until the dough begins to stick together. Gently remove the dough, shape it into a smooth disc, wrap in plastic wrap, and let it chill in the refrigerator for 1 hour.
Step 4: Shape the Crust
Dust your work surface with flour and roll out the chilled dough. Carefully transfer it to a 9-inch tart pan, pressing it into every nook and cranny. Poke some tiny holes with a fork and pop it in the freezer for 30 minutes.
Step 5: Blind Bake the Crust
Crank up the oven to 375°F. Line the crust with parchment paper and sprinkle pie weights on top. Bake for 20 minutes until it turns a gorgeous golden brown. Let it cool completely.
Step 6: Whip the Cream
In a clean bowl, whip heavy cream with half of the powdered sugar and vanilla. Whip until it stands up in stiff, beautiful peaks.
Step 7: Prepare Cream Cheese Mixture
In another bowl, blend cream cheese with the remaining sugar and a pinch of salt until silky smooth.
Step 8: Combine Cream Layers
Gently fold the whipped cream into the cream cheese mixture. Be delicate – you want to keep all that lovely air in the mixture!
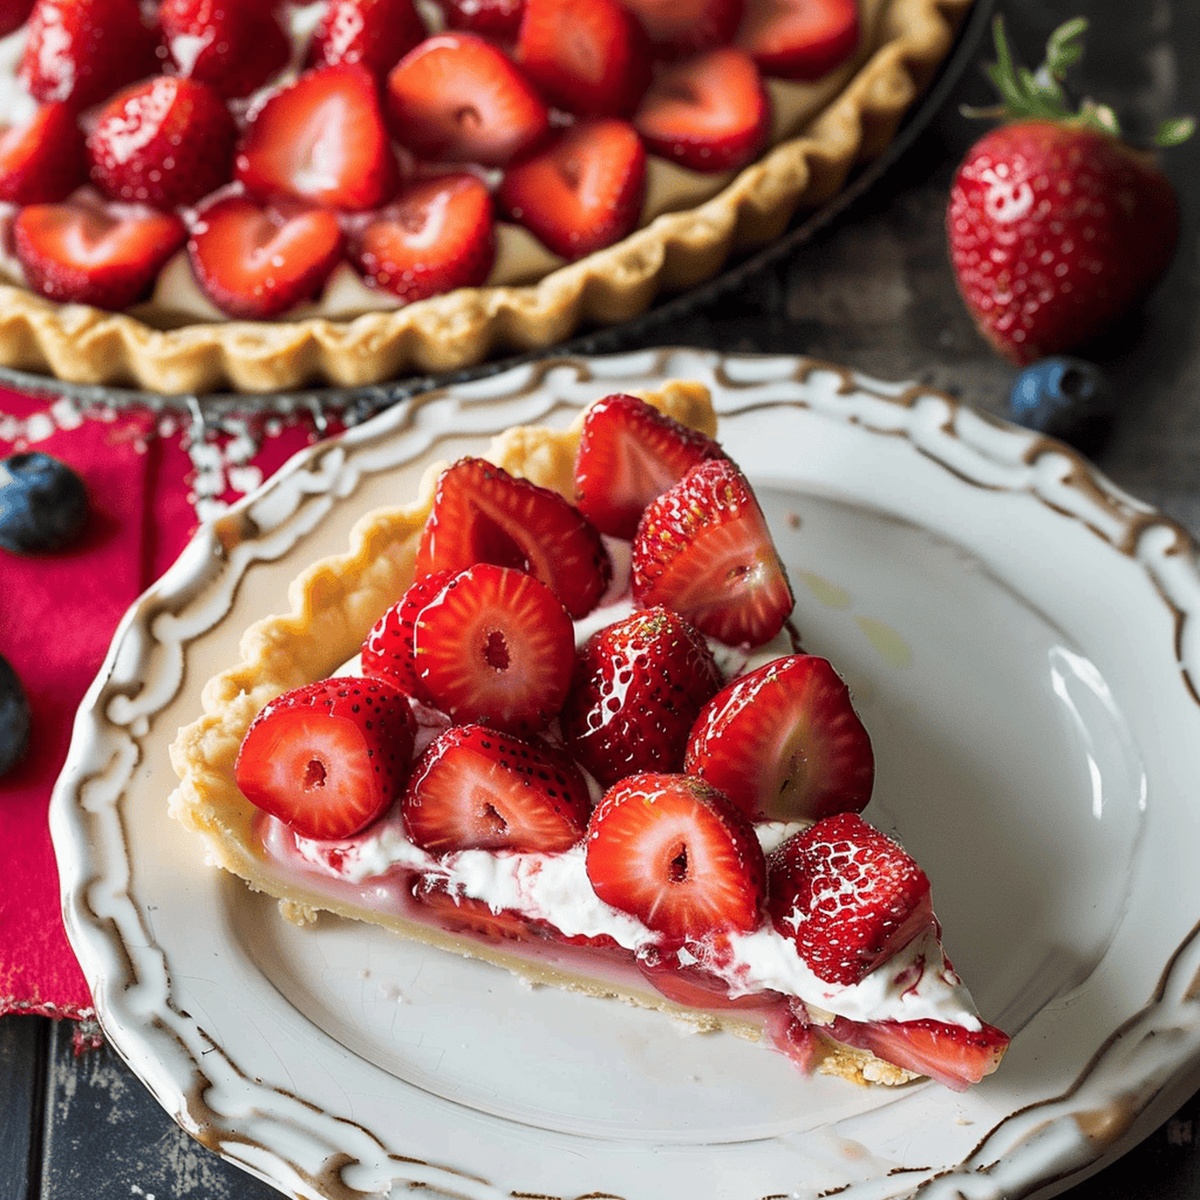
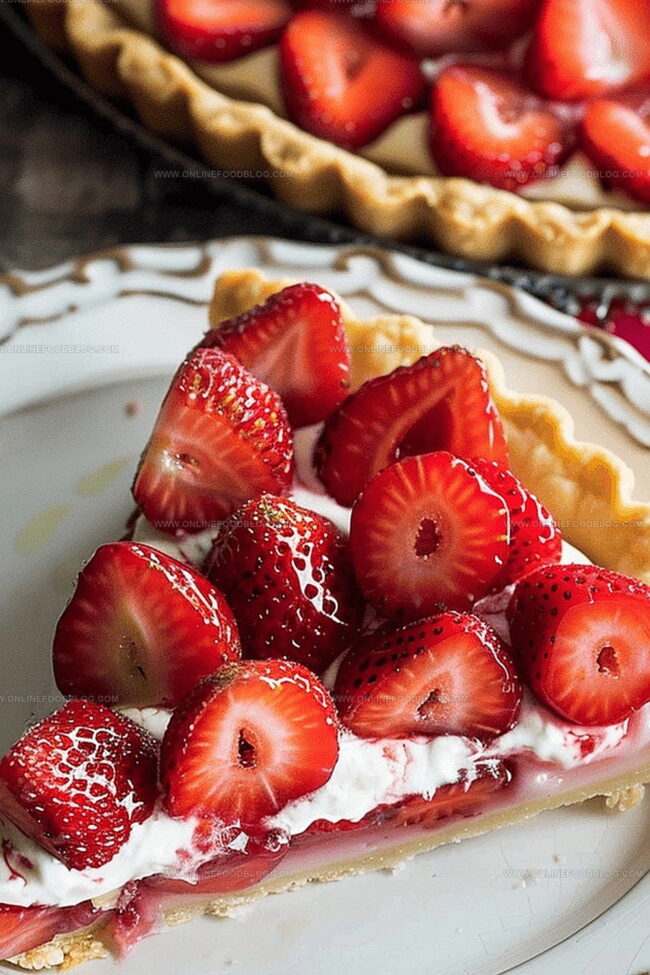
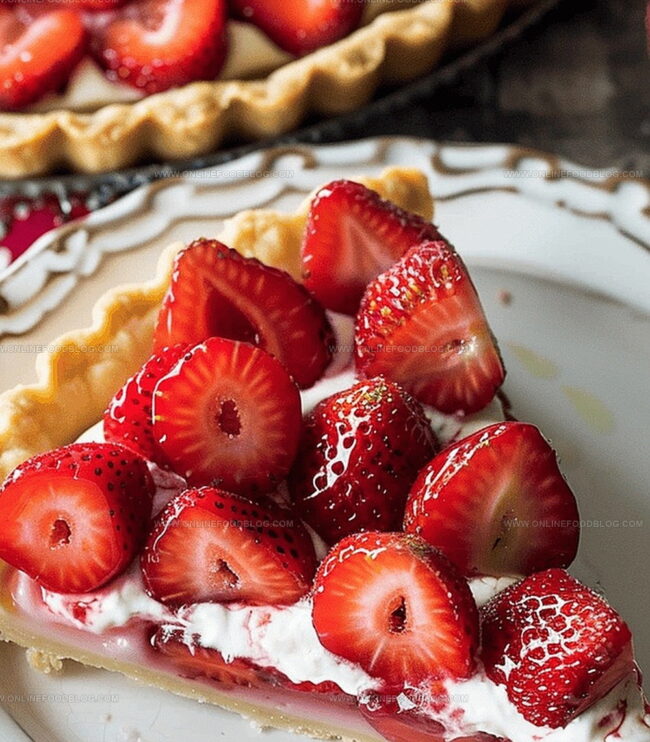
Step 9: Assemble and Decorate
Spread the dreamy cream mixture over the cooled crust. Arrange fresh sliced strawberries on top in a beautiful pattern.
Step 10: Serve and Enjoy
Slice, serve, and watch everyone’s eyes light up with pure dessert joy!
Tips to Nail the Texture of Strawberry Bliss Tart
Store and Reheat Strawberry Bliss Tart with Ease
Flavors That Match Strawberry Bliss Tart
Blissful Tart Variations You’ll Want to Try
Print
Strawberry Bliss Tart Recipe
- Total Time: 1 hour 50 minutes
- Yield: 8 1x
Description
Strawberry Bliss Tart delivers a luxurious dance of creamy vanilla custard and fresh, ripe strawberries nestled in a buttery graham cracker crust. Sweet summer memories come alive with each delicate slice that promises pure dessert perfection you cannot resist.
Ingredients
Strawberry Bliss Tart
Main Ingredients:
- 1.5 cups (190 g) all-purpose flour
- 1.5 lbs (680 g) strawberries, hulled and sliced
- 6 oz (170 g) cream cheese, softened
- 0.67 cup (157 g) heavy cream
Sweeteners and Sugar:
- 0.5 cup (66 g) powdered confectioner’s sugar
- 0.5 cup (66 g) powdered sugar
Baking and Seasoning:
- 0.5 cup (113 g) unsalted butter, cold and cubed
- 1 large egg, cold and beaten
- 0.25 teaspoon salt
- 0.5 teaspoon vanilla extract
- 0.125 teaspoon salt
Instructions
- Prepare the tart dough by combining all-purpose flour, granulated sugar, and salt in a food processor, pulsing to create a uniform mixture.
- Incorporate cold unsalted butter cut into small cubes, pulsing until the texture resembles coarse, sandy crumbs.
- Add 1 beaten large egg to the mixture, processing until the dough begins to clump together and form a cohesive mass.
- Transfer the dough onto a clean surface, gently shape into a flat disc, wrap tightly with plastic wrap, and refrigerate for 60 minutes to allow the gluten to relax and butter to firm.
- Remove chilled dough and roll out on a lightly floured surface to approximately 1/8 inch (3 millimeters) thickness, ensuring it fits a 9-inch (23-centimeter) tart pan.
- Carefully transfer the dough into the tart pan, pressing gently into corners and edges, then trim excess dough. Use a fork to create small punctures across the bottom to prevent bubbling.
- Place the prepared crust in the freezer for 30 minutes to solidify and prevent shrinkage during baking.
- Preheat the oven to 375°F (190°C) and position a rack in the middle position.
- Line the chilled crust with parchment paper and fill with ceramic pie weights or dried beans to prevent puffing.
- Bake the crust for 20 minutes, then remove weights and parchment, continuing to bake until golden brown, approximately 5-7 additional minutes.
- Allow the crust to cool completely on a wire rack, which prevents soggy bottoms and ensures crisp texture.
- Whip heavy cream with powdered sugar and vanilla extract until stiff, voluminous peaks form.
- In a separate mixing bowl, beat cream cheese with remaining powdered sugar and a pinch of salt until smooth and creamy.
- Gently fold the whipped cream into the cream cheese mixture, maintaining the airy texture and preventing deflation.
- Spread the filling evenly across the completely cooled tart crust, creating a smooth, luxurious surface.
- Arrange fresh strawberry slices artfully on top of the filling just before serving to maintain their vibrant color and prevent sogginess.
Notes
- Chill the dough thoroughly to ensure a flaky, tender crust that won’t shrink during baking.
- Blind baking the crust creates a crisp base that prevents soggy bottoms and locks in a perfect texture.
- Use room temperature cream cheese for smoother, lump-free filling that blends effortlessly with whipped cream.
- Select ripe, vibrant strawberries at peak season for the most intense, sweet flavor and beautiful presentation.
- Assemble the tart just before serving to maintain the crisp crust and fresh strawberry brightness.
- Refrigerate any leftovers and consume within 2 days for optimal taste and texture.
- Prep Time: 1 hour 30 minutes
- Cook Time: 20 minutes
- Category: Desserts
- Method: Baking
- Cuisine: French
Nutrition
- Serving Size: 8
- Calories: 285 kcal
- Sugar: 15 g
- Sodium: 95 mg
- Fat: 19 g
- Saturated Fat: 12 g
- Unsaturated Fat: 6 g
- Trans Fat: 0.5 g
- Carbohydrates: 26 g
- Fiber: 2 g
- Protein: 4 g
- Cholesterol: 70 mg
Lucas Bennett
Founder & Recipe Creator
Expertise
Simple Everyday Recipes, Sustainable Cooking Practices, Creative Meal Planning, Recipe Testing and Improvement
Education
Fox Valley Technical College, Appleton, Wisconsin
Lake Superior College, Duluth, Minnesota
Lucas Bennett’s cooking journey started in his parents’ kitchen, where he learned to prepare tasty, no-fuss meals from scratch. His culinary passion led him to Fox Valley Technical College, where he gained practical cooking skills.
He then expanded his focus on sustainability at Lake Superior College. Today, Lucas shares easy, approachable recipes designed to make cooking enjoyable and stress-free for everyone.