Sizzling Chilaquiles: Morning Breakfast Nachos Recipe
Sizzling corn tortilla chips dance with rich salsa in this mouthwatering chilaquiles recipe that promises a flavor explosion on your breakfast plate.
Mexican cuisine delivers another spectacular morning delight through these perfectly crispy, sauce-soaked tortillas.
Comfort meets culinary art in this traditional dish that balances zesty red or green salsa with tender, golden chips.
Each bite brings layers of texture and spice that wake up your taste buds with a vibrant punch.
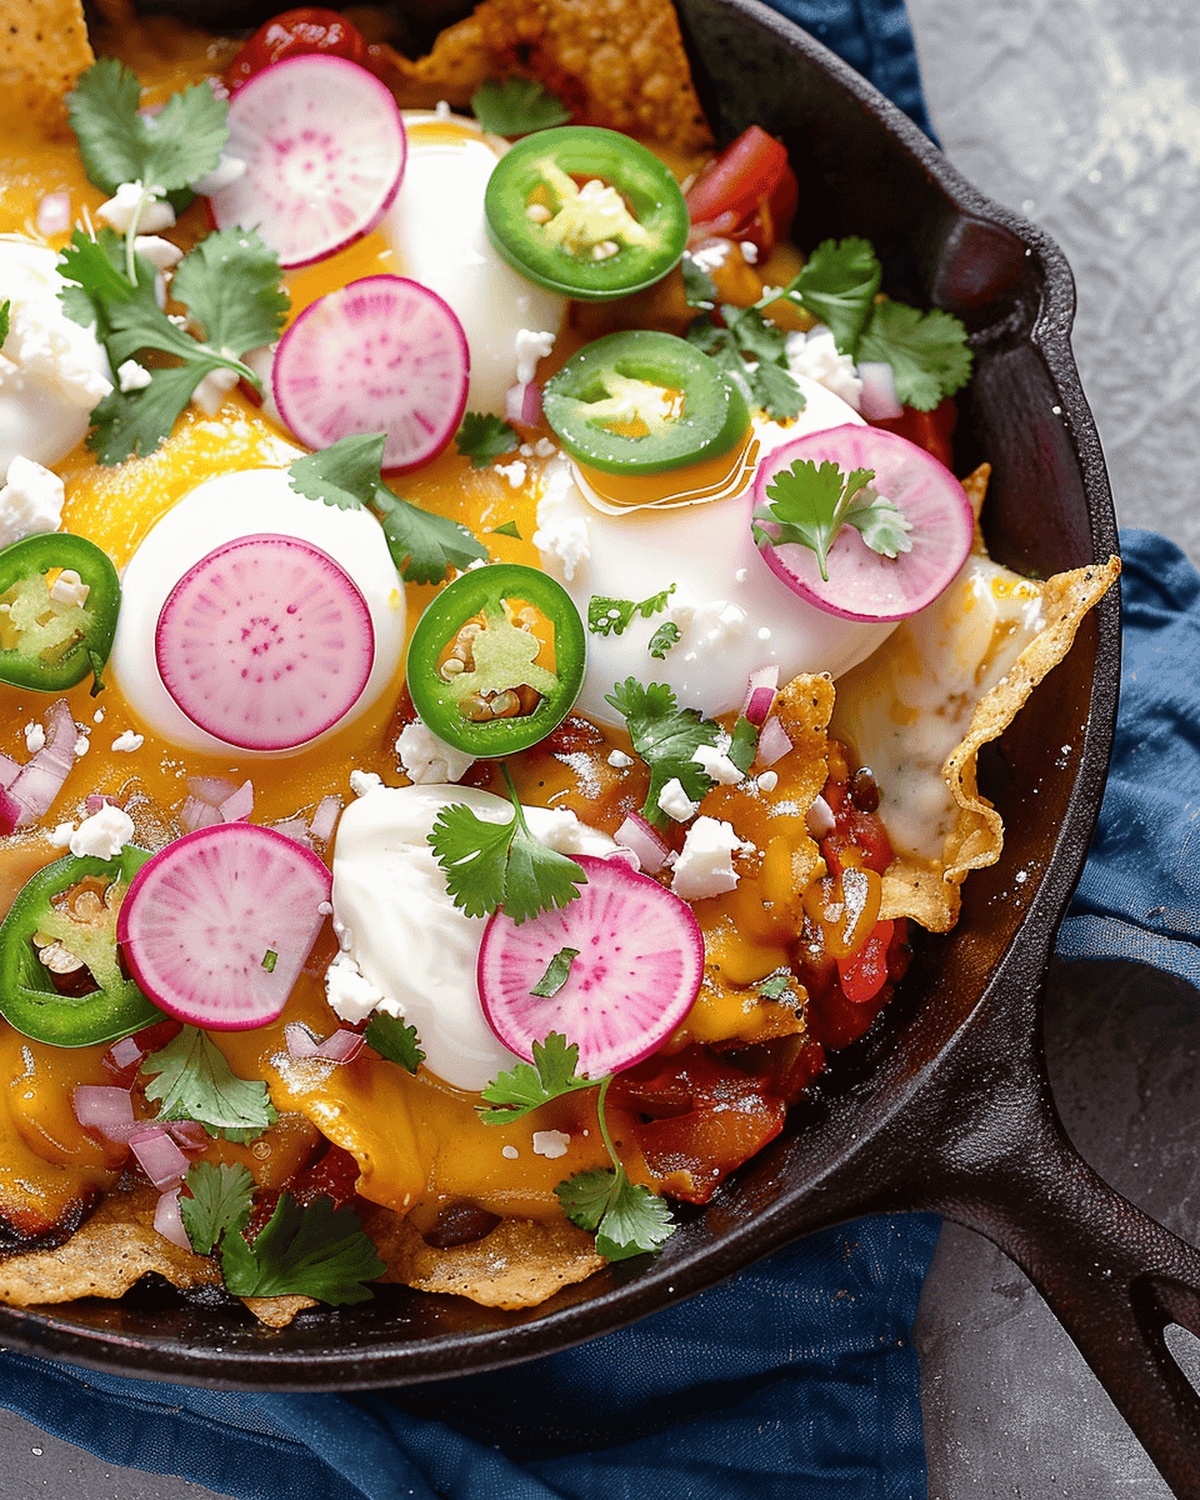
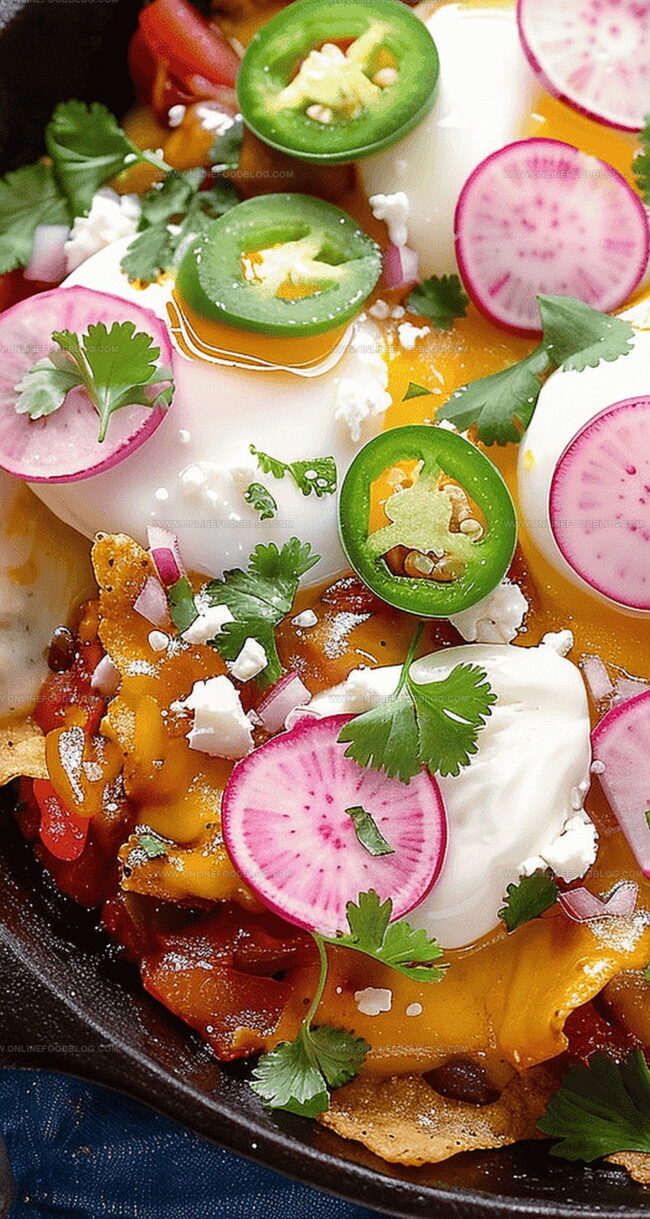
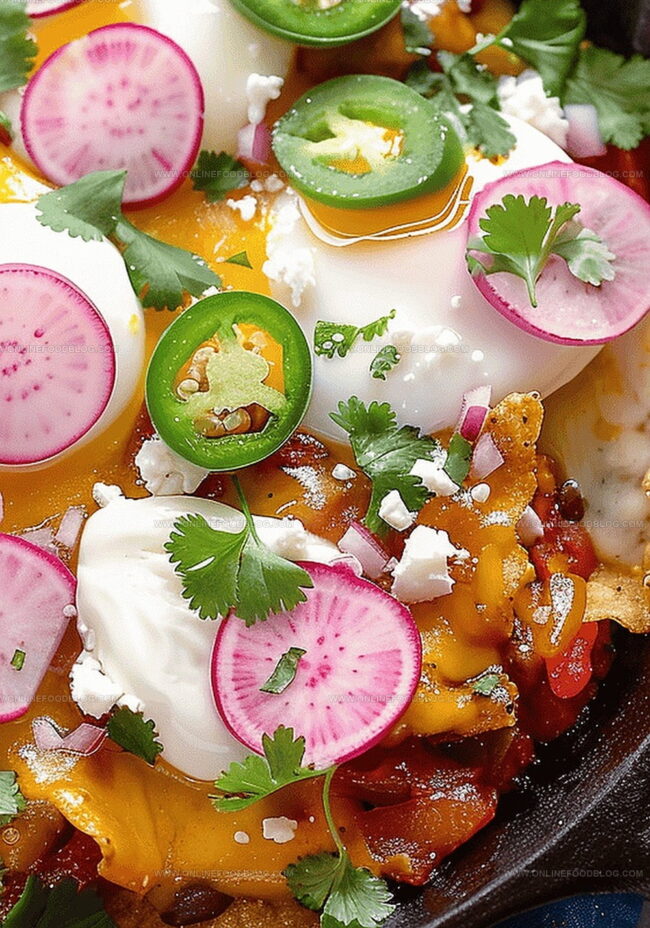
Topped with crema, queso fresco, and a perfectly runny egg, these chilaquiles turn an ordinary morning into a fiesta of deliciousness.
You won’t find a more satisfying way to start your day than with this classic Mexican breakfast that celebrates bold, hearty flavors.
So roll up your sleeves and get ready to master a breakfast classic that will transport you straight to the heart of Mexico.
Quick Recipe Overview
Ingredients List for Chilaquiles (Breakfast Nachos)
For Roasting Base:For Sauce Components:For Layering and Texture:For Protein and Topping:Equipment for Making Chilaquiles
Instructions for Chilaquiles Preparation
Crank up the broiler and prep a foil-lined baking sheet. Scatter onions, peppers, and garlic across the surface. Roast until vegetables soften and develop delicious charred edges, about 5-10 minutes.
Transfer roasted vegetables to a blender with canned tomatoes. Pulse until smooth, adjusting consistency as desired. Simmer the sauce in a pan, letting flavors meld and concentrate for 10 minutes. Season with salt and pepper.
Heat the oven to 400 degrees. In a cast-iron skillet, create layers of tortilla chips, drizzling sauce and sprinkling cheese between each layer. Aim for two complete layers.
Bake until cheese transforms into a golden, bubbly blanket, roughly 5-10 minutes.
In a nonstick skillet, whisk eggs and cook with gentle, continuous motion. Break up egg pieces, ensuring even cooking until just set.
Top the cheesy nachos with scrambled eggs. Garnish with sliced jalapeños, radishes, fresh cilantro, and a generous dollop of sour cream. Serve piping hot.
Tips & Flavor Variations for Chilaquiles
Ways to Plate and Serve Chilaquiles
Prep-Ahead & Leftover Notes for Chilaquiles
Print
Sizzling Chilaquiles Recipe
- Total Time: 45 minutes
- Yield: 3 1x
Description
Spicy Mexican chilaquiles blend crispy tortilla chips with zesty salsa and rich toppings. Hungry cooks can quickly craft this comforting breakfast dish with simple ingredients and bold flavors.
Ingredients
- ½ bag tortilla chips
- 4 large eggs
- ½ cup (120 ml) shredded Mexican blend cheese
- 12–16 pickled jalapeño slices
- 1 tbsp (15 ml) butter
- 2 tbsps crumbled cotija or queso fresco cheese
- 1 watermelon radish, thinly sliced
- fresh cilantro leaves, for garnish
- sour cream
Instructions
- Roasting Vegetables: Position onions, peppers, and garlic on a foil-lined baking sheet under the broiler, charring until edges blister and vegetables soften, approximately 5-7 minutes.
- Sauce Creation: Transfer roasted vegetables to a blender with canned tomatoes, pulsing until achieving a smooth, vibrant consistency while maintaining some textural chunks.
- Sauce Preparation: Simmer the sauce in a saucepan over medium heat, stirring occasionally to prevent splattering and allow flavors to intensify, seasoning with salt and pepper for approximately 10 minutes.
- Nacho Assembly: Lightly oil an oven-safe skillet, layer tortilla chips as a base, generously coating with sauce and alternating cheese varieties between chip layers.
- Baking and Egg Preparation: Simultaneously, preheat oven to 400°F and bake nachos until cheese melts completely, developing a golden, bubbly texture. In a separate nonstick skillet, whisk eggs to a uniform color, cooking with butter and continuously folding to create soft, fluffy scrambled eggs.
- Final Presentation: Remove nachos from oven, crown with freshly scrambled eggs, then embellish with sliced jalapeños, radish slivers, chopped cilantro, and a generous dollop of sour cream.
- Serving: Present immediately to preserve warmth and ensure optimal cheese meltiness and flavor intensity.
Notes
- Optimize Vegetable Roasting: Char vegetables precisely to develop deep, smoky flavors without burning, watching closely during broiling to achieve perfect blistered edges.
- Master Sauce Consistency: Control sauce thickness by adjusting tomato portions, ensuring a smooth yet slightly chunky texture that clings perfectly to tortilla chips.
- Cheese Layer Strategy: Alternate cheese types between chip layers for complex flavor profiles and ensure even melting throughout the nachos.
- Egg Technique Matters: Whisk eggs continuously and scrape pan edges to create creamy, soft scrambled eggs that elevate the entire breakfast dish.
- Prep Time: 15 minutes
- Cook Time: 30 minutes
- Category: Breakfast, Snacks
- Method: Broiling
- Cuisine: Mexican
Nutrition
- Serving Size: 3
- Calories: 380
- Sugar: 2g
- Sodium: 600mg
- Fat: 24g
- Saturated Fat: 12g
- Unsaturated Fat: 10g
- Trans Fat: 0g
- Carbohydrates: 30g
- Fiber: 3g
- Protein: 14g
- Cholesterol: 370mg
Mia Reynolds
Food Writer & Home Cooking Specialist
Expertise
Easy Home Baking, Recipe Writing and Storytelling, Local and Seasonal Ingredients, Baking for Beginners
Education
New England Culinary Institute (NECI), Montpelier, Vermont
Community College of Vermont, Winooski, Vermont
Mia Reynolds fell in love with baking as a teenager experimenting in her family kitchen. Her passion took her to New England Culinary Institute, where she learned practical pastry techniques, and later to Community College of Vermont to deepen her understanding of food management.
Mia combines clear, simple baking instructions with heartwarming stories, making home baking approachable for everyone.