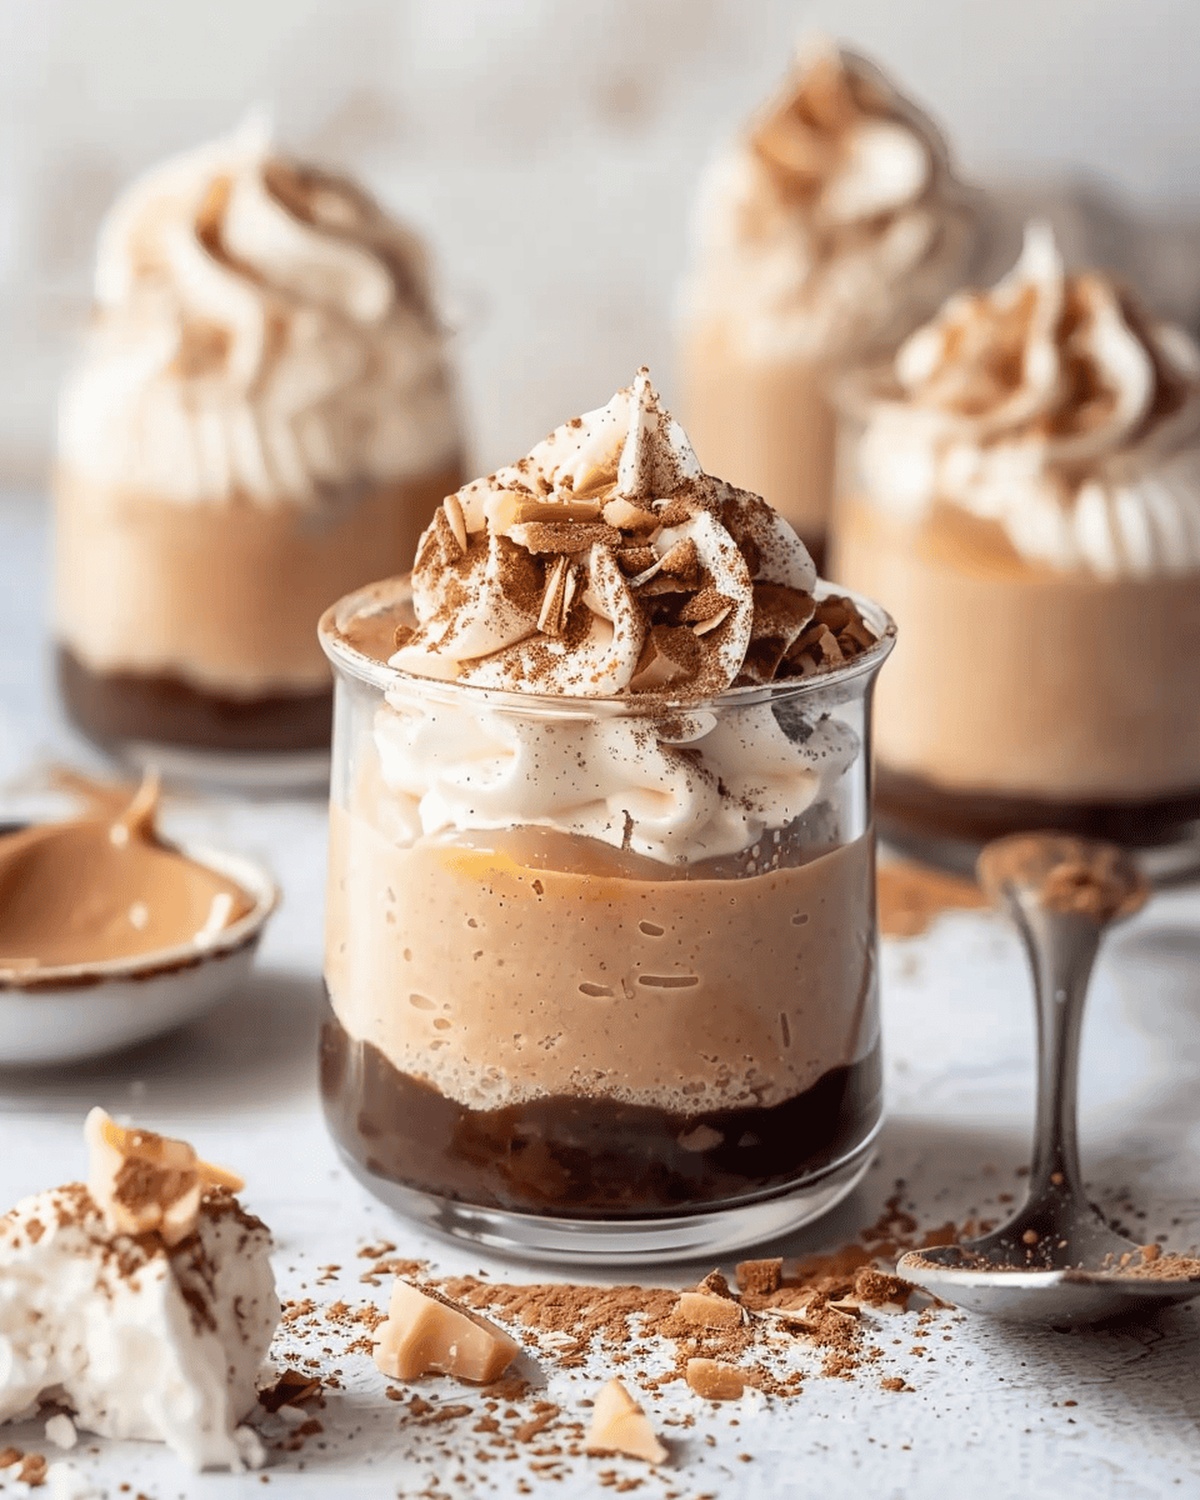
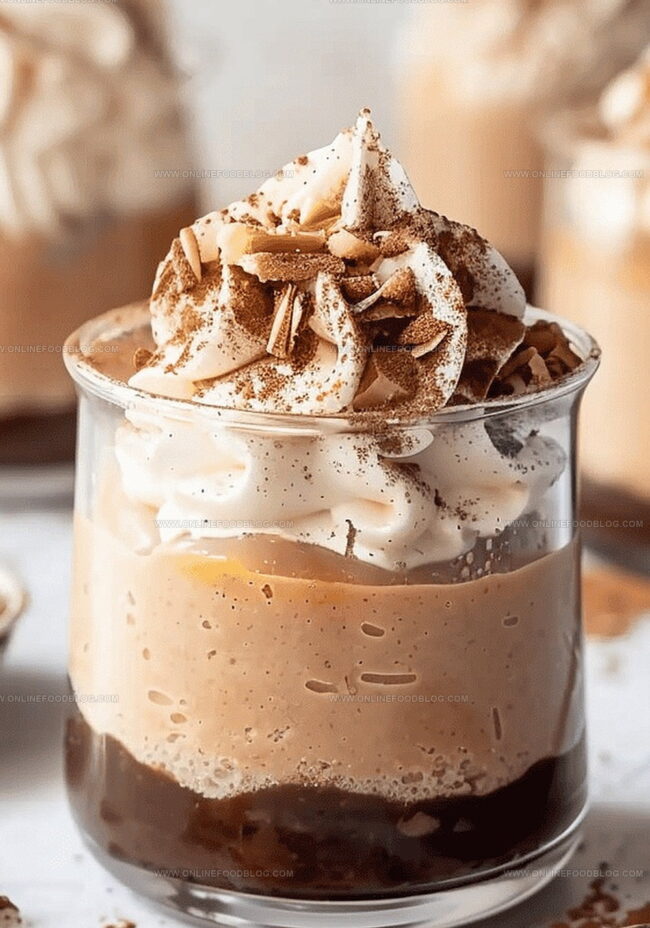
Smooth & Dreamy Peanut Butter Mousse Cups Recipe
These dreamy peanut butter mousse cups dance with silky smooth textures that melt effortlessly on your tongue.
Whipping up this no-cook dessert takes minimal effort but delivers maximum satisfaction.
Rich peanut butter blends seamlessly with creamy ingredients, creating an indulgent treat that feels decadent yet surprisingly light.
Each spoonful promises a luxurious experience without turning on the oven or wrestling with complicated techniques.
The recipe crafts individual servings perfect for intimate gatherings or solo sweet moments.
Chilled and velvety, these mousse cups offer a delightful escape into pure, unapologetic deliciousness.
You’ll want to savor every single delectable bite of this effortless dessert.
Quick Recipe Overview

Ingredient Rundown for No-Cook Peanut Butter Mousse
For Chocolate Base:For Creamy Peanut Butter Filling:For Fluffy Topping:Tools You’ll Need for Peanut Butter Mousse Cups
Instructions for Mixing Mousse Without Cooking
Melt chocolate and cream together in the microwave, stirring until smooth and glossy. Let the mixture cool and thicken naturally at room temperature.
Transform heavy cream into soft, billowy peaks using a mixer. Gently transfer the fluffy cream to a separate container, keeping its delicate texture intact.
Blend cream cheese, peanut butter, powdered sugar, and salt until silky and luxurious. Fold in half of the whipped cream, creating a light and airy mixture.
Pour a layer of cooled ganache into serving cups. Carefully spoon the peanut butter mixture on top, creating elegant swirls. Crown each cup with a gentle dollop of remaining whipped cream.
Refrigerate the dessert cups for at least an hour to set. Before serving, sprinkle with fun toppings like chocolate shards, crushed cookies, or chopped nuts for extra excitement.
Flavor Variations for Peanut Butter Mousse
Plating Ideas for Mousse Dessert Cups
Storage Guide for Chilling Mousse Cups
Print
Silky No-Cook Peanut Butter Mousse Cups Recipe
- Total Time: 1 hour 15min
- Yield: 5 1x
Description
Delightful peanut butter mousse cups offer a quick dessert solution for chocolate and nut butter enthusiasts. Rich layers of smooth cream and chocolate create an indulgent treat you can easily prepare without heating your kitchen.
Ingredients
- 8 oz (227g) cream cheese, room temperature
- 8 oz (227g) creamy peanut butter
- 12 oz (1½ cups) heavy cream, very cold
- 5 oz (142g) confectioner’s sugar
- 4½ oz (128g) semi-sweet chocolate, chopped or chocolate chips
- 4½ oz (128g) heavy cream
- 0.5 tsp kosher salt
- Chocolate shavings (optional)
- Crushed cookies (optional)
- Chopped peanut butter cups (optional)
- Chopped peanuts (optional)
Instructions
- Chocolate Ganache Preparation: Melt chocolate and heavy cream in a microwave-safe bowl, stirring until smooth and glossy. Allow the ganache to cool and slightly thicken at room temperature, creating a rich base for the dessert.
- Whipped Cream Creation: Whip heavy cream in a stand mixer until forming stiff, voluminous peaks. Transfer the airy cream to a separate container, preserving its delicate structure.
- Peanut Butter Mousse Fusion: Blend cream cheese, peanut butter, confectioner’s sugar, and kosher salt in the mixer bowl until achieving a velvety, uniform consistency. Gently incorporate half of the whipped cream, maintaining the mousse’s light and airy texture.
- Layering and Assembly: Spread a thin layer of chocolate ganache in serving cups as the foundational element. Carefully distribute the peanut butter mousse evenly, using a spatula to create a smooth, professional surface.
- Final Touches and Chilling: Top each mousse cup with a graceful swirl of remaining whipped cream. Refrigerate for at least one hour to allow flavors to meld and texture to set. Before serving, embellish with chocolate shavings, crushed cookies, chopped peanut butter cups, or roasted peanuts for added texture and visual appeal.
Notes
- Chocolate Ganache Tip: Microwave chocolate and cream in short bursts to prevent burning, stirring between each interval for smooth, glossy results.
- Whipped Cream Technique: Ensure mixer attachments and bowl are cold to achieve maximum volume and stability when whipping cream.
- Mousse Folding Method: Use a gentle, sweeping motion when incorporating whipped cream to maintain its airy texture and prevent deflation.
- Chilling Crucial: Refrigerate for at least one hour to allow flavors to develop and mousse to set perfectly, enhancing overall taste and texture.
- Prep Time: 15min
- Cook Time: 0 minutes
- Category: Desserts, Snacks
- Method: Blending
- Cuisine: American
Nutrition
- Serving Size: 5
- Calories: 475
- Sugar: 22g
- Sodium: 150mg
- Fat: 38g
- Saturated Fat: 18g
- Unsaturated Fat: 20g
- Trans Fat: 0g
- Carbohydrates: 30g
- Fiber: 1g
- Protein: 10g
- Cholesterol: 90mg
Mia Reynolds
Food Writer & Home Cooking Specialist
Expertise
Easy Home Baking, Recipe Writing and Storytelling, Local and Seasonal Ingredients, Baking for Beginners
Education
New England Culinary Institute (NECI), Montpelier, Vermont
Community College of Vermont, Winooski, Vermont
Mia Reynolds fell in love with baking as a teenager experimenting in her family kitchen. Her passion took her to New England Culinary Institute, where she learned practical pastry techniques, and later to Community College of Vermont to deepen her understanding of food management.
Mia combines clear, simple baking instructions with heartwarming stories, making home baking approachable for everyone.