
Fluffy Japanese Chocolate Cake Roll Recipe for Sweet Bliss
Soft, delicate layers whisper sweet promises of a chocolate swiss roll that dances between Japanese baking precision and decadent dessert artistry.
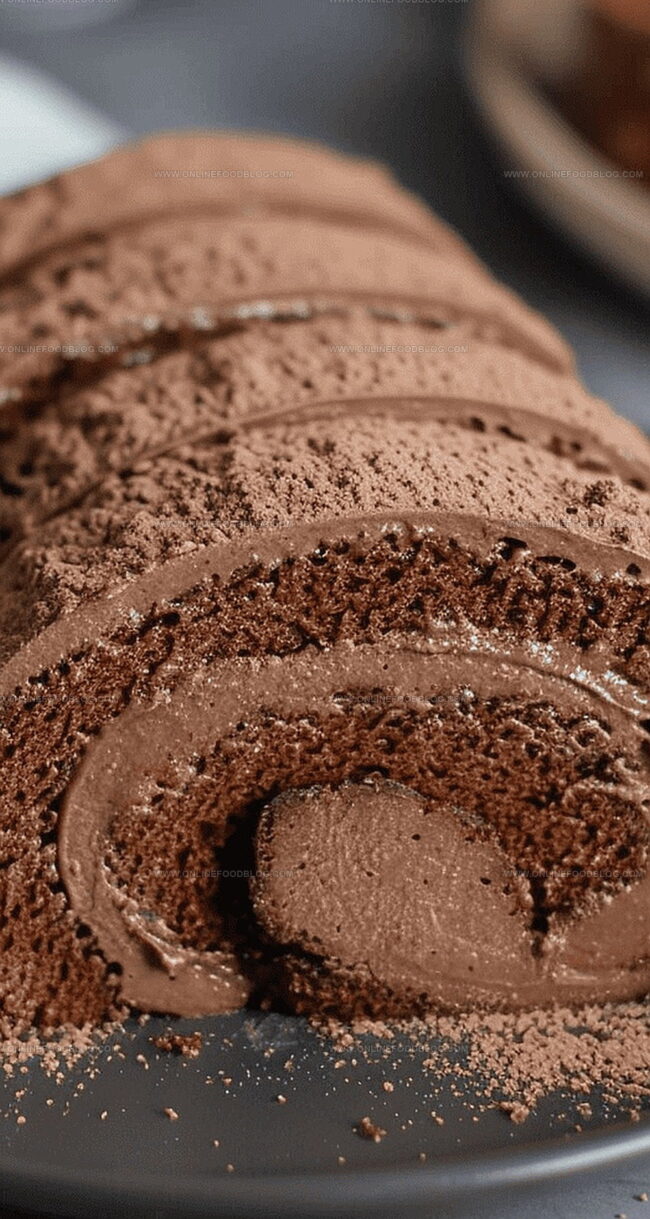
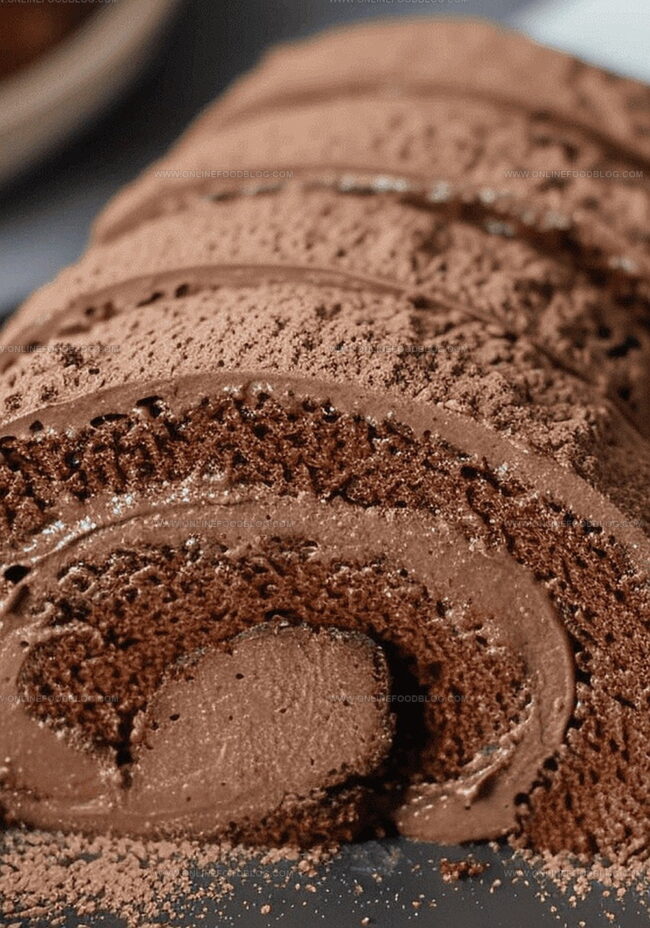
Every slice of this Japanese chocolate cake roll tells a story of culinary magic and delicate craftsmanship.
The velvety chocolate sponge melts effortlessly on your tongue, creating a sensational experience that transcends ordinary desserts.
Elegant and light, this roll captures the essence of Japanese pastry techniques with remarkable finesse.
Delicate swirls of rich chocolate cream nestle within a perfectly rolled sponge, promising pure indulgence.
The subtle balance of flavors and textures makes this cake an irresistible treat for anyone seeking a sophisticated dessert.
Get ready to savor a slice of pure bliss that will transport you to the delightful world of Japanese baking.
Quick Recipe Overview
Japanese Chocolate Cake Roll Ingredients
For The Base Of The Cake:For Moisture And Richness:For Structural Support And Texture:For Chocolate Whipped Cream:Tools for Rolling a Japanese Cake
Instructions for Making Chocolate Cake Rolls
Gather all baking tools and create a clean, organized workspace for smooth cake creation.
Warm milk and cocoa powder together, stirring until smooth and allowing mixture to cool completely.
Combine flour, sugar, salt, and baking elements in a large mixing bowl, ensuring even distribution.
Whip egg whites gradually, transforming them from frothy to glossy meringue with soft, delicate peaks.
Gently fold meringue into chocolate mixture, maintaining airiness and avoiding aggressive mixing.
Pour batter into lined pan, spreading evenly and tapping to release potential air bubbles.
Cook cake until center springs back and edges look perfectly golden, watching closely during short baking window.
Roll warm cake carefully with parchment paper, creating soft flexible shape before filling.
Prepare silky chocolate cream by melting chocolate into cream, whipping to light and airy consistency.
Unroll cake, spread cream smoothly, then re-roll with gentle pressure, trimming edges for elegant presentation.
Tips for Filling or Icing Cake Rolls
How to Slice and Serve Cake Rolls
Storing Cake Rolls Without Drying Out
Print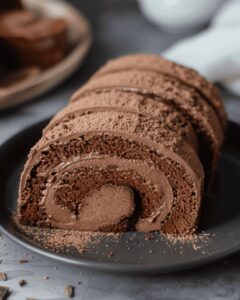
Silky Japanese Chocolate Cake Roll Recipe
- Total Time: 36 minutes
- Yield: 9 1x
Description
This elegant Japanese chocolate cake roll showcases delicate sponge and silky cream filling. Chocolate lovers will savor each luxurious slice of this classic Asian dessert that delivers rich flavor and refined texture.
Ingredients
- 120 g semi-sweet chocolate
- 290 mL (9.8 fl oz) whipping cream 33%
- 4 egg whites
- 3 egg yolks
- 50 g granulated sugar (for cake batter)
- 50 g granulated sugar (for egg whites)
- 45 g cake flour
- 50 mL (1.7 fl oz) whole fat milk
- 40 mL (1.35 fl oz) vegetable oil
- 5 tsp Dutch processed cocoa powder
- ½ tsp vanilla extract
- ¼ tsp baking soda
- ½ tsp cream of tartar (for cake batter)
- ¼ tsp cream of tartar (for egg whites)
- ¼ tsp sea salt
Instructions
- Prepare Pan: Line an 8 x 12″ rectangular cake pan with parchment paper, securing edges with small batter dabs to prevent shifting.
- Create Chocolate Base: Warm milk and cocoa powder in a saucepan, stirring until powder dissolves completely. Allow to cool while preparing other ingredients.
- Combine Dry Ingredients: Sift cake flour, sugar, baking soda, cream of tartar, and salt into a large mixing bowl, creating a central well.
- Mix Wet Components: Pour egg yolks, oil, vanilla extract, and cooled chocolate milk mixture into the well. Blend gently until just incorporated.
- Develop Meringue: Whip egg whites from low to high speed, gradually adding remaining cream of tartar and sugar until stiff, glossy peaks form.
- Fold Batter: Delicately incorporate meringue into chocolate mixture, using a light folding technique to maintain air volume.
- Bake Cake: Preheat oven to 325°F with rack centered. Pour batter into prepared pan, spreading evenly. Tap pan to release air bubbles. Bake 14-16 minutes until cake springs back when touched.
- Initial Cooling: Rest cake in pan for 5 minutes, then transfer to cooling rack. Carefully remove parchment paper and surface skin.
- Shape Cake Roll: While still warm, cover with fresh parchment and gently roll to prevent cracking. Set aside to cool completely.
- Prepare Chocolate Cream: Melt chocolate pieces with cream over medium heat until smooth. Chill mixture, stirring periodically.
- Finish Filling: Whip chilled chocolate cream to medium-stiff consistency. Unroll cake and spread cream evenly.
- Final Assembly: Carefully reroll cake using parchment paper as support, trimming edges before transferring to serving plate.
Notes
- Prevent Cake Cracking: Roll the cake while it’s still warm to maintain flexibility and prevent structural breaks during filling and final rolling.
- Maintain Meringue Integrity: Whip egg whites gradually and incrementally add sugar to create stable, glossy peaks that provide optimal volume and structure.
- Avoid Overmixing Batter: Gently fold meringue into chocolate base using delicate techniques to preserve air bubbles and ensure a light, tender texture.
- Temperature Control Matters: Use room temperature ingredients and precise oven positioning to guarantee even baking and consistent cake performance.
- Prep Time: 20 minutes
- Cook Time: 16 minutes
- Category: Desserts, Snacks
- Method: Baking
- Cuisine: Japanese
Nutrition
- Serving Size: 9
- Calories: 275
- Sugar: 19 g
- Sodium: 50 mg
- Fat: 21 g
- Saturated Fat: 12 g
- Unsaturated Fat: 9 g
- Trans Fat: 0 g
- Carbohydrates: 23 g
- Fiber: 1 g
- Protein: 4 g
- Cholesterol: 70 mg
Mia Reynolds
Food Writer & Home Cooking Specialist
Expertise
Easy Home Baking, Recipe Writing and Storytelling, Local and Seasonal Ingredients, Baking for Beginners
Education
New England Culinary Institute (NECI), Montpelier, Vermont
Community College of Vermont, Winooski, Vermont
Mia Reynolds fell in love with baking as a teenager experimenting in her family kitchen. Her passion took her to New England Culinary Institute, where she learned practical pastry techniques, and later to Community College of Vermont to deepen her understanding of food management.
Mia combines clear, simple baking instructions with heartwarming stories, making home baking approachable for everyone.