Whole Milk: Provides creamy consistency and subtle sweetness. Opt for full-fat milk for maximum richness.
Unsalted Butter: Adds luxurious texture and neutral fat base. Use room temperature butter for smooth blending.
Sugar: Sweetens and stabilizes custard mixture. Select fine granulated sugar for even dissolving.
For Ganache and Decoration Ingredients:
Heavy Cream: Creates smooth, glossy ganache coating. Use fresh, high-fat content cream.
Dark Chocolate: Delivers intense chocolate flavor for ganache. Choose quality chocolate with high cocoa percentage.
White Chocolate Crispearls: Provides decorative crunch and visual appeal. Optional garnish for added texture.
Tools to Bake and Roll Custard Cakes
Stand Mixer: Essential for whipping egg whites and butter to perfect consistency.
Saucepan: Needed to cook custard base smoothly and evenly.
Kitchen Scale: Precise measurement tool for ingredients like egg whites and flour.
Large Mixing Bowl: Clean and grease-free bowl for whipping meringue.
Fine Sieve: Critical for sifting flour and cocoa powder evenly.
Rimmed Baking Sheet: Required for baking the angel food cake.
Parchment Paper: Helps prevent sticking and easy cake removal.
Pastry Bag with Star Tip: Used for decorative piping of buttercream.
Sharp Serrated Knife: Perfect for trimming cake edges cleanly.
Cooling Rack: Allows air circulation when decorating the roll.
Spatulas: Helpful for transferring and spreading cream.
Steps to Make Chocolate Custard Rolls
Custard Buttercream Creation
Egg Yolk Blend Preparation Whisk egg yolks and sugar in a saucepan until silky smooth. Add milk and stir continuously.
Heating Process Gently cook the mixture over medium heat, stirring constantly. Watch carefully to prevent curdling, aiming for a thick, spoon-coating consistency.
Cooling Stage Allow the custard to reach room temperature completely.
Butter Transformation Whip butter until pale and fluffy, expanding in volume and creating a light texture.
Custard Integration Gradually incorporate the cooled custard into the whipped butter, blending carefully.
Chocolate Angel Food Cake
Equipment Setup Prepare a clean baking sheet with parchment paper. Ensure all tools are grease-free.
Meringue Magic Whip egg whites until foamy, then slowly add sugar. Continue whipping until glossy and thick.
Flour Incorporation Gently sift flour and cocoa powder over the meringue. Fold delicately to maintain airiness.
Baking Moment Spread batter evenly and bake until perfectly set.
Roll Assembly
Cream Spreading Distribute buttercream across the cooled cake, leaving a small border.
Rolling Technique Carefully roll the cake, creating a smooth, tight spiral.
Chilling Period Refrigerate to set the shape and firm up the cream.
Decorative Finish
Ganache Creation Blend hot cream with chocolate until smooth and glossy.
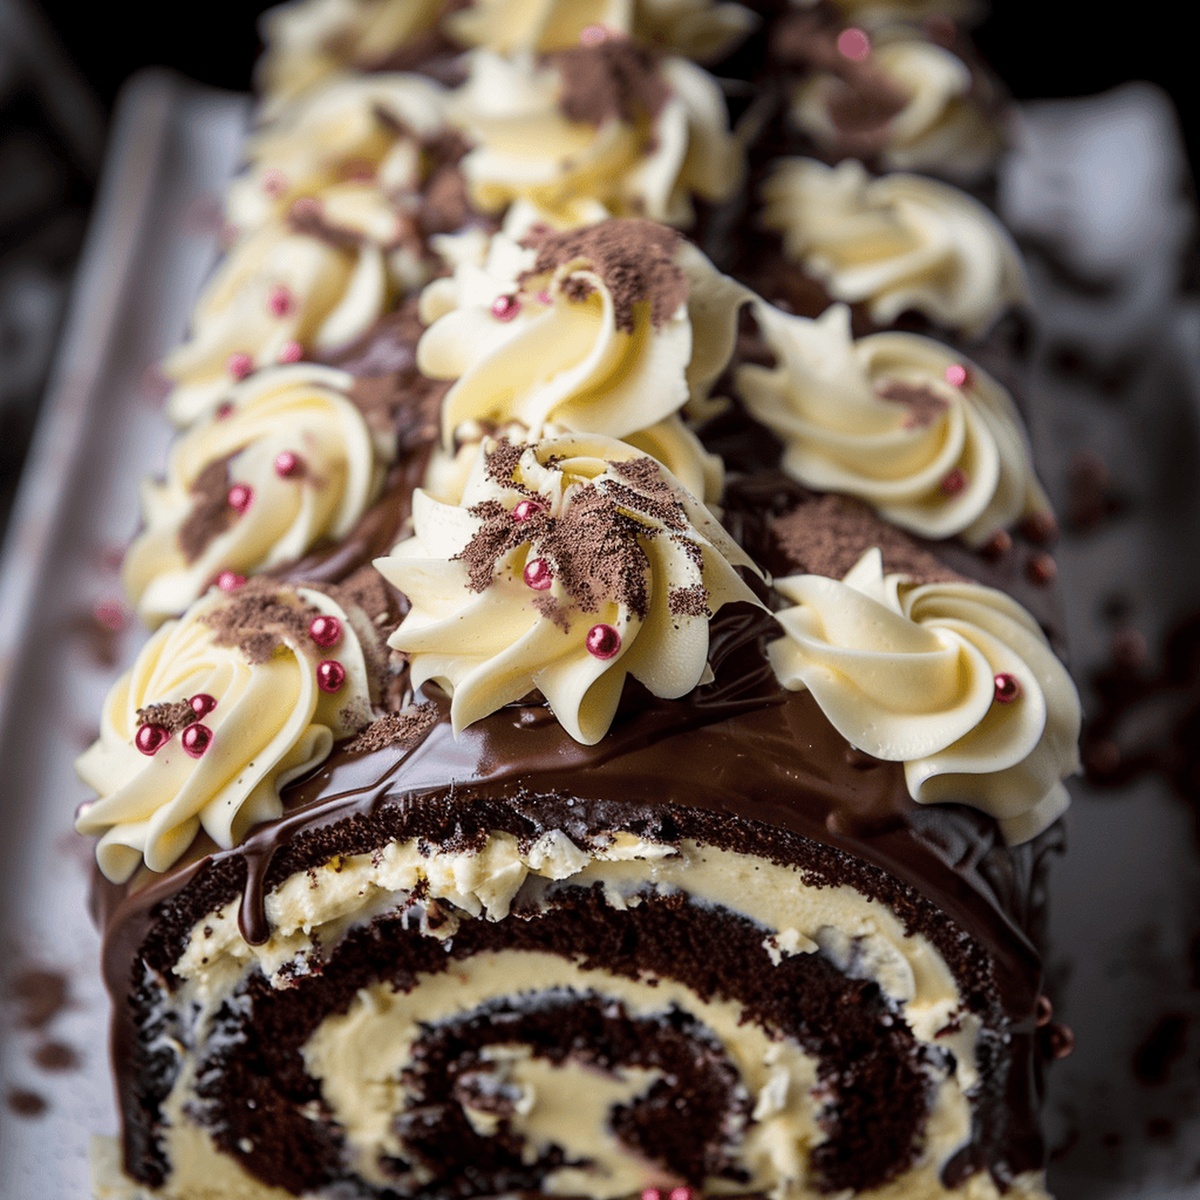
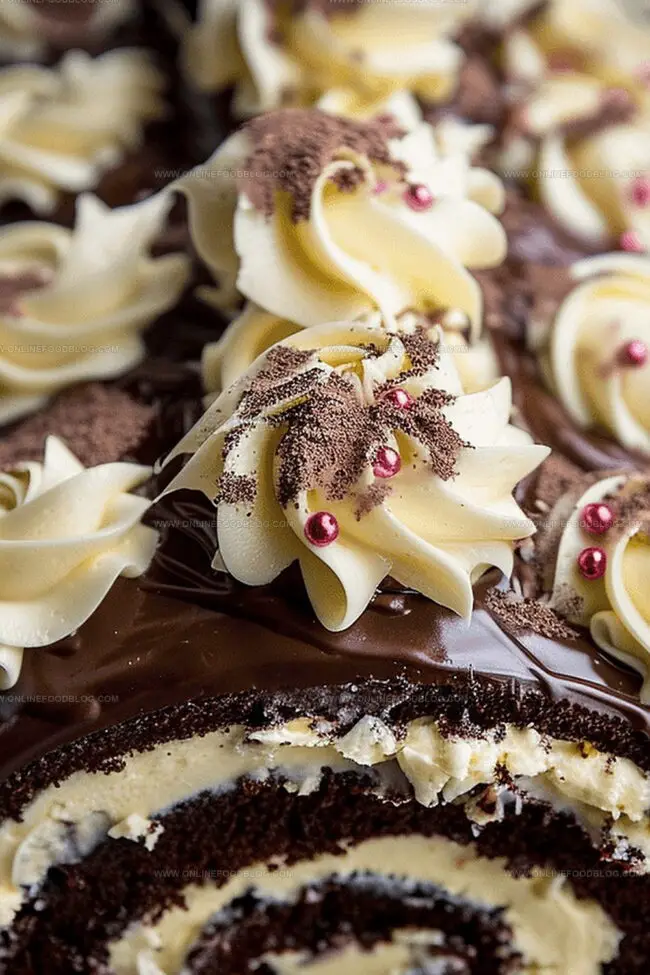
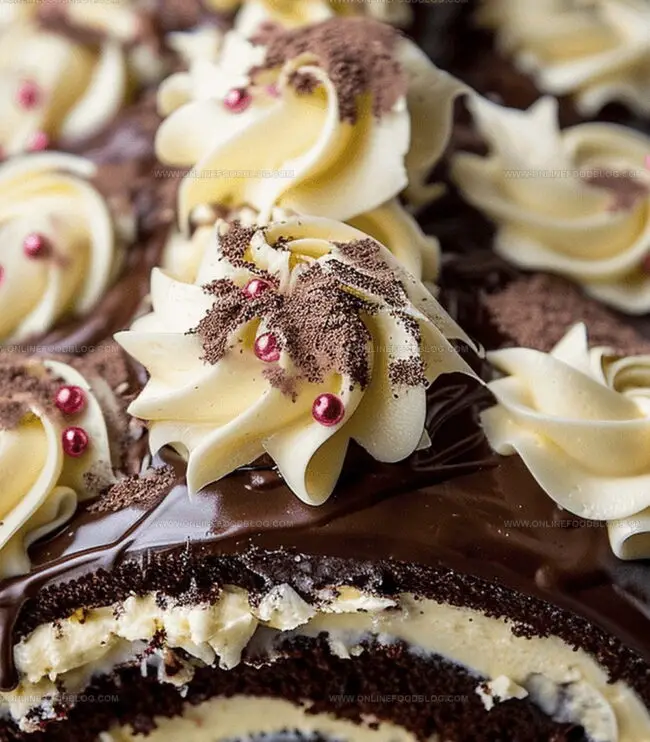
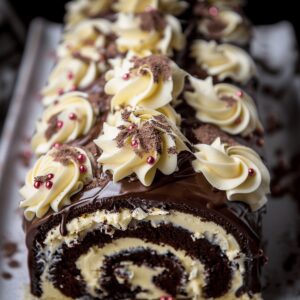
Final Touch Pour ganache over the roll and pipe decorative cream details.
Presentation Transfer to a serving plate and chill until ready to enjoy.
Tips for Filling and Rolling Smoothly
Whip butter at room temperature for maximum volume and lighter texture.
Monitor custard closely between 160-180°F to prevent curdling – use a digital thermometer for accuracy.
Keep the roll refrigerated and consume within 3-4 days for optimal freshness and flavor preservation.
Experiment with different cocoa powder intensities or swap vanilla extract with almond or coffee essence for unique taste profiles.
Replace White Chocolate Crispearls with crushed nuts, chocolate shavings, or edible flower petals to personalize the roll’s appearance.
Serving Custard Rolls for Dessert Tables
Elegant Dessert Centerpiece: Position the chocolate custard roll as the star attraction on a beautiful cake stand, creating a stunning visual display for special gatherings.
Chocolate Lover’s Dream Pairing: Serve each slice with a small scoop of vanilla bean ice cream or a dollop of fresh whipped cream to complement the rich chocolate flavors and creamy custard texture.
Wine and Dessert Companions: Enhance the experience by offering a small glass of sweet dessert wine like port or a smooth coffee liqueur that beautifully matches the roll’s decadent chocolate notes.
Seasonal Garnish Touch: Decorate the serving plate with fresh berries like raspberries or strawberries, or sprinkle some edible gold dust for an extra elegant presentation that makes the dessert feel extra special.
Keeping Chocolate Custard Rolls Fresh
Smart Storage Solutions
Chill Zone: Store the chocolate custard roll in an airtight container within the refrigerator for up to 4 days. Keep it away from strong-smelling foods to maintain its delicate flavor profile.
Freezing Magic: Wrap the entire roll tightly in plastic wrap, then aluminum foil, and freeze for maximum 2 weeks. Thaw overnight in the refrigerator for best texture and taste quality.
Slice Preparation: Cut individual servings before storing to make grab-and-go moments easier. Place wax paper between slices to prevent sticking and maintain presentation.
Temperature Wisdom: Always serve slightly chilled for optimal buttercream consistency and flavor intensity. Remove from refrigerator 10-15 minutes before serving to soften gently.
Indulgent chocolate custard roll showcases classic French pastry technique with silky chocolate cream nestled in delicate pastry. Chocolate lovers will savor each elegant slice of this luxurious dessert crafted to delight sophisticated palates.
Ingredients
Scale
10 egg yolks
240 grams (about 10) egg whites
1 ½ cups (340 grams) unsalted butter, room temperature
300 grams granulated sugar
¾ cups (150 grams) granulated sugar
120 grams all-purpose flour
40 grams cocoa powder
⅓ cup (55 grams) chopped dark chocolate or dark chocolate chips
¾ cups (180 milliliters) whole milk
¼ cup (60 milliliters) heavy whipping cream
1 tbsp vanilla extract
Instructions
Prepare Workspace: Meticulously organize and sanitize all equipment for crafting the custard buttercream.
Create Custard Base: Whisk egg yolks and sugar in a saucepan until silky, then blend with whole milk over medium heat, stirring constantly until the mixture thickens and coats a spoon.
Cool and Stabilize: Allow custard to reach room temperature completely, preventing potential separation or curdling.
Butter Preparation: Whip butter until transformed into a pale, voluminous cream, ensuring even incorporation by scraping the bowl periodically.
Combine Custard and Butter: Gently fold cooled custard into whipped butter in two careful additions, maintaining the mixture’s delicate structure.
Cake Batter Creation: Whip egg whites to a glossy meringue, gradually adding sugar, then delicately fold sifted flour and cocoa powder to preserve the mixture’s airiness.
Baking Process: Spread batter evenly on a parchment-lined baking sheet, baking until a toothpick comes out clean, then cool completely.
Rolling Technique: Spread custard buttercream evenly across the cake, leaving a small border, then roll tightly into a cylinder with the seam facing downward.
Final Decoration: Chill the rolled cake, apply a smooth layer of reserved cream, trim edges, and drizzle with chocolate ganache.
Presentation: Pipe decorative buttercream flowers, optionally embellish with chocolate pearls, and refrigerate until serving.
Notes
Precise Temperature Control: Monitor custard mixture carefully to prevent curdling, using medium heat and constant stirring for smooth, silky texture.
Meringue Mastery: Whip egg whites gradually with sugar to create stable, glossy base that ensures light, airy chocolate cake texture.
Gentle Folding Technique: Incorporate dry ingredients into meringue with delicate, minimal movements to preserve mixture’s airiness and prevent deflation.
Knife Warming Trick: Heat blade before slicing to achieve clean, professional-looking cake portions without disturbing delicate buttercream layers.
Degree: Certificate in Food and Beverage Management
Focus: Essential knowledge of recipe development, ingredient sourcing, and food business basics.
Mia Reynolds fell in love with baking as a teenager experimenting in her family kitchen. Her passion took her to New England Culinary Institute, where she learned practical pastry techniques, and later to Community College of Vermont to deepen her understanding of food management.
Mia combines clear, simple baking instructions with heartwarming stories, making home baking approachable for everyone.
Mia Reynolds
Food Writer & Home Cooking Specialist
Expertise
Easy Home Baking, Recipe Writing and Storytelling, Local and Seasonal Ingredients, Baking for Beginners
Education
New England Culinary Institute (NECI), Montpelier, Vermont
Community College of Vermont, Winooski, Vermont
Mia Reynolds fell in love with baking as a teenager experimenting in her family kitchen. Her passion took her to New England Culinary Institute, where she learned practical pastry techniques, and later to Community College of Vermont to deepen her understanding of food management.
Mia combines clear, simple baking instructions with heartwarming stories, making home baking approachable for everyone.