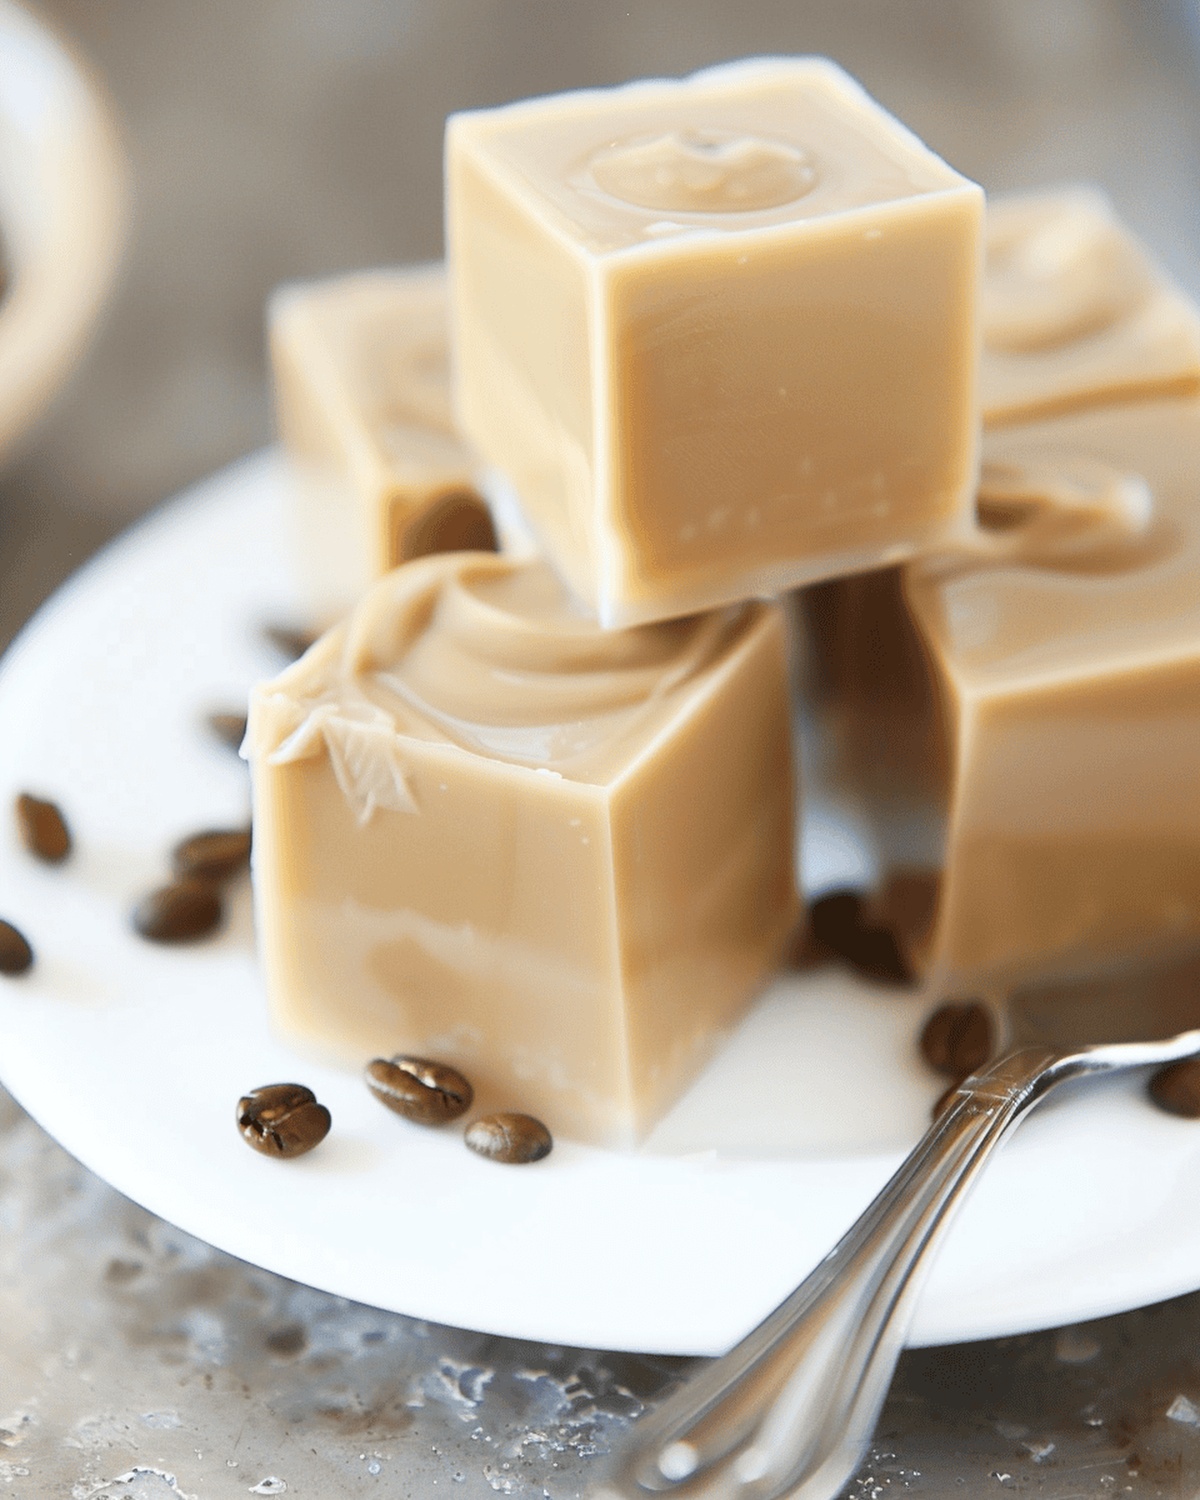
Jiggly Morning Delight: Quick Almond Milk Coffee Jello Recipe
Chilled and creamy, this almond milk coffee jello dazzles taste buds with unexpected texture and rich flavor.
coffee lovers will swoon over this delightful dessert that combines smooth almond milk with bold espresso notes.
The silky jello wobbles seductively on the plate, promising a refreshing treat that’s both elegant and playful.
Each spoonful delivers a cool burst of caffeine-infused sweetness that melts effortlessly on your tongue.
Forget boring desserts and embrace this unique culinary creation that bridges comfort and sophistication.
Simple ingredients come together to craft a dessert that’s sure to impress at any gathering.
You’ll fall in love with this innovative twist on traditional coffee treats.
Quick Recipe Overview
Almond Milk Coffee Jello – What You’ll Need
For Base and Binding:For Flavor Enhancers:For Optional Serving:Tools to Create Almond Milk Coffee Jello
Steps to Make Coffee Jello with Almond Milk
Combine gelatin and almond milk in a microwave-safe container, letting it rest for a few relaxing moments to bloom smoothly.
Mix in instant coffee granules, creating a rich aromatic blend that will awaken your senses.
Warm the liquid in the microwave, coaxing the coffee to dissolve completely without reaching a boiling point.
Introduce remaining cold almond milk, adjusting the quantity for your desired jello firmness.
Add liquid stevia, gently stirring to create a delightful balanced sweetness.
Pour the silky mixture into serving vessels – a large glass pan or individual ramekins work perfectly.
Let the dessert rest in the refrigerator, allowing the gelatin to set and flavors to meld overnight, transforming into a cool, jiggly treat.
Enhancing Coffee Jello – Flavor Tips
Serving Coffee Jello with Flair
Tips for Storing Almond Milk Coffee Jello
Print
Silky Almond Milk Coffee Jello Recipe
- Total Time: 12 minutes + setting time
- Yield: 9 1x
Description
Coffee jello made with almond milk offers a delightful twist on traditional desserts. Silky smooth cubes infused with rich espresso provide a cool, refreshing treat perfect for coffee enthusiasts wanting something unique.
Ingredients
- 4 cups (960 ml) unsweetened almond milk
- 2 tbsps instant coffee granules
- 3 packets (0.75 oz / 21 g) unflavored gelatin (Knox)
- Liquid stevia to taste
Instructions
- Gelatin Activation: Sprinkle gelatin into almond milk in a microwave-safe container, allowing it to bloom and soften for optimal texture.
- Coffee Integration: Whisk instant coffee granules into the gelatin-infused almond milk, creating a smooth, aromatic base.
- Thermal Treatment: Microwave the mixture for 90 seconds, heating thoroughly without boiling to ensure complete coffee dissolution and gelatin activation.
- Liquid Balancing: Incorporate remaining cold almond milk, adjusting to achieve desired jello consistency and mouthfeel.
- Sweetness Enhancement: Add liquid stevia, carefully calibrating the sweetness to create a perfectly balanced flavor profile.
- Homogenization: Vigorously whisk all ingredients to ensure uniform distribution and eliminate any potential clumping.
- Molding and Cooling: Pour the liquid jello into a Pyrex dish or individual ramekins, then allow to cool briefly at room temperature before refrigerating.
- Setting Period: Chill for minimum 5 hours or overnight, enabling the gelatin to fully set and develop a delicate, trembling consistency.
Notes
- Gelatin Activation Tip: Let gelatin bloom in a small portion of almond milk for at least 3-5 minutes to ensure smooth, lump-free dissolution and optimal texture.
- Temperature Control: Microwave carefully to heat without boiling, preventing gelatin protein breakdown and maintaining the jello’s delicate structure.
- Sweetness Balance: Start with minimal liquid stevia, tasting gradually to achieve perfect sweetness without overpowering the coffee’s rich flavor profile.
- Chilling Technique: Refrigerate for a minimum of 5 hours or overnight to guarantee a firm, perfectly set jello with a satisfying wobble and clean cut.
- Prep Time: 10 minutes
- Cook Time: 2 minutes
- Category: Desserts, Drinks
- Method: Blending
- Cuisine: Fusion
Nutrition
- Serving Size: 9
- Calories: 30
- Sugar: 0 g
- Sodium: 40 mg
- Fat: 2.5 g
- Saturated Fat: 0.25 g
- Unsaturated Fat: 2.25 g
- Trans Fat: 0 g
- Carbohydrates: 1 g
- Fiber: 0 g
- Protein: 1 g
- Cholesterol: 0 mg
Mia Reynolds
Food Writer & Home Cooking Specialist
Expertise
Easy Home Baking, Recipe Writing and Storytelling, Local and Seasonal Ingredients, Baking for Beginners
Education
New England Culinary Institute (NECI), Montpelier, Vermont
Community College of Vermont, Winooski, Vermont
Mia Reynolds fell in love with baking as a teenager experimenting in her family kitchen. Her passion took her to New England Culinary Institute, where she learned practical pastry techniques, and later to Community College of Vermont to deepen her understanding of food management.
Mia combines clear, simple baking instructions with heartwarming stories, making home baking approachable for everyone.