
Rustic Italian Bread Recipe: Bake a Golden Loaf at Home
Freshly baked crusty Italian bread brings warmth and comfort to any kitchen, filling the air with an irresistible aroma that beckons everyone closer.
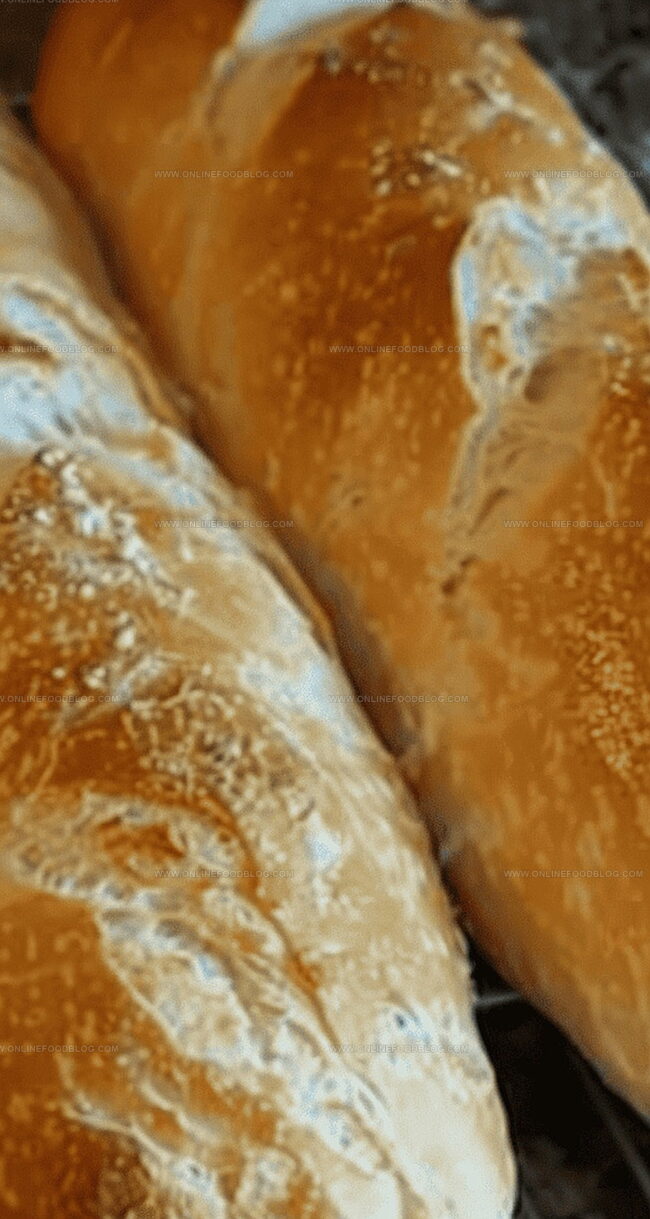
The golden, crisp exterior gives way to a soft, pillowy interior that promises pure deliciousness.
Crafting this classic bread requires simple ingredients and a bit of patience.
Generations of Italian bakers have perfected this timeless recipe, passing down techniques that create the most authentic loaf.
Each slice tells a story of tradition and culinary passion.
With just a few basic steps, you can recreate this beloved bread that pairs perfectly with soups, pastas, or simply enjoyed with a drizzle of olive oil.
Get ready to fill your home with the soul-warming magic of homemade bread that connects you to a rich culinary heritage.
Quick Recipe Overview
What You Need for Crusty Italian Bread
For Activation:For Flavor and Binding:For Structure:For Finishing Touch:Tools for Mixing and Baking Italian Bread
Directions for Perfect Crusty Italian Loaves

Combine warm water, yeast, and brown sugar in a mixing bowl. Allow the mixture to sit until it becomes frothy and bubbly, indicating the yeast is alive and ready.
Incorporate olive oil and salt into the activated yeast. Gradually add flour, mixing until a smooth, elastic dough develops. Knead using a dough hook until the mixture pulls away from the bowl’s sides.
Cover the dough and let it rest in a warm spot. Wait patiently until the dough doubles in size, transforming into a puffy, soft mass.
Gently deflate the risen dough and divide it into two equal portions. Carefully shape each section into a rustic loaf, creating an artisan appearance.
Drape a damp cloth over the shaped loaves. Allow them to expand and become pillowy, nearly doubling in volume.
Heat the oven to a toasty 375°F. Whisk an egg with water to create a golden glaze. Brush the loaves with this mixture and slice a decorative line down the center.
Place a shallow pan filled with hot water on the oven’s bottom rack. This creates a steamy environment that helps develop a crisp, beautiful crust. Bake the loaves until they turn a rich, golden brown and sound hollow when tapped.
Transfer the freshly baked bread to cooling racks. Let the loaves rest and develop their final texture before slicing and serving.
Tweaks to Add Herbs or Garlic Flavors
Serving Crusty Bread with Meals or Cheese
Storage Tips for Bread Crust Crunch
Print
Rustic Italian Bread Recipe
- Total Time: 1 hour 15 minutes
- Yield: 3 1x
Description
Homemade crusty Italian bread delivers authentic Mediterranean flavor with simple ingredients and traditional techniques. Crisp exterior and tender crumb invite bakers to enjoy a slice of Italy’s culinary heritage.
Ingredients
- 4 cups (948 ml) flour
- 2 ¼ teaspoons (11 ml) yeast
- 1 ⅓ cups (317 ml) warm water
- 1 tablespoon (15 ml) brown sugar
- 1 ½ teaspoons (7 ml) salt
- 1 ½ teaspoons (7 ml) olive oil
Instructions
- Activate Yeast: Combine warm water, active dry yeast, and brown sugar in a mixing bowl. Let the mixture bloom for 5 minutes until frothy.
- Create Liquid Base: Mix olive oil and salt into the activated yeast, forming a foundational liquid.
- Develop Dough: Gradually fold flour into the liquid, using a stand mixer with a dough hook to knead until smooth and elastic, cleanly separating from the bowl’s sides.
- First Fermentation: Transfer dough to an oiled container, cover with a towel, and let rise in a warm spot until dramatically expanded, about 30-40 minutes.
- Shape Loaves: Gently deflate the dough, divide into two portions, and shape into elongated loaves with smooth surfaces and tapered ends. Cover with a damp cloth for a second rise until visibly larger.
- Prepare Oven: Preheat to 375°F, placing a shallow pan on the lower rack. Whisk egg with water to create a glossy wash.
- Finish and Bake: Brush loaves with egg mixture, score a central incision along each loaf. Pour hot water into the shallow pan to generate steam. Bake for 25-30 minutes until rich amber in color.
- Cool and Serve: Remove bread from oven, transfer to cooling racks. Allow complete temperature reduction before slicing.
Notes
- Activate Yeast Carefully: Ensure water temperature is between 100-110°F to properly wake up yeast without killing it.
- Knead for Texture: Develop gluten thoroughly by kneading 8-10 minutes to achieve perfect bread elasticity and structure.
- Steam Creates Crust: Hot water pan method generates professional bakery-style crispy, golden exterior with beautiful sheen.
- Cool Completely: Allow bread to rest on wire rack for minimum 1 hour to prevent gummy interior and maintain ideal crumb texture.
- Prep Time: 15 minutes
- Cook Time: 30 minutes
- Category: Snacks, Dinner
- Method: Baking
- Cuisine: Italian
Nutrition
- Serving Size: 3
- Calories: 290
- Sugar: 1 g
- Sodium: 220 mg
- Fat: 3 g
- Saturated Fat: 0.5 g
- Unsaturated Fat: 2.5 g
- Trans Fat: 0 g
- Carbohydrates: 58 g
- Fiber: 2 g
- Protein: 9 g
- Cholesterol: 0 mg
Mia Reynolds
Food Writer & Home Cooking Specialist
Expertise
Easy Home Baking, Recipe Writing and Storytelling, Local and Seasonal Ingredients, Baking for Beginners
Education
New England Culinary Institute (NECI), Montpelier, Vermont
Community College of Vermont, Winooski, Vermont
Mia Reynolds fell in love with baking as a teenager experimenting in her family kitchen. Her passion took her to New England Culinary Institute, where she learned practical pastry techniques, and later to Community College of Vermont to deepen her understanding of food management.
Mia combines clear, simple baking instructions with heartwarming stories, making home baking approachable for everyone.