Perfect Pie Crust Recipe

Easy, Flaky Perfect Pie Crust Recipe for Baking Success

Crafting a perfect pie crust requires finesse and a touch of culinary magic that elevates simple ingredients into a flaky, golden masterpiece.

Home bakers often struggle with achieving that ideal texture that crumbles delicately yet holds its shape with impressive strength.

Professional pastry chefs understand the delicate balance between butter, flour, and technique that makes a truly remarkable crust.

Cold ingredients play a crucial role in creating those sought-after layers that melt in your mouth with buttery richness.

Salt and fat interact in ways that create microscopic pockets of tenderness, while precise mixing prevents tough, dense results.

Gentle handling and strategic chilling are the secret weapons that separate mediocre crusts from extraordinary ones.

Prepare to elevate your baking skills and impress everyone at the table with a technique that turns ordinary desserts into extraordinary culinary experiences.

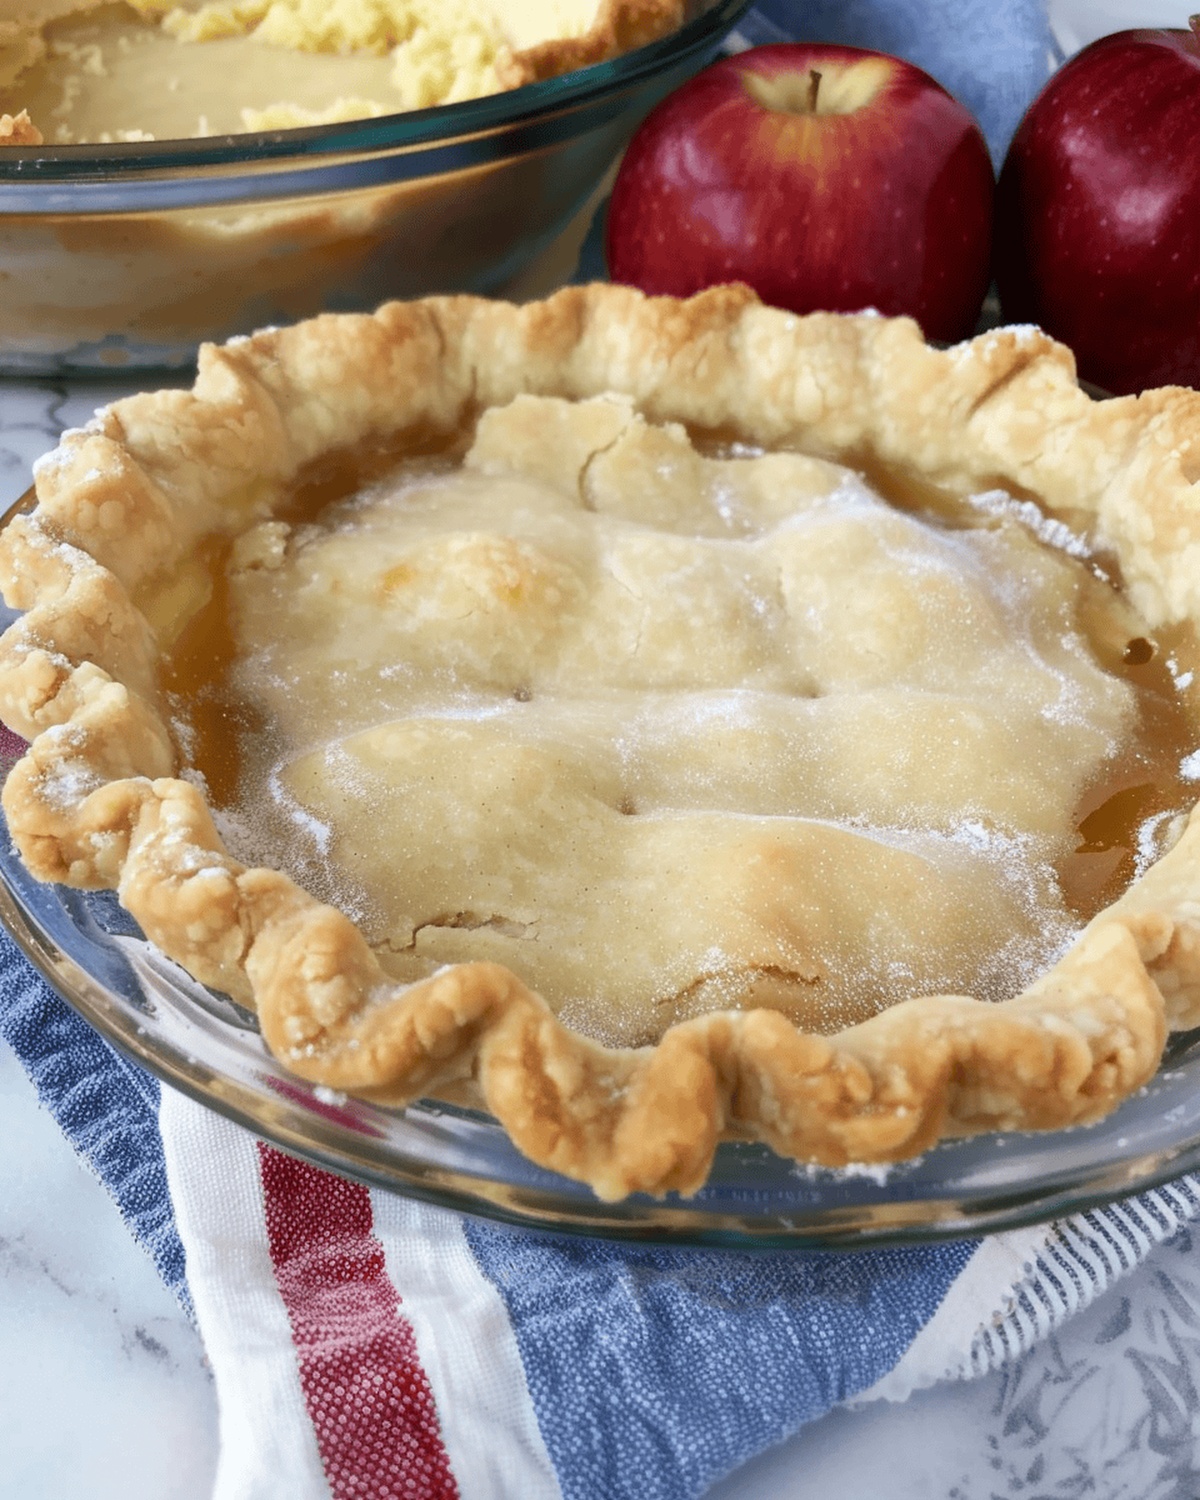
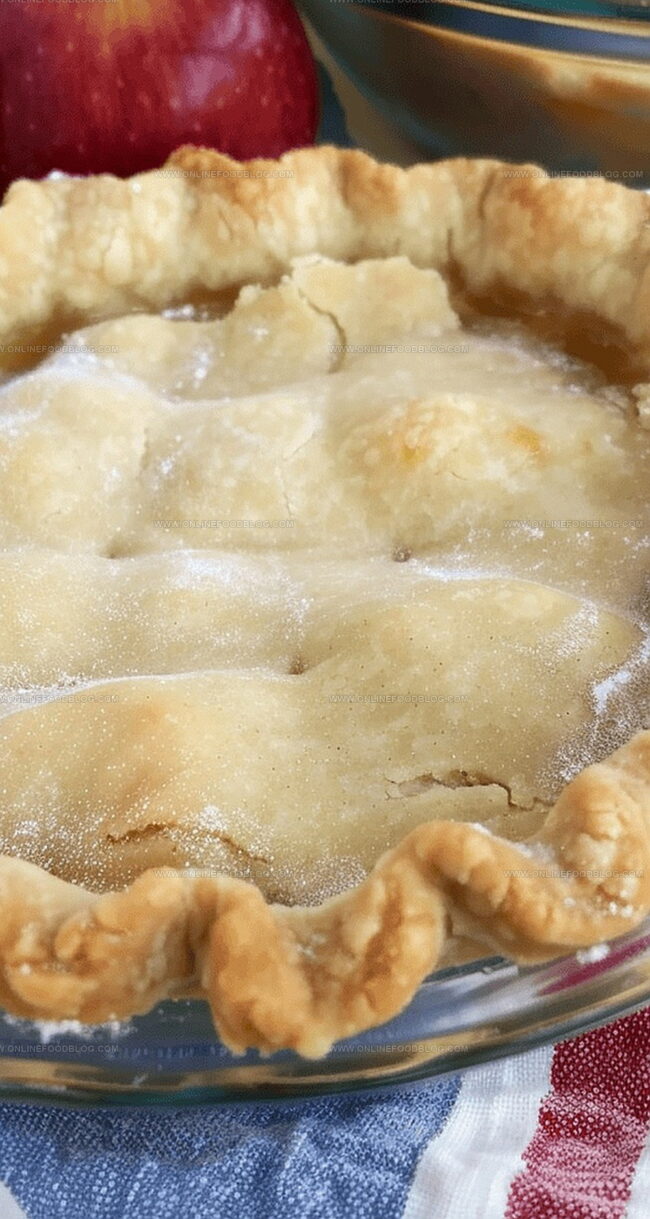
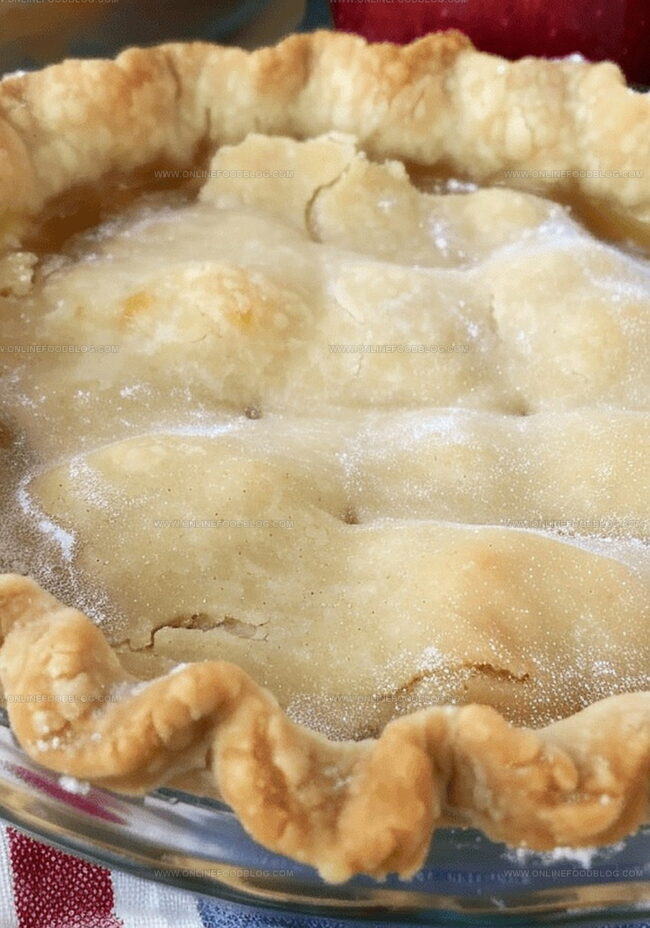
Perfect Pie Crust Snapshot

  • Effortlessly Create Tender Pastry: This recipe transforms simple ingredients into a delightfully soft, flaky pie crust that melts in your mouth, making even novice bakers feel like professional pastry chefs.
  • Quick and Foolproof Technique: The method is incredibly straightforward, requiring minimal equipment and just a few basic steps that guarantee a perfect crust every single time, reducing kitchen stress and baking anxiety.
  • Temperature-Controlled Perfection: Chilling the dough for 15 minutes is a game-changing technique that helps relax the gluten, prevents shrinkage, and ensures a beautifully crisp, structured crust that holds its shape during baking.
  • Versatile Baking Companion: This universal pie crust recipe works wonderfully for sweet and savory dishes, from classic apple pies to hearty chicken pot pies, making it a must-have staple in any home cook's recipe collection.

Everything in a Perfect Pie Crust

Dry Ingredients:
  • All-Purpose Flour: A foundational ingredient that provides structure and texture to the pie crust.
  • Sugar: Adds a subtle sweetness and helps with browning during baking.
  • Shortening: Creates a flaky, tender texture and helps prevent gluten development.
Wet Ingredients:
  • Large Egg, Ice Water: Bind the dry ingredients together and provide moisture for a smooth, pliable dough. Fresh, cold ingredients are key for the best pie crust texture.
Optional Ingredient:
  • Plastic Wrap: Used for wrapping and chilling the dough, ensuring easy handling and optimal texture.

Roll Out a Perfect Pie Crust

Step 1: Whip Up Wet Components

In a separate bowl, whisk the egg thoroughly. Pour in of ice water and mix until completely blended.

Step 2: Combine Mixtures

Slowly pour the liquid mixture into the flour blend. Gently stir with a fork until the ingredients come together and start forming a soft dough.

Step 3: Shape and Chill Dough

Carefully gather the dough into a smooth ball. Wrap tightly in plastic wrap, ensuring no air pockets. Place in the refrigerator and let it rest for 15 minutes. This chilling time helps the dough become more manageable and easier to roll out later.

Pie Crust Tips and Shortcuts

  • Chill for Flakiness: Refrigerate the dough for at least 15 minutes to allow gluten to relax and fats to solidify, ensuring a tender, flaky crust that melts in your mouth.
  • Prevent Tough Texture: Handle the dough minimally to avoid overworking, which can develop gluten and create a tough, dense pie crust instead of a light, delicate one.
  • Master the Cutting Technique: Use a pastry cutter or two forks to blend shortening into flour, creating pea-sized crumbs that guarantee a perfectly crumbly and crisp crust.
  • Maintain Cold Ingredients: Keep all ingredients extremely cold, especially water and shortening, to help create those coveted flaky layers that make homemade pie crusts irresistible.
  • Roll with Precision: Use a well-floured surface and roll from the center outward in smooth, even strokes to achieve a uniform thickness and prevent sticking during pie preparation.

Store Pie Crust for Later Use

  • Refrigerate Leftovers: Carefully wrap leftover pie crust in plastic wrap or store in an airtight container. Refrigerate for up to 3-4 days to maintain its fresh texture and prevent bacterial growth.
  • Freeze for Long-Term Storage: Transfer the wrapped pie crust to a freezer-safe bag or container. Freeze for up to 2 months, ensuring you label the package with the date to track freshness.
  • Reheat with Care: Thaw frozen pie crust in the refrigerator overnight. Bring to room temperature before using, and gently warm in the oven at 350°F for 5-7 minutes to restore its crisp texture and original flavor.

Best Fillings for Pie Crust

  • Pair with Creamy Vanilla Custard: The buttery, flaky pie crust begs for a silky smooth vanilla custard that complements its delicate texture. The cool, rich custard creates a heavenly contrast against the crisp pastry.
  • Match with Spiced Apple Cider: A warm mug of apple cider with hints of cinnamon and nutmeg perfectly balances the neutral flavor of the pie crust. The spicy-sweet beverage brings out the subtle richness of the pastry.
  • Serve with Sharp Cheddar Cheese: Crumble some aged cheddar alongside the pie crust for a tangy, savory companion. The sharp cheese cuts through the buttery crust, creating an unexpected and delightful flavor combination.
  • Enjoy with Light Herbal Tea: A delicate chamomile or lavender tea provides a gentle, aromatic backdrop to the pie crust's neutral base. The herbal notes enhance the subtle flavors without overwhelming the pastry's delicate structure.

New Spins on Pie Crust Recipes

  • Herb-Infused Pie Crust: Add 1-2 tablespoons of finely chopped fresh herbs like rosemary, thyme, or sage to the dry ingredients for an aromatic and savory flavor profile that complements both sweet and savory pies.
  • Whole Wheat Rustic Crust: Replace half the all-purpose flour with whole wheat flour to create a nuttier, more robust crust with added nutritional value and a hearty texture that pairs wonderfully with fruit and vegetable fillings.
  • Spiced Sweet Crust: Incorporate ground cinnamon, nutmeg, or cardamom into the dry ingredients to develop a warm, subtly sweet undertone that enhances dessert pies like apple, pumpkin, or pecan.
  • Gluten-Free Alternative: Substitute the all-purpose flour with a gluten-free flour blend and add 1 teaspoon of xanthan gum to maintain the crust's structure and ensure a tender, flaky result for those with dietary restrictions.
Print
clock clock iconcutlery cutlery iconflag flag iconfolder folder iconinstagram instagram iconpinterest pinterest iconfacebook facebook iconprint print iconsquares squares iconheart heart iconheart solid heart solid icon
Perfect Pie Crust Recipe

Perfect Pie Crust Recipe


5 Stars 4 Stars 3 Stars 2 Stars 1 Star

4.6 from 36 reviews

  • Total Time: 20 minutes
  • Yield: 8 1x

Description

Homemade pie crust delivers flaky, buttery perfection with simple ingredients and expert techniques. Crisp pastry edges and delicate texture promise delightful baking adventures you’ll savor with each delicious slice.


Ingredients

Scale

Main Ingredients:

  • 4 cups all-purpose flour
  • 1 ¾ cups (397 grams) shortening

Binding Ingredients:

  • 1 large egg
  • ½ cup (120 milliliters) ice water
  • 1 tablespoon (15 milliliters) apple cider vinegar

Flavor Enhancers:

  • 1 tablespoon (12.5 grams) sugar

Instructions

  1. Gather all-purpose flour, sugar, and shortening in a spacious mixing bowl, creating a foundation for the delicate pie crust.
  2. Utilize a pastry cutter or fork to methodically blend the dry ingredients, transforming them into a texture reminiscent of coarse, crumbly gravel.
  3. In a separate container, whisk the large egg vigorously until thoroughly beaten and uniform in consistency.
  4. Incorporate of ice-cold water into the beaten egg, stirring until the liquid mixture becomes completely integrated.
  5. Gently cascade the egg and water combination over the flour mixture, using a fork to delicately combine the ingredients until a soft, cohesive dough begins to form.
  6. With clean hands, carefully consolidate the dough into a compact, smooth ball, ensuring all components are evenly distributed.
  7. Encase the dough tightly in plastic wrap, creating a secure seal that prevents moisture loss and helps maintain its structure.
  8. Transfer the wrapped dough to the refrigerator, allowing it to rest and chill for precisely 15 minutes, which relaxes the gluten and enhances the crust’s rollability and texture.

Notes

  • Chilling the dough is crucial for achieving a flaky, tender pie crust that’s easy to roll out and work with.
  • Cold ingredients, especially ice-cold water and chilled shortening, help prevent gluten development and create a more delicate pastry texture.
  • Avoid overmixing the dough, as this can make the crust tough and dense instead of light and crispy.
  • Use a pastry cutter or fork to blend ingredients until they resemble coarse crumbs, which helps create those signature flaky layers.
  • Wrap the dough tightly in plastic wrap to prevent it from drying out and to help it rest and relax before rolling.
  • For best results, chill the dough for at least 15 minutes (or up to overnight) to allow the fats to solidify and the gluten to relax.
  • Prep Time: 20 minutes
  • Cook Time: 0 minutes
  • Category: Desserts, Snacks
  • Method: Mixing
  • Cuisine: American

Nutrition

  • Serving Size: 8
  • Calories: 388 kcal
  • Sugar: 1 g
  • Sodium: 3 mg
  • Fat: 27 g
  • Saturated Fat: 7 g
  • Unsaturated Fat: 18 g
  • Trans Fat: 3 g
  • Carbohydrates: 32 g
  • Fiber: 1 g
  • Protein: 5 g
  • Cholesterol: 27 mg
Lucas Bennett

Lucas Bennett

Founder & Recipe Creator

Expertise

Simple Everyday Recipes, Sustainable Cooking Practices, Creative Meal Planning, Recipe Testing and Improvement

Education

Fox Valley Technical College, Appleton, Wisconsin

  • Degree: Associate of Applied Science in Culinary Arts
  • Focus: Practical culinary training, fundamental cooking techniques, meal planning, and using fresh, local ingredients.

Lake Superior College, Duluth, Minnesota

  • Program: Certificate in Sustainable Food Systems
  • Focus: Cooking methods that promote sustainability, farm-to-table practices, and eco-friendly meal creation.

Lucas Bennett’s cooking journey started in his parents’ kitchen, where he learned to prepare tasty, no-fuss meals from scratch. His culinary passion led him to Fox Valley Technical College, where he gained practical cooking skills.
He then expanded his focus on sustainability at Lake Superior College. Today, Lucas shares easy, approachable recipes designed to make cooking enjoyable and stress-free for everyone.

Leave a Reply

Your email address will not be published. Required fields are marked *

Recipe rating 5 Stars 4 Stars 3 Stars 2 Stars 1 Star