
Easy Peanut Butter & Jelly Cookie Cups Recipe: Bite-Sized Joy
Peanut butter and jelly cookie cups blend nostalgic childhood flavors into an irresistible dessert that enhances classic sandwich memories.
Sweet memories dance across taste buds with these mini treats that merge soft, chewy textures and rich, complementary ingredients.
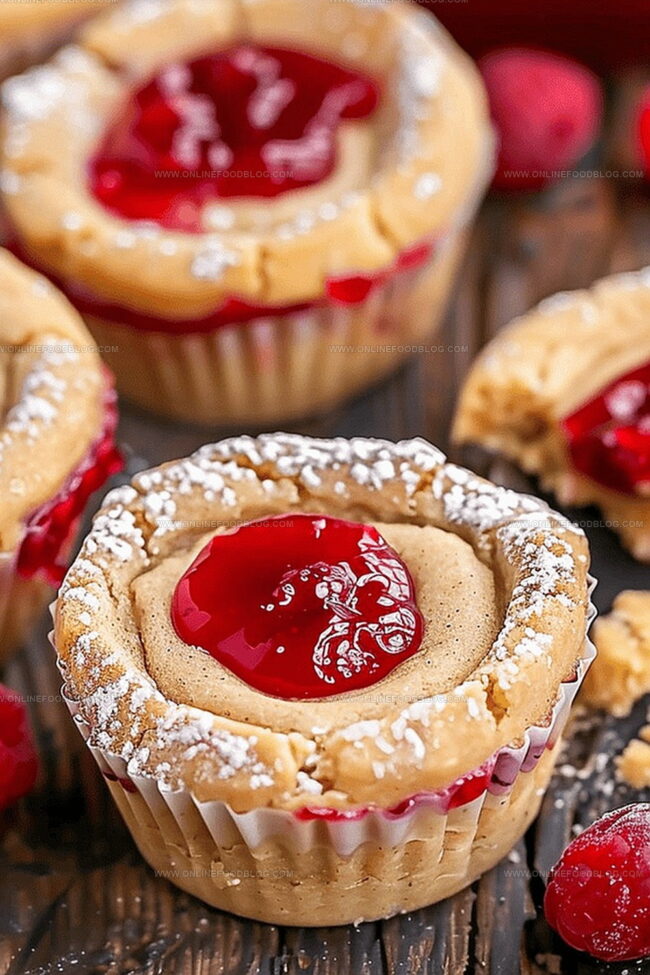
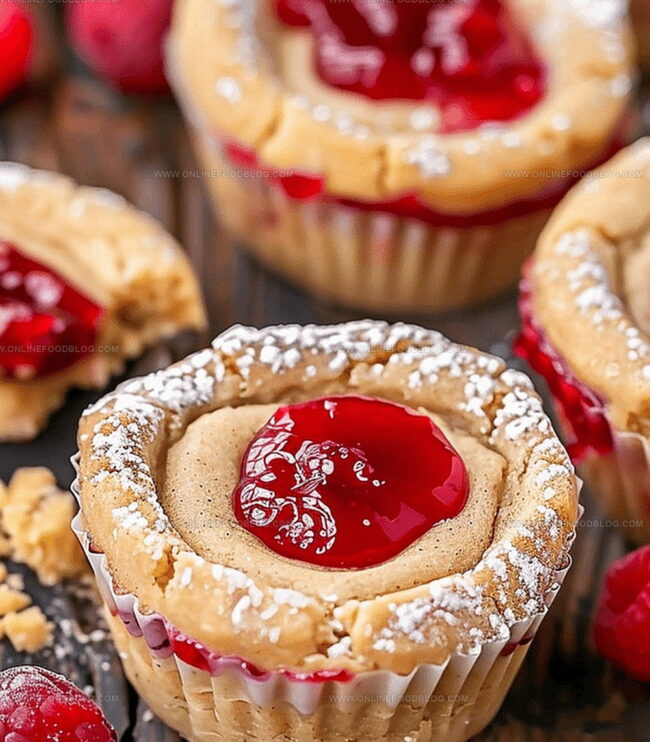
Creamy spreads and fruity preserves nestle perfectly inside delicate, golden-brown cookie shells, creating a miniature edible canvas of comfort.
Bakers of all skill levels can master these delightful morsels with simple techniques and accessible pantry staples.
Crisp edges and tender centers showcase the magical alchemy of familiar ingredients reimagined in a playful, handheld format.
Gooey centers burst with subtle sweetness, promising a delectable experience that bridges generations and culinary traditions.
Prepare to delight friends and family with this whimsical dessert that captures pure, unapologetic joy.
Peanut Butter & Jelly Cookie Cups That Taste Like Childhood
What Goes Into Peanut Butter & Jelly Cookie Cups
Cookie Base:Fats and Binders:Sweeteners:Flavoring:Filling and Topping:Garnish (Optional):How to Bake the Best PB&J Cookie Cups Ever
Step 1: Prepare the Oven and Baking Tin
Preheat the oven to 350°F. Generously spray a regular-sized muffin tin with cooking spray to prevent sticking.
Step 2: Mix Dry Ingredients
In a bowl, whisk together:Set the mixture aside for later use.
Step 3: Create Cookie Dough Base
Beat butter and peanut butter until smooth and creamy. Add sugars and mix on medium-high speed until the mixture becomes pale and fluffy (about 2-3 minutes). Reduce speed and incorporate:Beat until well combined.
Step 4: Combine Dough
Gradually add the flour mixture to the wet ingredients. Mix until just combined, being careful not to overmix.
Step 5: Scoop and Shape Cookies
Use a large cookie scoop () to distribute dough into muffin tin cavities. Gently press down to flatten slightly.
Step 6: Bake Cookie Cups
Bake for 10-12 minutes or until edges are lightly browned and centers are mostly set.
Step 7: Create Cookie Wells
Immediately after removing from the oven, use a small jar or container to press firmly in the center of each cookie, creating a well. Cool in the pan for 10 minutes, then transfer to a wire rack to cool completely.
Step 8: Prepare Peanut Butter Mousse
Whip heavy cream until stiff peaks form (use a cold whisk and cold bowl for best results).
In a separate bowl, beat:Until smooth. Add peanut butter and mix until completely incorporated.
Step 9: Fold Mousse
Gently fold whipped cream into the peanut butter mixture, adding at a time until fully combined.
Step 10: Add Raspberry Jam
Microwave raspberry jam in 20-second intervals to thin it out. Spoon 1 to 1 of jam into each cookie cup. Chill for 20 minutes.
Step 11: Pipe Mousse
Pipe peanut butter mousse on top of the raspberry jam layer. Refrigerate until set (approximately 2 hours).
Step 12: Final Touches
Optional: Top with additional raspberry jam and chopped peanuts.
Step 13: Serve and Store
Serve chilled. Enjoy within 2-3 days, or freeze for up to 4 weeks for longer storage.
Smart Tips for Perfect Peanut Butter & Jelly Cookie Cups
Keep Cookie Cups Fresh and Soft After Baking
What to Pair with Peanut Butter & Jelly Cookie Cups
New Flavors for Peanut Butter & Jelly Cookie Cups
Print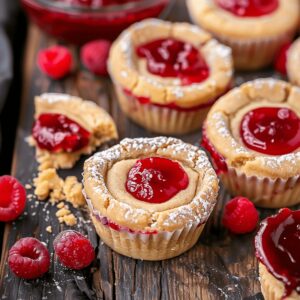
Peanut Butter & Jelly Cookie Cups Recipe
- Total Time: 42 minutes
- Yield: 12 1x
Description
Nostalgic Peanut Butter & Jelly Cookie Cups bring childhood comfort to dessert tables with classic sweet-savory charm. Crisp cookie shells cradle creamy peanut butter filling and sweet jelly, inviting friends and family to savor this playful, memory-laden treat.
Ingredients
Peanut Butter Cookie Cups Ingredients:
Dry Ingredients:
- 1 ¼ cups (156 grams) all-purpose flour
- ¼ teaspoon baking soda
- ½ teaspoon salt
Butter and Sugar Ingredients:
- ¼ cup (57 grams) unsalted butter, room temperature
- ¼ cup (64 grams) smooth peanut butter (not natural)
- ¼ cup (50 grams) granulated sugar
- ½ cup (110 grams) light brown sugar, packed
Binding and Flavoring Ingredients:
- 1 large egg, room temperature
- 1 teaspoon vanilla extract
Peanut Butter Mousse Filling Ingredients:
- ½ cup (120 milliliters) heavy whipping cream, cold
- 3 ounces (85 grams) cream cheese, softened
- ¼ cup (50 grams) granulated sugar
- ½ cup (128 grams) smooth peanut butter (not natural)
Additional Ingredients:
- 1 cup (320 grams) raspberry jam, seedless (or your choice of jam)
- Optional: chopped peanuts
Instructions
- Prepare the workspace by preheating the oven to 350°F (175°C) and generously coating a standard-sized muffin tin with non-stick cooking spray.
- In a medium mixing bowl, thoroughly combine all-purpose flour, baking soda, and salt using a whisk. Set the dry ingredient mixture aside.
- Using an electric mixer, cream together unsalted butter and creamy peanut butter until smooth and well-integrated.
- Gradually add granulated and brown sugars to the butter mixture, beating on medium-high speed until the mixture becomes pale and develops a light, fluffy texture (approximately 2-3 minutes).
- Reduce mixer speed and incorporate the whole egg and pure vanilla extract, mixing until just combined.
- Gently fold the prepared flour mixture into the wet ingredients, stirring until the dough comes together without overmixing.
- Portion the cookie dough into the muffin tin using a 3-tablespoon (45 milliliters) cookie scoop, pressing each portion down slightly to create an even surface.
- Bake the cookie cups for 10-12 minutes, or until the edges turn a light golden brown and the centers appear mostly set.
- Immediately after removing from the oven, use a small jar or container to create a well in the center of each warm cookie cup by pressing down firmly.
- Allow the cookie cups to cool in the pan for 10 minutes, then carefully transfer to a wire cooling rack to reach room temperature.
- For the peanut butter mousse, whip heavy cream in a chilled bowl using a cold whisk until stiff peaks form.
- In a separate mixing bowl, beat cream cheese and powdered sugar until completely smooth, then incorporate creamy peanut butter and mix until well combined.
- Gently fold the whipped cream into the peanut butter mixture, adding at a time to maintain the airy texture.
- Warm the raspberry jam in a microwave-safe bowl, heating in 20-second intervals to achieve a more fluid consistency.
- Spoon 1 to 1 of raspberry jam into each cooled cookie cup and chill for 20 minutes.
- Pipe the prepared peanut butter mousse on top of the chilled jam layer.
- Refrigerate the assembled cookie cups until the mousse sets completely (approximately 2 hours).
- Optional: Garnish with additional raspberry jam and chopped roasted peanuts before serving.
- Store the cookie cups in the refrigerator and consume within 2-3 days, or freeze for up to 4 weeks for extended enjoyment.
Notes
- Prep ahead by chilling your mixing bowl and whisk for perfectly whipped cream that holds its shape beautifully.
- Create consistent cookie cups by using a large cookie scoop to ensure uniform size and even baking.
- The secret to perfect wells is pressing immediately after baking while cookies are still soft and malleable.
- Gentle folding technique prevents deflating the whipped cream, maintaining a light and airy peanut butter mousse texture.
- Microwave jam in short intervals to prevent burning and achieve a smooth, spreadable consistency for easy filling.
- Store these delightful treats in an airtight container in the refrigerator and enjoy within 2-3 days for maximum freshness and flavor.
- Prep Time: 30 minutes
- Cook Time: 12 minutes
- Category: Desserts, Snacks
- Method: Baking
- Cuisine: American
Nutrition
- Serving Size: 12
- Calories: 250 kcal
- Sugar: 18 g
- Sodium: 150 mg
- Fat: 14 g
- Saturated Fat: 6 g
- Unsaturated Fat: 6 g
- Trans Fat: 0.2 g
- Carbohydrates: 28 g
- Fiber: 1 g
- Protein: 5 g
- Cholesterol: 35 mg
Lucas Bennett
Founder & Recipe Creator
Expertise
Simple Everyday Recipes, Sustainable Cooking Practices, Creative Meal Planning, Recipe Testing and Improvement
Education
Fox Valley Technical College, Appleton, Wisconsin
Lake Superior College, Duluth, Minnesota
Lucas Bennett’s cooking journey started in his parents’ kitchen, where he learned to prepare tasty, no-fuss meals from scratch. His culinary passion led him to Fox Valley Technical College, where he gained practical cooking skills.
He then expanded his focus on sustainability at Lake Superior College. Today, Lucas shares easy, approachable recipes designed to make cooking enjoyable and stress-free for everyone.