The Dreamiest Peanut Butter Ice Box Cake Recipe Ever Made
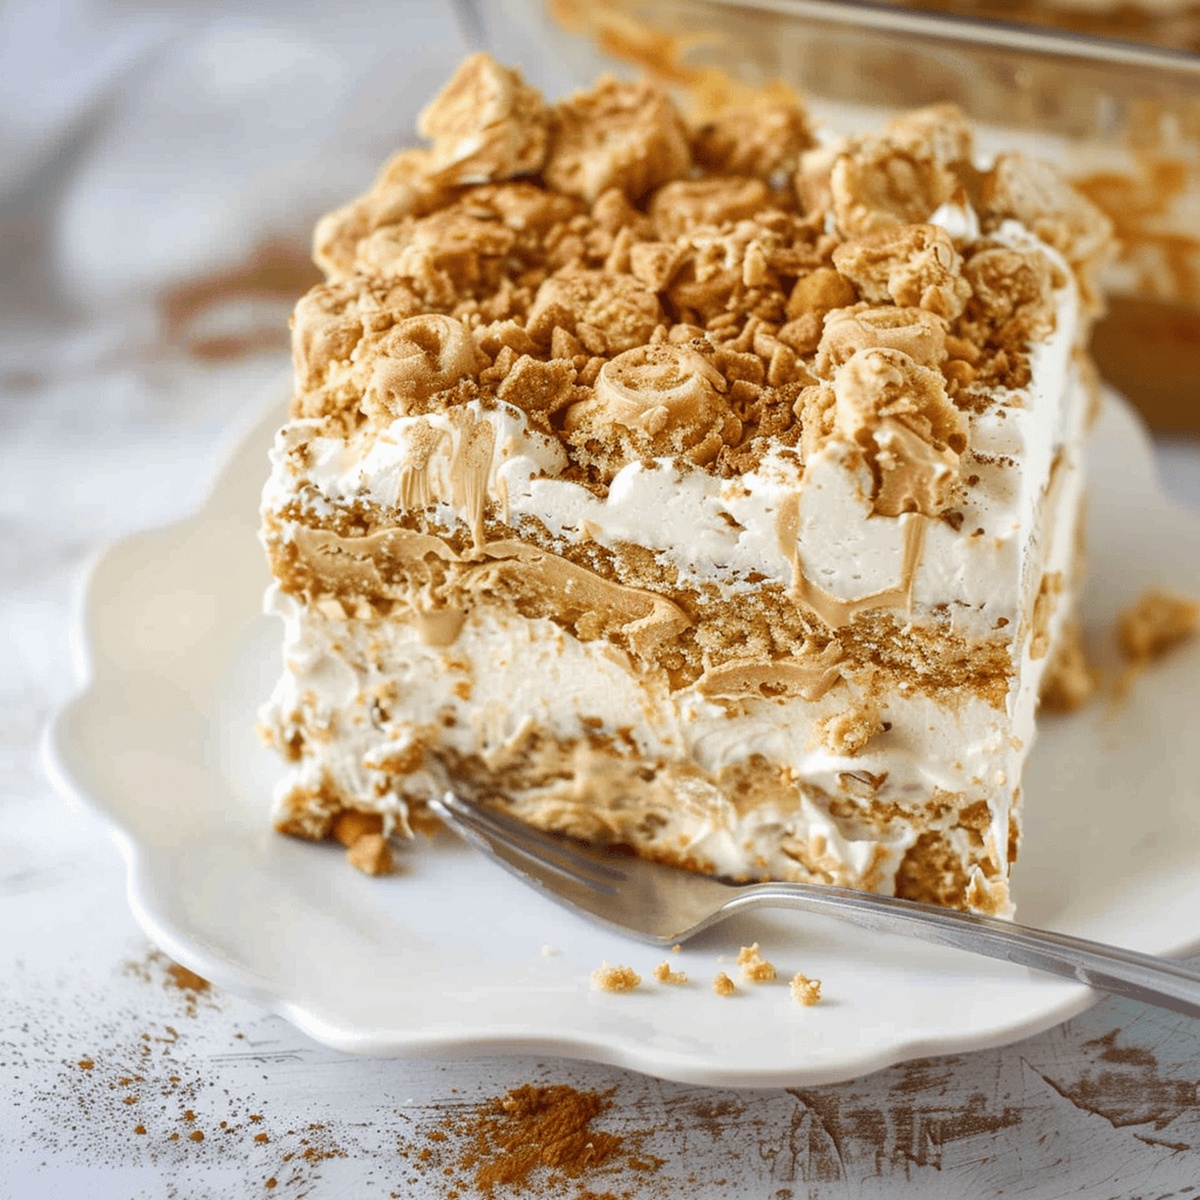
Peanut butter ice box cake crafts ordinary dessert into a creamy, decadent experience that tantalizes taste buds with minimal effort.
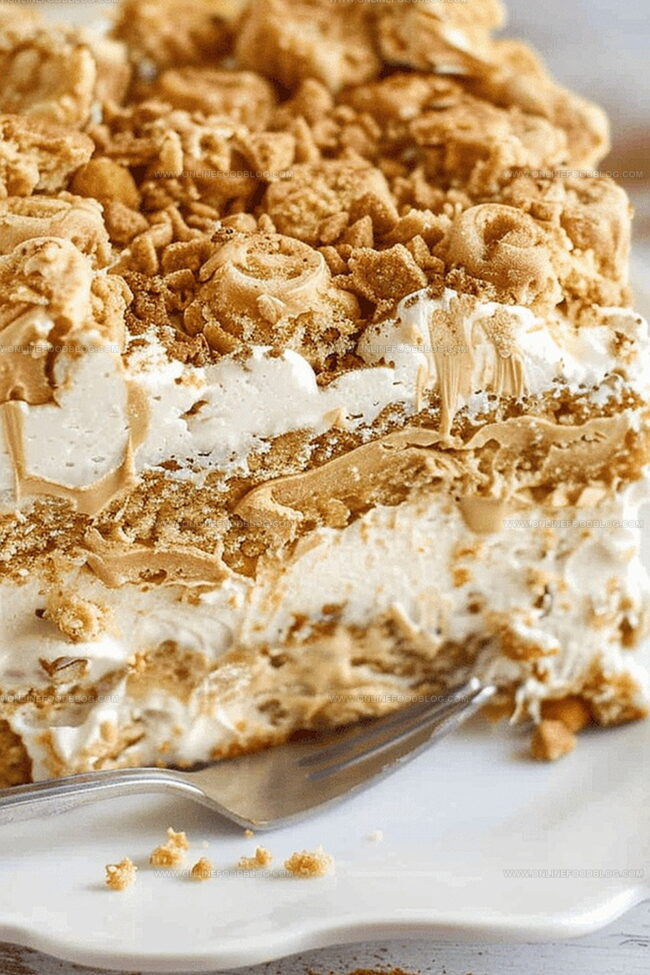
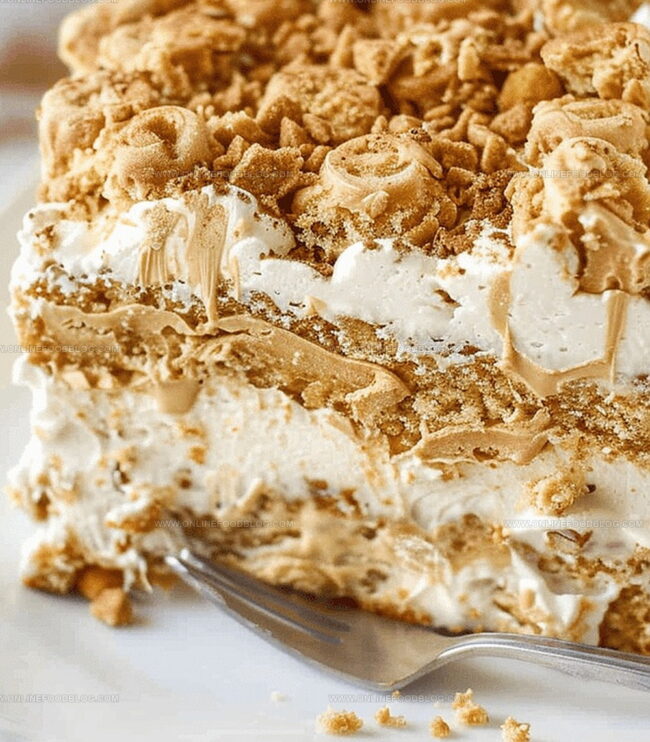
Sweet layers of rich, velvety goodness stack between crisp cookies, creating a no-bake marvel that chills to perfection.
Each bite promises a luxurious blend of smooth, nutty flavors that melt delightfully on your tongue.
Cool and indulgent, this dessert combines classic comfort with sophisticated simplicity that impresses without complex techniques.
Kitchen novices and seasoned bakers alike can craft this stunning treat with just a few pantry staples.
Minimal ingredients and zero oven time make this recipe a summer superhero for satisfying sweet cravings.
Prepare to revolutionize your dessert game with a treat that looks gourmet but feels effortlessly fun.
Ice Box Cake That’s a Cool Classic
Peanut Butter Lovers, Grab These Ingredients
Base Ingredients:Garnish Ingredients:Binding/Preparation Ingredients:Building a Chilled Cake Worth Savoring
Step 1: Prepare the Base
Line the bottom of a 9×13 inch casserole dish with Nutter Butter cookies, creating a solid foundation for the cake.
Step 2: Blend Cream Cheese and Peanut Butter
In a large mixing bowl, whip cream cheese and peanut butter until the mixture becomes silky smooth and fully incorporated.
Step 3: Incorporate Whipped Topping
Step 4: Create First Layer
Spread approximately 1/3 of the peanut butter cream mixture over the cookie base, ensuring an even distribution.
Step 5: Build Cake Layers
Repeat the layering process:Step 6: Final Cream Layer
Finish with a top layer of peanut butter cream mixture for a smooth, luxurious appearance.
Step 7: Add Crunchy Topping
Sprinkle crushed Nutter Butter cookies over the top for a delightful textural contrast.
Step 8: Chill and Set
Cover the casserole dish with plastic wrap and refrigerate for 4 hours or overnight to allow the cake to set and flavors to meld.
Step 9: Serve and Enjoy
Remove from refrigerator, slice, and savor this cool, creamy dessert.
Tips for Layers That Stay Smooth
How to Keep Ice Box Cake Fresh
What Complements This Peanutty Dessert
Swaps and Extras to Personalize Your Cake
Print
Peanut Butter Ice Box Cake Recipe
- Total Time: 4 hours 40 minutes
- Yield: 12 1x
Description
Peanut butter ice box cake delivers creamy bliss with layers of graham crackers and smooth peanut butter mousse. Cool dessert lovers will savor each chilled spoonful of this simple no-bake treat that promises delightful indulgence.
Ingredients
Main Ingredients:
- 2 family-size packages Nutter Butter cookies
- 1 cup peanut butter
- 1 package (16 ounces / 454 grams) frozen whipped topping, thawed
Dairy Ingredients:
- 8 ounces (226 grams) cream cheese, room temperature
Garnish:
- 2 tablespoons Nutter Butter cookies, crushed
Instructions
- Meticulously arrange Nutter Butter cookies in a single, uniform layer across the bottom of a 9×13 inches (22.86×33.02 centimeters) casserole dish, ensuring complete coverage.
- Using an electric mixer, thoroughly blend cream cheese and peanut butter until achieving a velvety, homogeneous consistency with no visible lumps.
- Incorporate half of the whipped topping into the peanut butter mixture, gently mixing to preserve its delicate, airy texture.
- Delicately fold the remaining whipped topping into the mixture using a silicone spatula, maintaining maximum volume and lightness.
- Carefully distribute approximately one-third of the peanut butter cream across the cookie base, spreading evenly with smooth, deliberate strokes to create a consistent layer.
- Methodically construct a second layer of Nutter Butter cookies atop the initial cream layer, covering the entire surface.
- Repeat the cream application process, ensuring complete and uniform coverage of the cookie layer.
- Add a final layer of Nutter Butter cookies, followed by the remaining peanut butter cream mixture, creating a smooth, enticing top surface.
- Generously sprinkle crushed Nutter Butter cookies over the entire top, providing a textural and visual garnish.
- Completely seal the casserole dish with plastic wrap, preventing moisture loss and potential flavor contamination.
- Refrigerate the dessert for a minimum of 4 hours or ideally overnight, allowing flavors to meld and texture to set perfectly.
Notes
- Chill this decadent dessert for at least 4 hours to ensure the layers meld together perfectly, creating a creamy and indulgent treat.
- Use room temperature cream cheese and peanut butter for a smoother, easier-to-mix consistency that prevents lumps in the filling.
- Fold whipped topping gently to maintain its light and airy texture, which gives the cake its signature fluffy and creamy structure.
- Crush Nutter Butter cookies just before adding as a topping to preserve their crunch and prevent them from getting soggy.
- Make ahead friendly: This no-bake dessert can be prepared a day in advance, making it ideal for entertaining or busy schedules.
- Store covered in the refrigerator for up to 3-4 days, allowing you to enjoy this delightful treat throughout the week.
- Prep Time: 20 minutes
- Cook Time: 4 hours 20 minutes
- Category: Desserts, Snacks
- Method: Blending
- Cuisine: American
Nutrition
- Serving Size: 12
- Calories: 380 kcal
- Sugar: 22 g
- Sodium: 280 mg
- Fat: 26 g
- Saturated Fat: 12 g
- Unsaturated Fat: 10 g
- Trans Fat: 0.5 g
- Carbohydrates: 32 g
- Fiber: 1 g
- Protein: 7 g
- Cholesterol: 35 mg
Lucas Bennett
Founder & Recipe Creator
Expertise
Simple Everyday Recipes, Sustainable Cooking Practices, Creative Meal Planning, Recipe Testing and Improvement
Education
Fox Valley Technical College, Appleton, Wisconsin
Lake Superior College, Duluth, Minnesota
Lucas Bennett’s cooking journey started in his parents’ kitchen, where he learned to prepare tasty, no-fuss meals from scratch. His culinary passion led him to Fox Valley Technical College, where he gained practical cooking skills.
He then expanded his focus on sustainability at Lake Superior College. Today, Lucas shares easy, approachable recipes designed to make cooking enjoyable and stress-free for everyone.