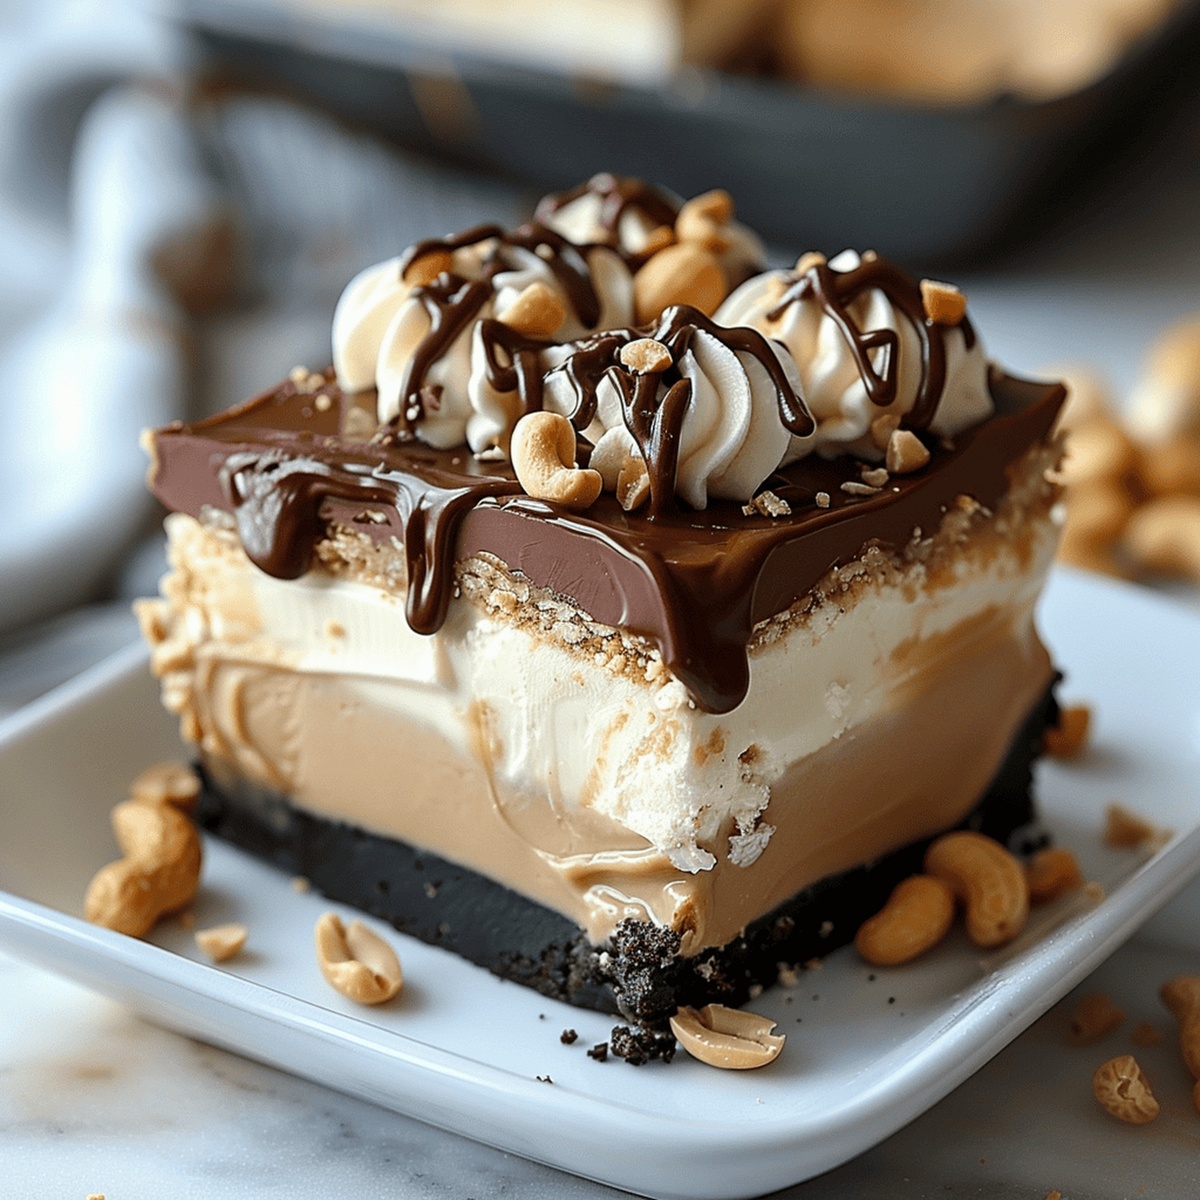
The Ultimate No-Bake Buckeye Cheesecake Bars Recipe: Dreamy & Heavenly
These decadent no-bake buckeye cheesecake bars represent the ultimate dessert fusion for chocolate and peanut butter enthusiasts.
Sweet, creamy layers combine with a rich, indulgent profile that satisfies the most intense cravings.
Chocolate lovers appreciate the smooth texture and balanced flavors melding perfectly within each delightful square.
The classic combination refines traditional expectations into a chilled, luxurious treat that feels both nostalgic and innovative.
Minimal kitchen effort yields maximum deliciousness, making these bars an impressive yet simple dessert option.
Skilled home bakers and novice cooks alike can master this crowd-pleasing recipe with confidence.
Prepare to elevate your dessert game and impress everyone at your next gathering.
What to Know About No-Bake Buckeye Cheesecake Bars
No-Bake Buckeye Cheesecake Bars Ingredient List
Crust:Base Filling:Topping and Garnish:No-Bake Buckeye Cheesecake Bars Instructions
Step 1: Prepare the Baking Dish
Line an 8×8 inch baking dish with parchment paper, allowing extra edges to hang over for easy removal.
Step 2: Create the Crunchy Crust
Mix chocolate graham cracker crumbs with melted butter:Press the mixture firmly into the bottom of the dish. Refrigerate the crust while preparing the filling.
Step 3: Whip Up the Creamy Filling
In a large mixing bowl, blend together:Beat until smooth and creamy. Gently fold in whipped topping.
Step 4: Spread the Filling
Evenly spread the filling over the chilled crust. Return to the refrigerator.
Step 5: Craft the Chocolate Topping
Melt together:Stir until smooth and well combined. Pour and spread over the chilled filling.
Step 6: Chill and Set
Refrigerate for at least 4 hours or until the bars are completely set.
Step 7: Serve with Flair
Garnish with:Lift the bars out of the dish using the parchment paper edges. Slice into squares and serve chilled.
Tricks for Perfect No-Bake Buckeye Cheesecake Bars
Save and Store No-Bake Buckeye Cheesecake Bars
Pairing Suggestions for No-Bake Buckeye Cheesecake Bars
Creative Twists on No-Bake Buckeye Cheesecake Bars
Print
No-Bake Buckeye Cheesecake Bars Recipe
- Total Time: 4 hours 20 minutes
- Yield: 16 1x
Description
Creamy No-Bake Buckeye Cheesecake Bars merge Ohio’s beloved peanut butter and chocolate treat with silky cheesecake perfection. Rich chocolate ganache and peanut butter swirls create an irresistible dessert you’ll crave again and again.
Ingredients
Main Ingredients:
- 16 ounces (454 grams) cream cheese, softened
- 1 cup (240 milliliters) creamy peanut butter
- 2 cups (256 grams) chocolate graham cracker crumbs
- 1 cup (240 milliliters) whipped topping
- 1 cup (170 grams) semi-sweet chocolate chips
Sweeteners and Flavor Enhancers:
- 1 cup (120 grams) powdered sugar
- 1 teaspoon vanilla extract
Binding and Garnish Ingredients:
- ½ cup (113 grams) unsalted butter, melted
- 2 tablespoons (30 milliliters) peanut butter
- Whole peanuts for garnish
Instructions
- Prepare an 8×8 inch (20×20 centimeters) baking dish by lining it with parchment paper, ensuring extra paper hangs over the edges for easy removal later.
- Combine chocolate graham cracker crumbs with melted butter, pressing the mixture firmly and evenly into the bottom of the prepared dish to create a compact crust.
- Chill the crust in the refrigerator while preparing the creamy filling.
- In a large mixing bowl, thoroughly beat cream cheese, creamy peanut butter, powdered sugar, and vanilla extract until the mixture becomes completely smooth and well-incorporated.
- Gently fold in the whipped topping, creating a light and airy texture for the filling.
- Spread the peanut butter cheesecake filling uniformly over the chilled crust, ensuring an even layer.
- Return the dish to the refrigerator to allow the filling to set and firm up.
- Create the chocolate topping by melting chocolate chips and additional peanut butter together in a microwave or double boiler until the mixture is completely smooth and glossy.
- Carefully pour and spread the chocolate-peanut butter mixture over the chilled filling, covering the entire surface.
- Refrigerate the dessert for a minimum of 4 hours, or preferably overnight, to ensure complete setting.
- Before serving, garnish with additional whipped topping and whole peanuts for extra texture and visual appeal.
- Use the overhanging parchment paper to lift the dessert from the dish, then slice into neat squares using a sharp knife.
Notes
- Chill the crust first to create a solid foundation that prevents soggy bottoms and ensures clean, crisp edges when cutting.
- Use room temperature cream cheese for a smoother, lump-free filling that blends perfectly with peanut butter and powdered sugar.
- Melt chocolate chips and peanut butter slowly and carefully to avoid burning, creating a glossy, silky topping that sets beautifully.
- Refrigerate for minimum 4 hours to allow layers to set completely, developing rich, intense flavors and perfect texture.
- Lift bars using parchment paper overhang for clean, professional-looking cuts without damaging the delicate layers.
- Store leftovers in an airtight container in the refrigerator for up to 5 days, making this a make-ahead dessert dream.
- Prep Time: 20 minutes
- Cook Time: 4 hours
- Category: Desserts, Snacks
- Method: None
- Cuisine: American
Nutrition
- Serving Size: 16
- Calories: 380 cal
- Sugar: 25 g
- Sodium: 220 mg
- Fat: 28 g
- Saturated Fat: 14 g
- Unsaturated Fat: 10 g
- Trans Fat: 0.5 g
- Carbohydrates: 30 g
- Fiber: 2 g
- Protein: 8 g
- Cholesterol: 45 mg
Lucas Bennett
Founder & Recipe Creator
Expertise
Simple Everyday Recipes, Sustainable Cooking Practices, Creative Meal Planning, Recipe Testing and Improvement
Education
Fox Valley Technical College, Appleton, Wisconsin
Lake Superior College, Duluth, Minnesota
Lucas Bennett’s cooking journey started in his parents’ kitchen, where he learned to prepare tasty, no-fuss meals from scratch. His culinary passion led him to Fox Valley Technical College, where he gained practical cooking skills.
He then expanded his focus on sustainability at Lake Superior College. Today, Lucas shares easy, approachable recipes designed to make cooking enjoyable and stress-free for everyone.