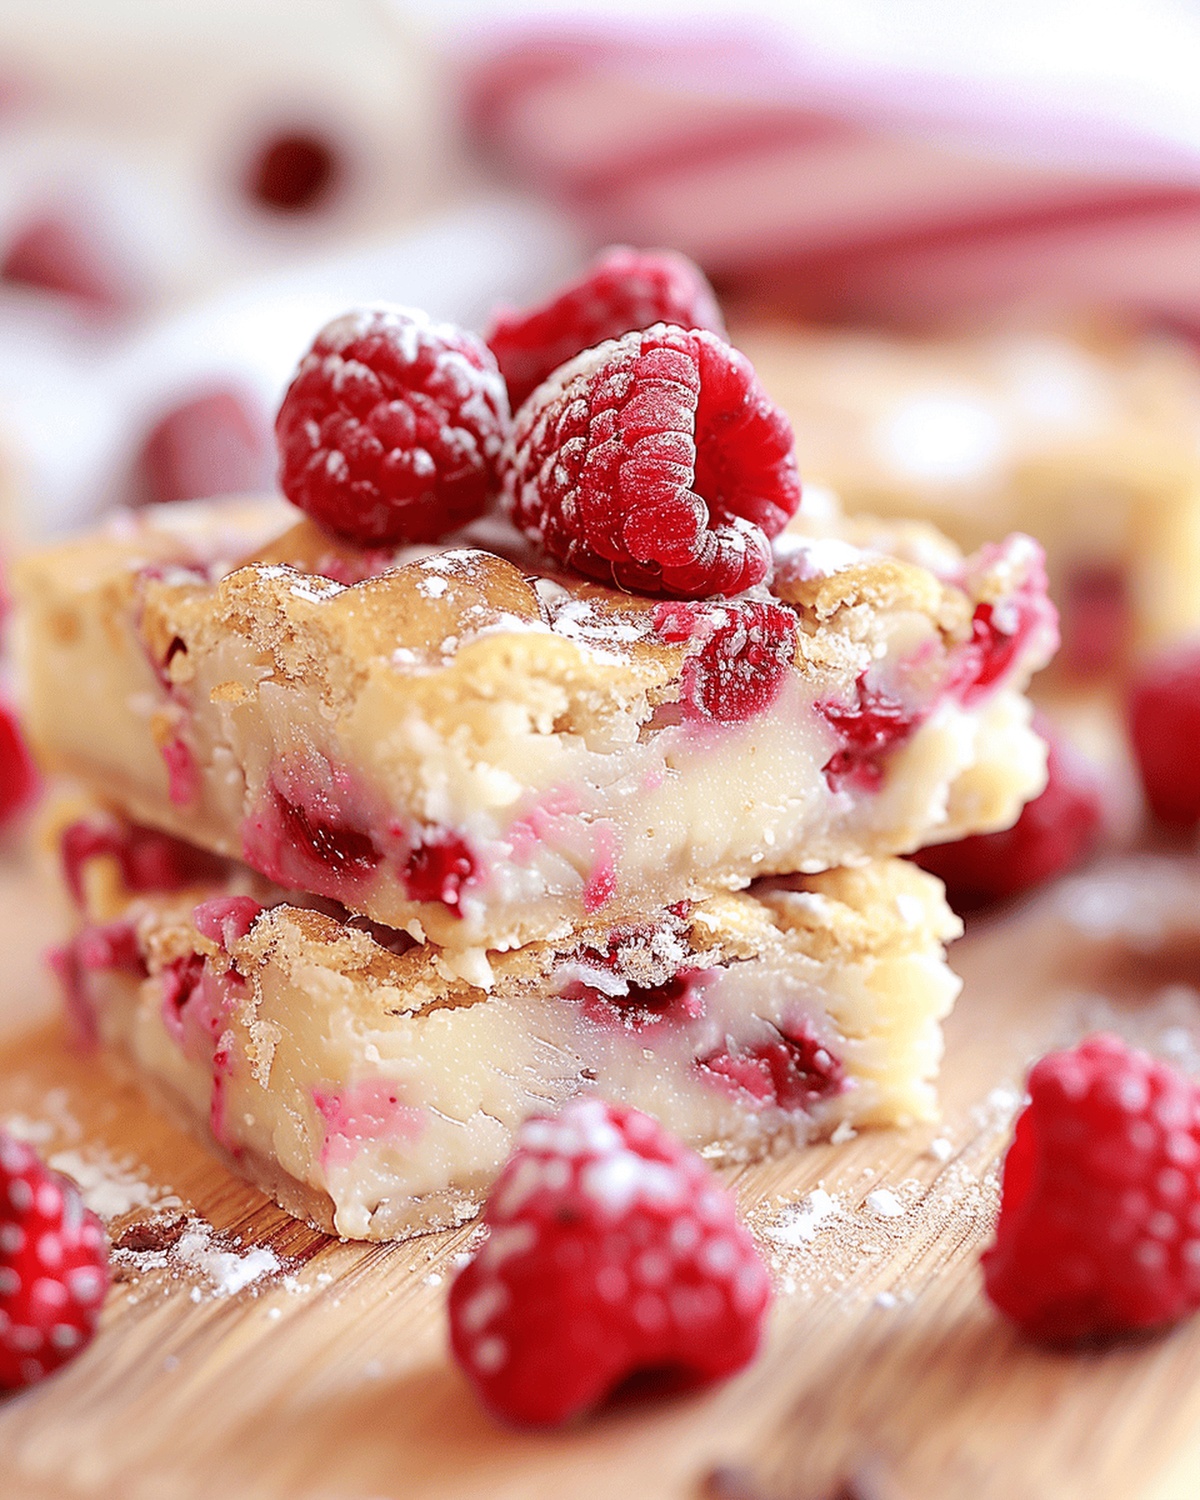
Decadent chocolate meets tangy berries in this white chocolate raspberry brownie recipe that promises pure indulgence.
Layers of rich, fudgy goodness dance with bright raspberry swirls across each delectable square.
The contrast between smooth white chocolate and tart raspberries creates a stunning dessert experience.
Deep cocoa notes provide a luxurious base for these irresistible brownies.
Silky white chocolate melts into pockets of vibrant raspberry throughout the dense, moist cake.
Every bite delivers a perfect balance of sweetness and tartness that will make your taste buds sing.
Bakers of all skill levels can master this simple yet impressive dessert that’s sure to steal the spotlight at any gathering.
Quick Recipe Overview
Prep Time: 10 minutes
Cook Time: 30 minutes
Total Time: 40 minutes
Calories: 304 kcal
Servings: 9
White Chocolate Raspberry Brownie Must-Haves
For Base Ingredients:
Butter: Adds rich, velvety texture and enhances the brownie’s moistness.
White Chocolate: Provides creamy sweetness and luxurious melting quality for depth of flavor.
Sugar: Balances sweetness and helps create a tender, soft brownie texture.
Eggs: Bind ingredients together and contribute to the brownie’s structure and richness.
For Dry Ingredients:
Flour: Creates the fundamental structure and provides a soft, tender crumb.
Vanilla Extract: Elevates and rounds out the overall flavor profile with its warm, aromatic notes.
For Fruity Accent:
Raspberries: Introduces bright, tangy freshness and beautiful color contrast to the rich chocolate base, adding a burst of natural sweetness.
Baking Tools to Get That Fudgy Texture
Large mixing bowl: Essential for combining ingredients smoothly.
Whisk: Perfect for blending sugar and eggs thoroughly.
Microwave-safe dish: Needed for melting butter quickly and evenly.
Heatproof bowl: Crucial for melting white chocolate using double boiler method.
20 x 20 cm baking pan: Ideal size for creating perfect brownie thickness.
Parchment paper: Ensures easy removal and prevents sticking.
Aluminum foil: Helpful for preventing over-browning during baking.
Measuring cups/spoons: Accurate for measuring ingredients precisely.
Cutting board: Useful for chopping white chocolate and raspberries.
Sharp knife: Needed for halving large raspberries if required.
How to Layer Raspberry Into Rich Brownies
Oven Preparation Warm up your oven to create the perfect baking environment for these decadent treats.
Butter Transformation Gently melt butter in a microwave-safe dish, creating a smooth liquid base for your brownies.
Chocolate Magic Carefully dissolve white chocolate using a double boiler, watching it transform into a silky mixture.
Flavor Fusion Combine sugar, eggs, and vanilla in a mixing bowl. Introduce the melted butter and chocolate, stirring until everything blends beautifully.
Texture Building Fold in flour and additional white chocolate pieces, creating a rich and creamy batter.
Fruity Surprise Gently incorporate fresh raspberries, distributing them evenly throughout the mixture.
Baking Adventure Pour the batter into a lined baking pan, letting it spread evenly. Slide into the preheated oven and bake until perfectly set.
Cooling and Finishing Allow the brownies to rest and cool completely. Dust with a light sprinkle of powdered sugar and add a few fresh raspberries for a stunning presentation.
Flavor Variations & Swirl Techniques
Create beautiful raspberry swirls by gently dragging a toothpick through raspberry dollops before baking, transforming the brownies into a visual masterpiece.
Experiment with different white chocolate brands or cocoa percentages to discover your perfect balance of sweetness and richness, tailoring the dessert to your taste preferences.
Wrap individual brownie squares in plastic wrap and store in the freezer for up to 3 months, ensuring a delightful dessert is always within reach for unexpected sweet cravings.
Sprinkle chopped toasted almonds or pistachios on top before baking to add a delightful crunch and nutty undertone that complements the white chocolate and raspberry combination.
Serve warm with a scoop of vanilla bean ice cream or a dollop of fresh whipped cream to transform these brownies into an elegant dessert that impresses family and guests alike.
Serving This Sweet Treat with a Scoop or Drizzle
Dessert Elegance Plating: Dust the brownies with a delicate snowfall of powdered sugar, creating a stunning white canvas against the rich, fudgy surface. Arrange fresh raspberries artfully around the edges for a pop of vibrant color.
Berry Bliss Pairing: Serve alongside a scoop of vanilla bean ice cream or a dollop of whipped cream to complement the intense white chocolate and raspberry flavors. The cool, creamy element balances the rich, decadent brownie perfectly.
Afternoon Tea Delight: Cut brownies into elegant bite-sized squares and present on a vintage cake stand with a pot of Earl Grey tea. This presentation transforms the dessert into a sophisticated treat perfect for a leisurely afternoon gathering.
Gifting Presentation: Wrap individual brownies in parchment paper tied with a delicate ribbon, creating a charming homemade gift. Package in a pretty box with a few fresh raspberries for an extra touch of gourmet elegance.
How to Cut, Store, and Keep Brownies Moist
Fridge Fresh Strategy: Store brownies in an airtight container within the refrigerator for up to 5 days. Wrap each piece individually with plastic wrap to maintain moisture and prevent flavor absorption from other foods.
Make-Ahead Magic: Prepare the brownie batter a day before baking and refrigerate overnight. This technique allows flavors to develop deeper complexity and saves precious morning preparation time.
Freezer-Friendly Option: Slice brownies into individual portions, wrap tightly in plastic wrap, then aluminum foil. These sweet treats can be frozen for 2-3 months. Thaw at room temperature for 1-2 hours before serving for optimal texture.
Serving Temperature Tips: Enjoy brownies slightly chilled from the refrigerator or let them sit at room temperature for 15-20 minutes. Warming gently in the microwave for 10-15 seconds can recreate that fresh-from-the-oven softness and release the rich white chocolate and raspberry aromas.
Indulgent white chocolate raspberry brownie blends rich chocolate with tangy fruit in a delightful dessert. Creamy white chocolate and fresh raspberries create a luxurious treat you’ll crave again and again.
Ingredients
Scale
3 eggs
180g (6.3 oz) white chocolate, divided
115g (4 oz) butter
110g (3.9 oz) fresh or frozen raspberries
90g (0.45 cups/0.44 cups) granulated sugar
90g (0.44 cups) flour
2 tsp liquid vanilla extract
Instructions
Oven Preparation: Calibrate the oven to 165°C, creating an optimal thermal environment for brownie baking.
Ingredient Fusion: Melt butter in the microwave and white chocolate using a double boiler, transforming them into liquid form.
Mixture Development: Whisk sugar and eggs vigorously until voluminous, then integrate vanilla extract, melted butter, and white chocolate into a smooth, cohesive mixture.
Batter Formation: Gently fold flour and white chocolate fragments into the liquid base, maintaining a consistent texture without overworking the mixture.
Raspberry Integration: Tenderly incorporate fresh raspberries throughout the batter, ensuring even distribution without damaging the delicate fruit.
Pan Preparation: Line a 20 x 20 cm baking pan with parchment paper, then pour the batter evenly, creating a level surface for uniform baking.
Baking Process: Place the pan in the preheated oven, monitoring browning and covering with aluminum foil if the top darkens too quickly. Bake for approximately 30 minutes until achieving a perfect balance of crisp exterior and moist interior.
Cooling and Presentation: Allow the brownie to rest for 20 minutes, stabilizing its structure before carefully removing from the pan. Dust with powdered sugar and garnish with fresh raspberries for an elegant finishing touch.
Notes
Prevent Fruit Sinking: Lightly coat raspberries in flour before folding into batter to ensure even distribution and prevent them from sinking during baking.
Control Moisture Balance: Watch brownie closely during baking; cover with foil if top browns too quickly to maintain a perfectly moist texture without burning.
Enhance Flavor Depth: Allow brownies to cool completely before cutting to let flavors meld and texture set, resulting in a more intense and harmonious taste profile.
Precision in Mixing: Avoid overmixing batter to maintain a tender crumb; fold ingredients gently to preserve the delicate structure of the brownie.
Degree: Certificate in Food and Beverage Management
Focus: Essential knowledge of recipe development, ingredient sourcing, and food business basics.
Mia Reynolds fell in love with baking as a teenager experimenting in her family kitchen. Her passion took her to New England Culinary Institute, where she learned practical pastry techniques, and later to Community College of Vermont to deepen her understanding of food management.
Mia combines clear, simple baking instructions with heartwarming stories, making home baking approachable for everyone.
Mia Reynolds
Food Writer & Home Cooking Specialist
Expertise
Easy Home Baking, Recipe Writing and Storytelling, Local and Seasonal Ingredients, Baking for Beginners
Education
New England Culinary Institute (NECI), Montpelier, Vermont
Community College of Vermont, Winooski, Vermont
Mia Reynolds fell in love with baking as a teenager experimenting in her family kitchen. Her passion took her to New England Culinary Institute, where she learned practical pastry techniques, and later to Community College of Vermont to deepen her understanding of food management.
Mia combines clear, simple baking instructions with heartwarming stories, making home baking approachable for everyone.