Dreamy Homemade Whipped Strawberry Tart Recipe for Sweet Lovers
Summer’s sweetest dessert meets pure indulgence in this delectable whipped strawberry tart that promises to steal every heart at the table.
Bursting with vibrant flavors, the recipe combines delicate textures and fresh ingredients into one irresistible treat.
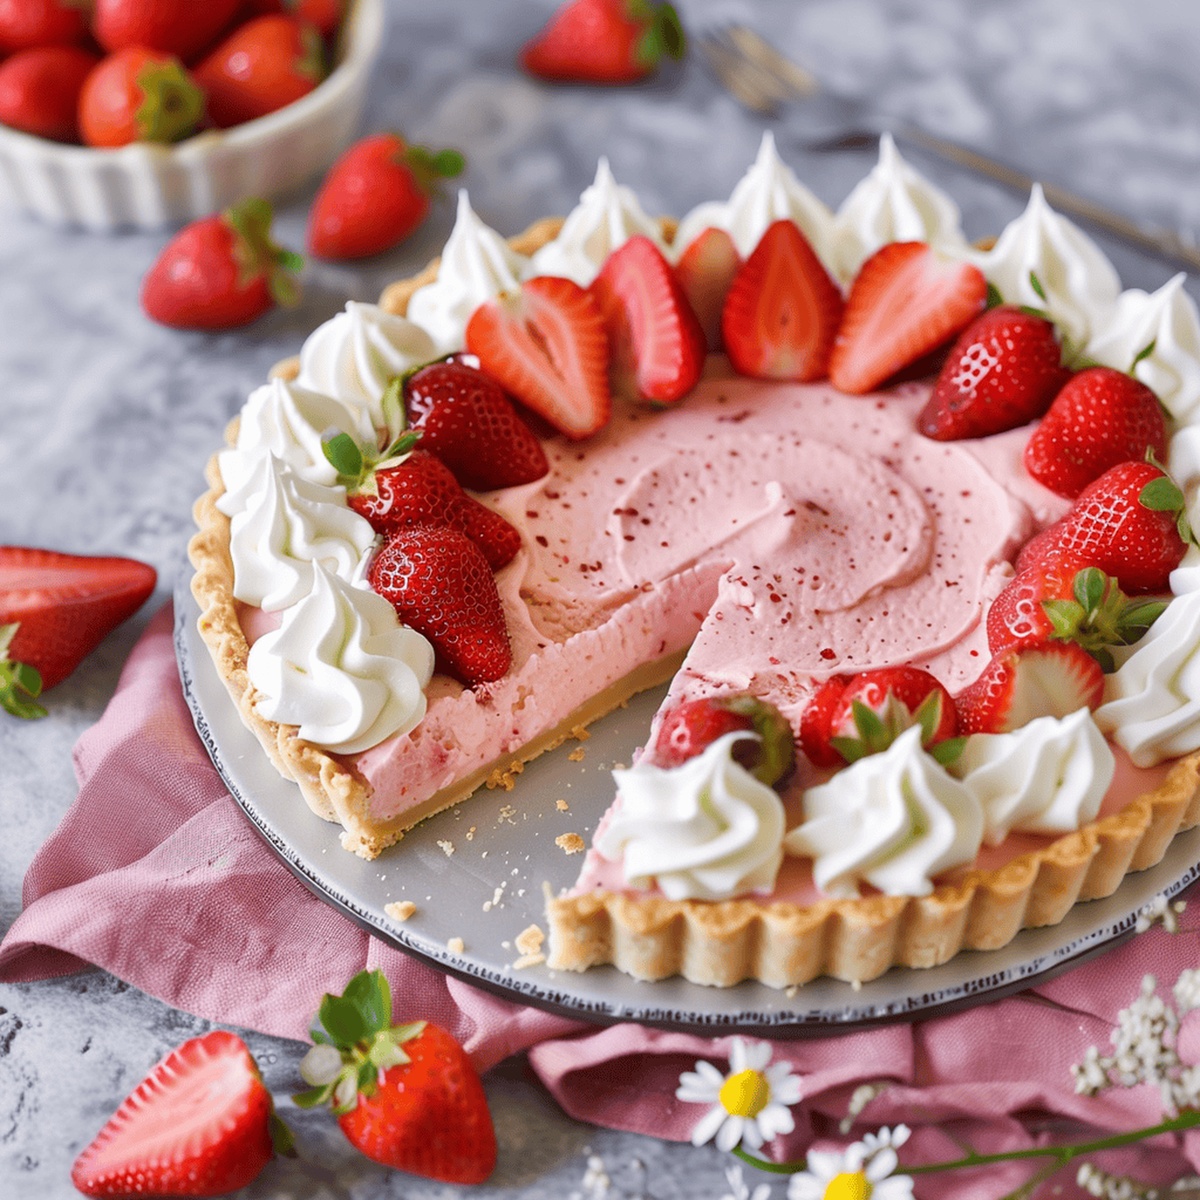
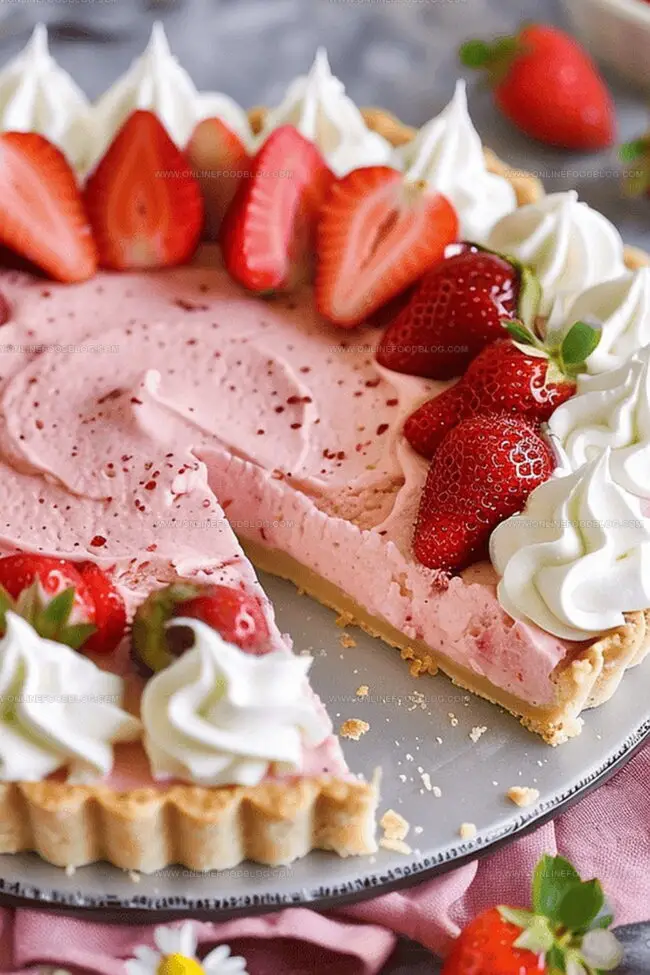
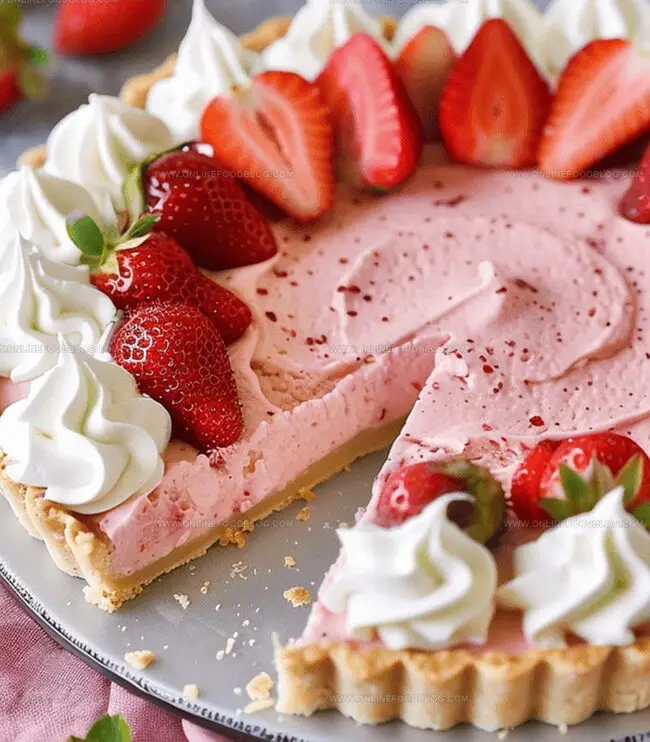
Silky smooth cream and ripe strawberries dance together in a buttery, crisp crust that melts in your mouth.
Each slice offers a symphony of sweet, tangy notes that capture the essence of sunny days.
The elegant dessert looks like it belongs in a professional bakery but comes together with surprisingly simple steps.
Bakers of all skill levels can master this show-stopping tart that turns ordinary moments into delightful celebrations.
Grab your apron and get ready to create a dessert that will have everyone asking for seconds.
Quick Recipe Overview
Whipped Strawberry Tart – Ingredients Checklist
For The Crust:For The Strawberry Filling:For The Cream Topping:Garnish:Tools You’ll Need for a Whipped Strawberry Tart
How to Assemble a Fluffy Strawberry Tart
Create a silky strawberry base by blending ripe berries into a smooth puree. Gently heat the mixture with sweeteners and natural thickening agents, transforming it into a luxurious sauce.
Whip soft cream cheese until it becomes incredibly light and airy. Slowly incorporate rich cream, creating a dreamy, cloudlike texture that will become the tart’s signature element.
Carefully spread the vibrant strawberry sauce across a delicate crust, allowing the first layer to set perfectly in the cool refrigerator. Then crown the tart with the billowy cream cheese mixture.
Allow the tart to rest peacefully in the refrigerator, giving the flavors time to mingle and the texture to become wonderfully firm. Patience creates magic in this dessert.
Decorate the tart with a playful arrangement of fresh berries, delicate meringue cookies, or a soft swirl of whipped cream. Each garnish adds a personal artistic flair to your culinary creation.
Tips for Perfect Texture in Whipped Strawberry Tarts
How to Serve a Strawberry Tart That Pops
Storing a Whipped Strawberry Tart Without Collapse
Print
Luscious Strawberry Tart Recipe
- Total Time: 45 minutes
- Yield: 9 1x
Description
Homemade whipped strawberry tart combines silky pastry cream with fresh strawberries nestled in a buttery crust. Sweet summer flavors deliver delightful moments for dessert enthusiasts craving elegant French-inspired pastries.
Ingredients
- 1 ¾ cups all-purpose flour
- 1 cup sugar (for tart crust and filling)
- ½ cup unsalted butter, room temperature
- 4 oz cream cheese, room temperature
- 400 g (14.1 oz) fresh strawberries, quartered
- 1 ½ cups heavy cream
- 1 large egg, room temperature
- 2 tsps unflavored gelatin
- 1 tbsp cornstarch
- ½ cup water or rosé
- ½ tsp salt
- 1 tsp vanilla extract
- 1 tbsp water
Instructions
- Puree Preparation: Blend ripe strawberries with water in a high-powered blender until smooth and vibrant, ensuring a consistent texture without lumps.
- Sauce Development: In a saucepan, combine strawberry puree with granulated sugar and gelatin. Simmer over medium heat, stirring continuously until ingredients fully dissolve and integrate, creating a glossy base.
- Thickening Process: Whisk cornstarch with cool water to create a smooth slurry. Gradually add this mixture to the strawberry sauce, stirring constantly to prevent clumping and allow gentle thickening.
- Cooling Stage: Remove strawberry sauce from heat and transfer to a clean container. Refrigerate for 30-45 minutes until the mixture reaches a cool, slightly set consistency.
- Cream Mixture: Using a stand mixer, whip cream cheese until light and airy. Gradually introduce heavy cream, beating until stiff, defined peaks form, creating a luxurious base.
- Filling Integration: Gently fold the chilled strawberry sauce into the cream cheese mixture, creating a marbled, blush-colored filling with a silky smooth texture.
- Layer Construction: Spread half the strawberry cream evenly across the prepared tart crust. Chill in the refrigerator for 20-25 minutes to partially set, ensuring a stable foundation.
- Final Setting: Top with remaining strawberry cream, smoothing the surface. Refrigerate for 2-3 hours or overnight to achieve complete firmness and optimal flavor melding.
- Garnish and Serve: Before presenting, artfully decorate the tart with fresh whole strawberries, delicate pineberries, crisp meringue cookies, or elegant whipped cream dollops.
Notes
- Puree Perfection: Use ripe, sweet strawberries for the most vibrant flavor and smooth consistency in your puree.
- Gelatin Technique: Dissolve gelatin completely to prevent lumps and ensure a silky texture in the strawberry sauce.
- Cream Whipping Tip: Beat cream cheese and heavy cream until stiff peaks form for a light, airy filling that holds its shape.
- Chilling Strategy: Allow sufficient refrigeration time to set the tart completely, ideally overnight for the best texture and flavor melding.
- Prep Time: 25 minutes
- Cook Time: 20 minutes
- Category: Desserts, Snacks
- Method: Blending
- Cuisine: French
Nutrition
- Serving Size: 9
- Calories: 458
- Sugar: 36 g
- Sodium: 148 mg
- Fat: 34 g
- Saturated Fat: 21 g
- Unsaturated Fat: 11 g
- Trans Fat: 1 g
- Carbohydrates: 39 g
- Fiber: 1 g
- Protein: 4 g
- Cholesterol: 93 mg
Mia Reynolds
Food Writer & Home Cooking Specialist
Expertise
Easy Home Baking, Recipe Writing and Storytelling, Local and Seasonal Ingredients, Baking for Beginners
Education
New England Culinary Institute (NECI), Montpelier, Vermont
Community College of Vermont, Winooski, Vermont
Mia Reynolds fell in love with baking as a teenager experimenting in her family kitchen. Her passion took her to New England Culinary Institute, where she learned practical pastry techniques, and later to Community College of Vermont to deepen her understanding of food management.
Mia combines clear, simple baking instructions with heartwarming stories, making home baking approachable for everyone.