Luscious Raspberry Peach Cake Recipe

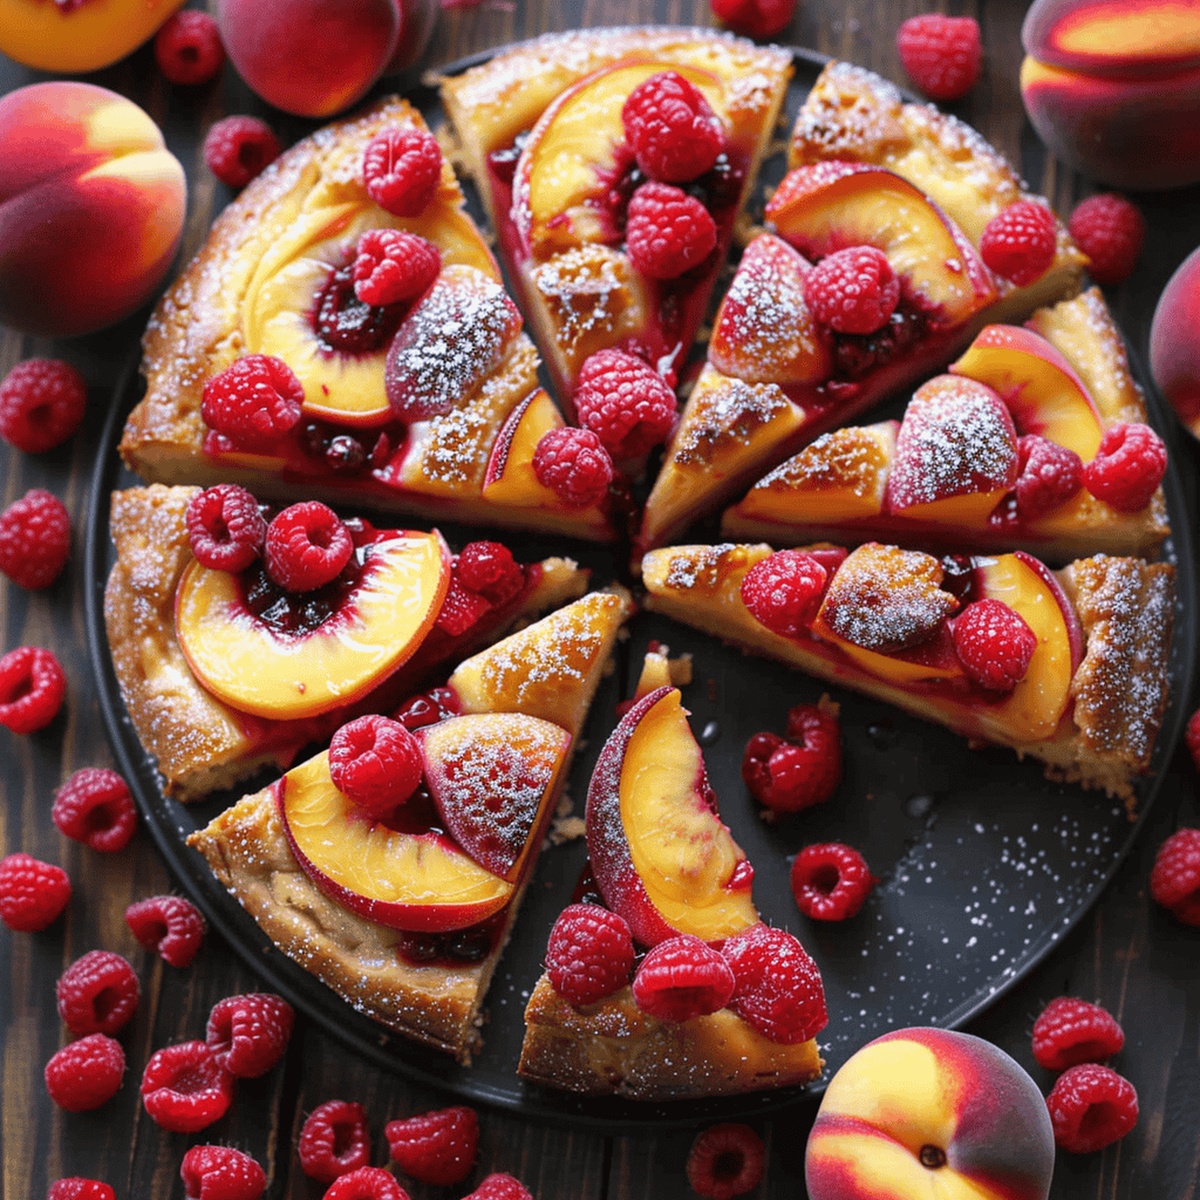
Sweet Symphony: Raspberry Peach Cake Recipe for Summer Joy

Summers burst with sweet memories, and this raspberry peach cake recipe weaves pure magic into every slice.

Ripe, juicy peaches dance alongside vibrant raspberries, creating a dessert that sings of sunshine.

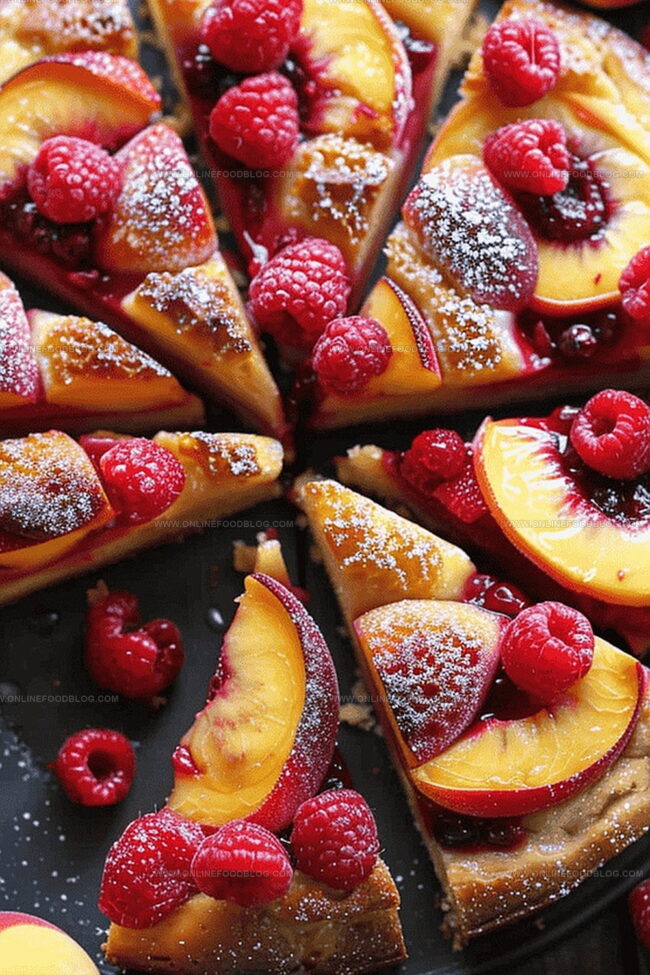
Layers of tender cake embrace fresh fruit with delicate warmth and rich flavor.

Each forkful promises a perfect balance between tangy berries and soft, buttery crumb.

The golden-hued cake captures the essence of leisurely afternoons and spontaneous gatherings.

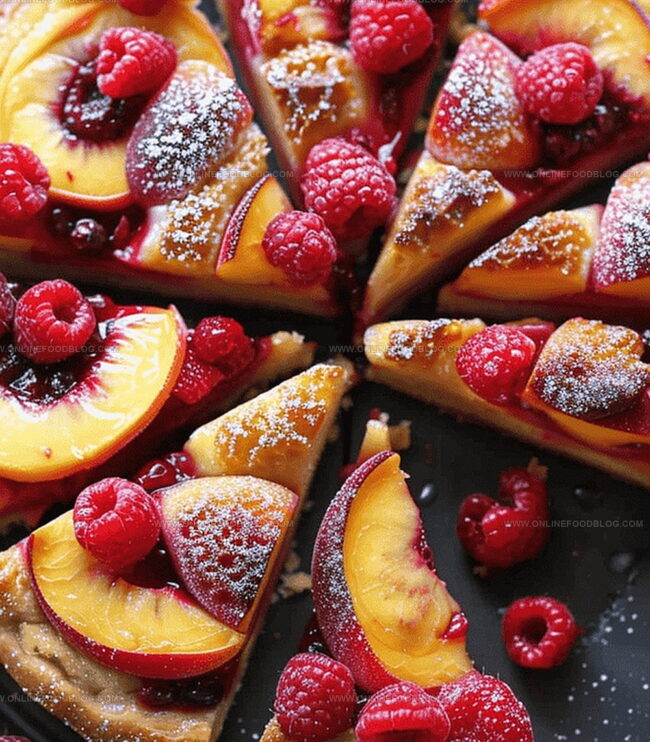
Seasonal ingredients blend seamlessly, promising a dessert that delights from the first bite to the last crumb.

Get ready to bake a slice of pure summer bliss that will have everyone asking for seconds.

Quick Recipe Overview

Prep Time: 15 minutes

Cook Time: 50 minutes

Total Time: 1 hour 5 minutes

Calories: 240 kcal

Servings: 9

Ingredients for Raspberry Peach Cake Perfection

For The Base:
  • All-Purpose Flour: The foundation of our cake, providing structure and softness with its delicate protein content.
  • Baking Powder: The magical rising agent that gives our cake its light and airy texture.
For The Sweet and Moist Elements:
  • Granulated Sugar: Brings sweetness and helps create a tender crumb with beautiful golden color.
  • Unsalted Butter: Delivers rich flavor and contributes to the cake's luxurious moisture.
  • Eggs: Bind ingredients together and add richness while creating a smooth, velvety consistency.
  • Greek Yogurt: Introduces tangy brightness and ensures an incredibly moist, tender cake texture.
  • Vanilla Extract: Enhances overall flavor with its warm, aromatic essence.
For The Fruity Topping and Decoration:
  • Fresh Raspberries: Burst with vibrant tartness and create beautiful ruby-red pockets throughout the cake.
  • Fresh Peaches: Add natural sweetness and juicy summer charm to the dessert.
  • Powdered Sugar: Provides a light dusting and helps prevent delicate raspberries from sinking in the batter.

Tools to Bake Raspberry Peach Cake Without Fuss

  • Springform Pan: 9×3-inch pan with removable sides for easy cake release.
  • Parchment Paper: Essential for lining pan bottom and sides, preventing sticking.
  • Whisk: Perfect for beating eggs, sugar, and butter until light and fluffy.
  • Medium Bowl: Used for mixing dry ingredients like flour and baking powder.
  • Large Bowl: Needed for combining wet ingredients and creating cake batter.
  • Measuring Cups and Spoons: Crucial for accurately measuring ingredients.
  • Cooling Plate: Helps cake cool down after baking.
  • Cake Tester or Toothpick: Checks cake doneness by inserting into center.

Steps to Create a Raspberry Peach Cake from Scratch

  • Warm Kitchen Prep Gather your baking tools and create a cheerful workspace with sunlight streaming in.
  • Batter Foundation Mix the dry and wet ingredients gently, creating a smooth canvas for your fruity masterpiece.
  • Fruit Dance Softly tumble fresh raspberries with a light dusting of sweet powder, then nestle them into the creamy batter.
  • Peach Placement Artfully arrange golden peach slices and remaining berries across the top, creating a beautiful landscape.
  • Oven Magic Slide the pan into a warm oven and let the cake transform, filling your kitchen with a delightful aroma.
  • Cooling Moment Allow the cake to rest and settle, letting flavors mingle and texture become perfectly tender.
  • Serving Celebration Carefully lift the cake using parchment paper edges, revealing a stunning dessert ready to be shared with loved ones.

Tips for Juicier Raspberry Peach Cake Results

  • Choose ripe, juicy peaches and raspberries at peak ripeness for the most vibrant flavor and natural sweetness in your cake.
  • Lightly dust raspberries and peach slices with a thin layer of flour before adding to the batter to help them stay suspended during baking.
  • Swap Greek yogurt with sour cream or buttermilk for a slightly different moisture level and subtle tanginess in the final cake.
  • Sprinkle ground cinnamon or almond extract into the batter for a warm, complementary note that pairs beautifully with stone fruits and berries.
  • Replace all-purpose flour with a one-to-one gluten-free flour blend to accommodate dietary restrictions without compromising the cake's delicate texture.

Ways to Serve Raspberry Peach Cake at Any Occasion

  • Serve Warm and Cozy: Slice the cake while it's slightly warm and enjoy with a dollop of whipped cream or vanilla ice cream for a comforting dessert experience.
  • Brunch Centerpiece: Place the cake on a beautiful serving platter as a stunning centerpiece for weekend brunches or afternoon tea gatherings.
  • Garnish with Fresh Flair: Sprinkle some extra fresh raspberries and thinly sliced peaches around the cake, or dust with a light layer of powdered sugar to enhance its visual appeal.
  • Pair with Beverages: Complement the cake's fruity flavors with a cup of hot chamomile tea, cold iced coffee, or a refreshing peach bellini for a delightful taste combination.

Keeping Raspberry Peach Cake Fresh

  • Refrigerate Wisely: Store the cake in an airtight container in the refrigerator for up to 4 days, keeping its delightful fruity flavor and soft texture intact.
  • Freeze for Later: Wrap the cake tightly in plastic wrap and aluminum foil, then freeze for 2-3 months, perfect for enjoying a sweet treat anytime a craving hits.
  • Room Temperature Tip: Allow refrigerated cake to sit at room temperature for 15-20 minutes before serving to restore its original soft and moist consistency.
  • Quick Freshness Check: Before serving, inspect the cake for any signs of moisture or unusual odors, ensuring peak taste and quality for your enjoyment.
Print
clock clock iconcutlery cutlery iconflag flag iconfolder folder iconinstagram instagram iconpinterest pinterest iconfacebook facebook iconprint print iconsquares squares iconheart heart iconheart solid heart solid icon
Luscious Raspberry Peach Cake Recipe

Luscious Raspberry Peach Cake Recipe


5 Stars 4 Stars 3 Stars 2 Stars 1 Star

4.8 from 38 reviews

  • Total Time: 1 hour 5 minutes
  • Yield: 9 1x

Description

Homemade raspberry peach cake delivers summer’s sweetest memories with delicate layers of moist sponge and fresh fruit. Delightful combinations of ripe peaches and tart raspberries make you savor each delectable slice.


Ingredients

Scale
  • 2 cups (480 ml) all-purpose flour, sifted
  • 1.25 cups (250 g) granulated sugar
  • 2 tsp baking powder
  • 2 eggs
  • 1 cup (240 ml) low-fat plain Greek yogurt
  • 2 oz (½ cup or 56 g) salted butter, melted
  • 1 tsp pure vanilla extract
  • 12 oz (340 g) raspberries, fresh or frozen
  • 2 medium yellow peaches, sliced
  • 1 tbsp powdered sugar (for dusting raspberries)

Instructions

  1. Preparation: Preheat oven to 350°F (177°C) and line a 9×3-inch springform pan with parchment paper, ensuring complete coverage of bottom and sides.
  2. Dry Ingredients: Sift flour and baking powder together in a medium bowl, creating a smooth, lump-free mixture.
  3. Wet Mixture: Whisk granulated sugar, melted butter, and eggs in a large bowl until the mixture becomes light, fluffy, and pale, approximately 1-2 minutes.
  4. Flavor Integration: Mix Greek yogurt and vanilla extract into the wet ingredients, stirring until completely incorporated and uniform.
  5. Batter Formation: Gently fold flour mixture into wet ingredients using delicate whisking motions to maintain the batter’s airy consistency, avoiding overmixing.
  6. Berry Incorporation: Dust half the raspberries with powdered sugar and carefully fold into the batter, distributing evenly.
  7. Pan Filling: Pour batter into prepared springform pan, spreading smoothly and creating an even surface.
  8. Fruit Topping: Decoratively arrange sliced peaches and remaining whole raspberries across the batter’s surface.
  9. Baking Process: Position cake on middle oven rack and bake for 45-60 minutes, checking doneness by inserting a toothpick into the center – it should emerge clean and dry.
  10. Cooling and Serving: Let cake rest in pan for 20 minutes, then carefully lift using parchment paper edges and transfer to a serving plate for elegant presentation.

Notes

  • Prevent Overmixing: Gently fold flour into wet ingredients to maintain a light, tender cake texture and avoid dense, tough results.
  • Sugar Coating Technique: Dust raspberries with powdered sugar before adding to batter to prevent sinking and distribute fruit evenly throughout the cake.
  • Oven Variation Alert: Standard ovens may require up to 1 hour baking time; always use the toothpick test to confirm doneness.
  • Cooling Method: Let cake rest in pan for 20 minutes to stabilize structure before transferring, ensuring clean removal and preventing crumbling.
  • Prep Time: 15 minutes
  • Cook Time: 50 minutes
  • Category: Desserts
  • Method: Baking
  • Cuisine: American

Nutrition

  • Serving Size: 9
  • Calories: 240
  • Sugar: 21 g
  • Sodium: 180 mg
  • Fat: 9 g
  • Saturated Fat: 5 g
  • Unsaturated Fat: 4 g
  • Trans Fat: 0 g
  • Carbohydrates: 36 g
  • Fiber: 1 g
  • Protein: 4 g
  • Cholesterol: 50 mg
Mia Reynolds

Mia Reynolds

Food Writer & Home Cooking Specialist

Expertise

Easy Home Baking, Recipe Writing and Storytelling, Local and Seasonal Ingredients, Baking for Beginners

Education

New England Culinary Institute (NECI), Montpelier, Vermont

  • Certificate: Baking and Pastry Arts Certificate
  • Focus: Hands-on baking skills, pastry basics, and creating delicious, approachable baked goods.

Community College of Vermont, Winooski, Vermont

  • Degree: Certificate in Food and Beverage Management
  • Focus: Essential knowledge of recipe development, ingredient sourcing, and food business basics.

Mia Reynolds fell in love with baking as a teenager experimenting in her family kitchen. Her passion took her to New England Culinary Institute, where she learned practical pastry techniques, and later to Community College of Vermont to deepen her understanding of food management.

Mia combines clear, simple baking instructions with heartwarming stories, making home baking approachable for everyone.

Leave a Reply

Your email address will not be published. Required fields are marked *

Recipe rating 5 Stars 4 Stars 3 Stars 2 Stars 1 Star