
The Best Layered Cherry Angel Delight Recipe for Sweet Tooths
Sweet, cloud-like angel delight with cherry layers promises a dessert experience that transcends ordinary treats.
Creamy textures and delicate flavors dance together in this elegant culinary creation.
Soft, airy ingredients combine to craft a heavenly confection that melts effortlessly on your tongue.
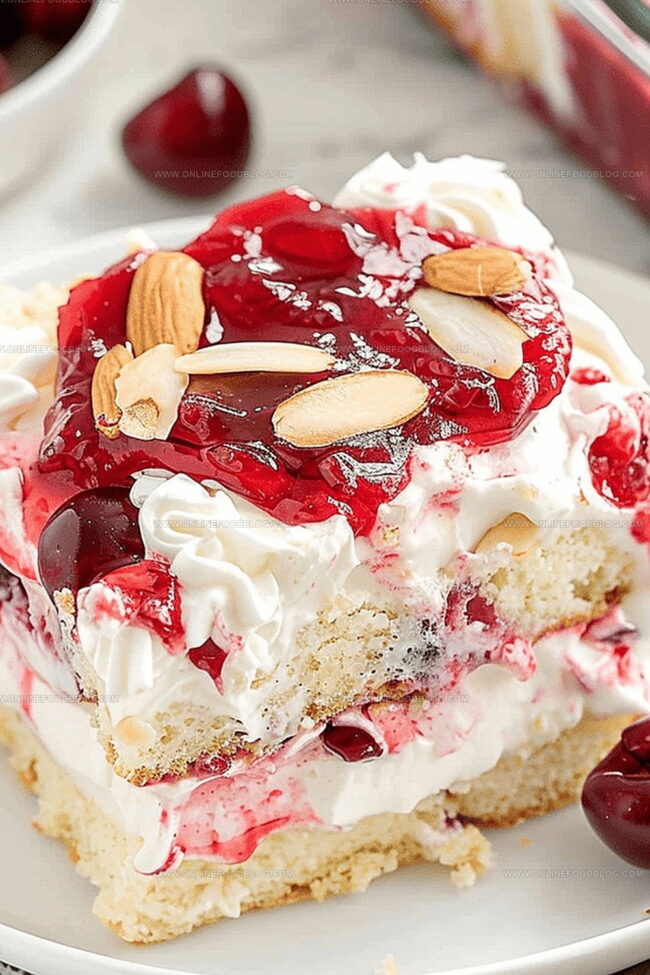
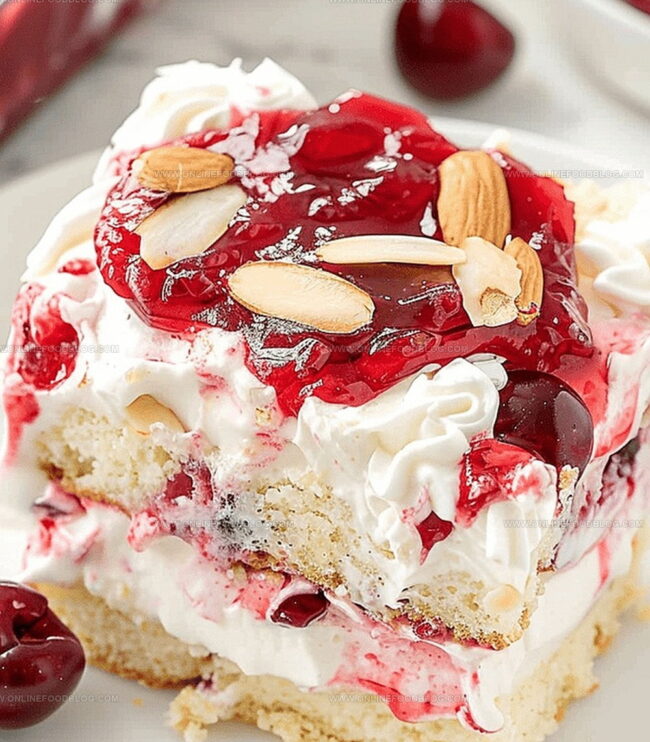
Delicate white peaks contrast beautifully with rich crimson fruit accents, creating visual and gustatory harmony.
Light and luxurious, this dessert represents a perfect balance between simplicity and sophistication.
Generations of home cooks have treasured such nostalgic recipes that bring comfort and joy to family gatherings.
Every spoonful carries whispers of tradition and subtle culinary craftsmanship.
Your taste buds will embark on a delightful journey through layers of pure deliciousness.
Why Layered Cherry Angel Delight Lives Up to Its Name
What’s in Layered Cherry Angel Delight
Cake Base:Fruit and Filling:Creamy Layers:How to Assemble Layered Cherry Angel Delight
Step 1: Prepare Angel Food Cake
Cut the cooled angel food cake into 1-inch cubes.
Step 2: Create First Cake Layer
Place half of the cake pieces evenly in the bottom of a 9×9 cake pan.
Step 3: Add Cherry Filling Base
Spread 2/3 of the cherry pie filling over the cake layer.
Step 4: Build Second Cake Layer
Add the remaining cake cubes on top of the cherry pie filling.
Step 5: Whip Up Creamy Pudding Mix
In a medium bowl, combine:Mix ingredients until smooth for about 2 minutes.
Step 6: Spread Pudding Layer
Pour the creamy pudding mixture evenly over the cake layers.
Step 7: Top with Whipped Cream
Spread Cool Whip over the pudding layer.
Step 8: Finish with Cherry Topping
Add the remaining cherry pie filling on top of the whipped cream.
Step 9: Chill and Set
Refrigerate the dessert for 4 to 5 hours before serving.
Step 10: Optional Garnish
Sprinkle sliced almonds on top just before serving for extra crunch.
Tips for a Perfect Cherry Angel Delight
How to Store and Reheat Layered Cherry Angel Delight
Great Companions for Layered Cherry Angel Delight
Cherry Angel Delight Variations to Try
Print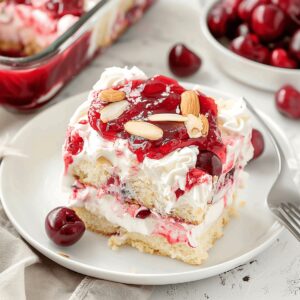
Layered Cherry Angel Delight Recipe
- Total Time: 20 minutes
- Yield: 8 1x
Description
Layered Cherry Angel Delight brings luscious cherry magic to a classic dessert, blending creamy textures with sweet fruit layers. Delicate angel food cake nestles between velvety cherry filling, creating an irresistible treat you’ll crave at first bite.
Ingredients
Main Ingredients:
- 1 angel food cake
- 1 can (540 milliliters / 18 ounces) cherry pie filling
- 1 package (102 grams / 3.6 ounces) instant vanilla pudding mix
Dairy and Creamy Components:
- 1½ cups 2% milk
- 1 cup sour cream
- 8 ounces Cool Whip
Garnish:
- Sliced almonds (optional)
Instructions
- Preheat the oven and prepare the angel food cake according to package instructions, allowing it to cool completely.
- Slice the cooled angel food cake into precise 1-inch uniform cubes using a sharp serrated knife.
- Select a 9×9 inch (23×23 centimeters) cake pan and create the first cake layer by arranging half of the cake cubes evenly across the bottom.
- Generously distribute approximately two-thirds of the cherry pie filling across the initial cake layer, ensuring even coverage.
- Carefully position the remaining cake cubes over the cherry pie filling, creating a second cake layer.
- In a medium mixing bowl, combine instant vanilla pudding mix, whole milk, and sour cream, whisking thoroughly for 2 minutes until the mixture becomes smooth and creamy.
- Gently spread the pudding mixture over the layered cake, creating a consistent and even coating.
- Add a generous layer of whipped topping across the pudding surface, covering it completely.
- Drizzle the remaining cherry pie filling on top of the whipped topping, creating an attractive and appetizing presentation.
- Refrigerate the dessert for 4 to 5 hours, allowing all layers to set and flavors to meld together.
- Optional: Garnish with sliced almonds just before serving for added texture and visual appeal.
Notes
- Prepare cake cubes in advance by cutting cooled angel food cake into uniform 1-inch pieces for even layering.
- Ensure smooth pudding mixture by whisking pudding mix, milk, and sour cream for exactly 2 minutes to prevent lumps.
- Refrigerate dessert for minimum 4-5 hours to allow flavors to meld and layers to set completely.
- Use chilled Cool Whip for easier spreading and more stable topping layer.
- Consider toasting sliced almonds before sprinkling for enhanced nutty flavor and added crunch.
- Select high-quality cherry pie filling for richer, more authentic fruit taste.
- Prep Time: 20 minutes
- Cook Time: 0 minutes
- Category: Desserts, Snacks
- Method: None
- Cuisine: British
Nutrition
- Serving Size: 8
- Calories: 283 kcal
- Sugar: 36 g
- Sodium: 288 mg
- Fat: 12 g
- Saturated Fat: 6 g
- Unsaturated Fat: 5 g
- Trans Fat: 0 g
- Carbohydrates: 42 g
- Fiber: 1 g
- Protein: 4 g
- Cholesterol: 30 mg
Lucas Bennett
Founder & Recipe Creator
Expertise
Simple Everyday Recipes, Sustainable Cooking Practices, Creative Meal Planning, Recipe Testing and Improvement
Education
Fox Valley Technical College, Appleton, Wisconsin
Lake Superior College, Duluth, Minnesota
Lucas Bennett’s cooking journey started in his parents’ kitchen, where he learned to prepare tasty, no-fuss meals from scratch. His culinary passion led him to Fox Valley Technical College, where he gained practical cooking skills.
He then expanded his focus on sustainability at Lake Superior College. Today, Lucas shares easy, approachable recipes designed to make cooking enjoyable and stress-free for everyone.