
Easy Keto Cheesy Garlic Breadsticks Recipe That’ll Make You Smile
Keto cheesy garlic breadsticks refine ordinary low-carb ingredients into a mouthwatering culinary adventure that defies traditional carbohydrate limitations.
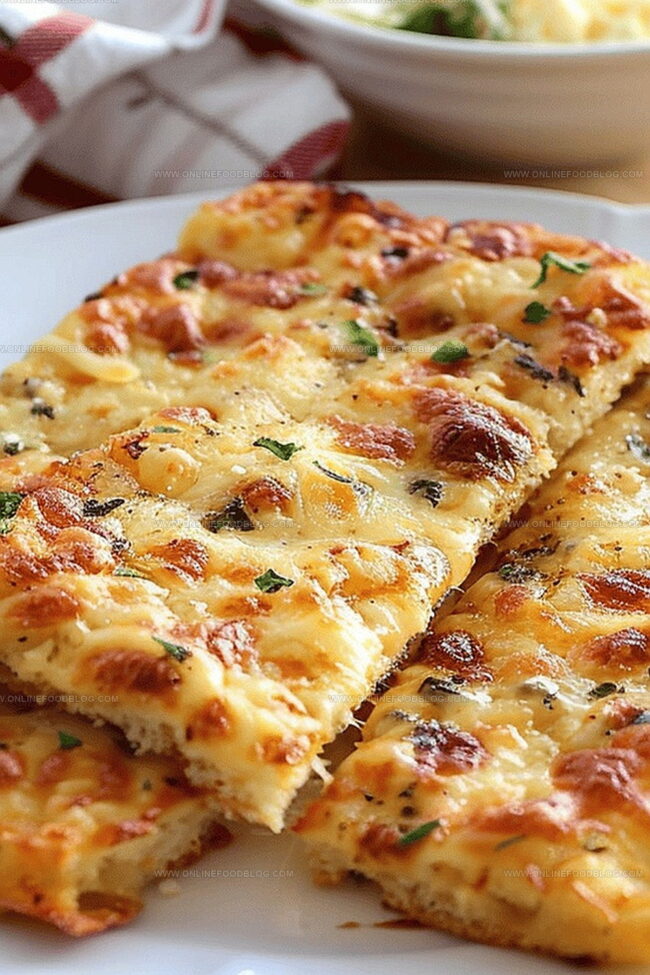
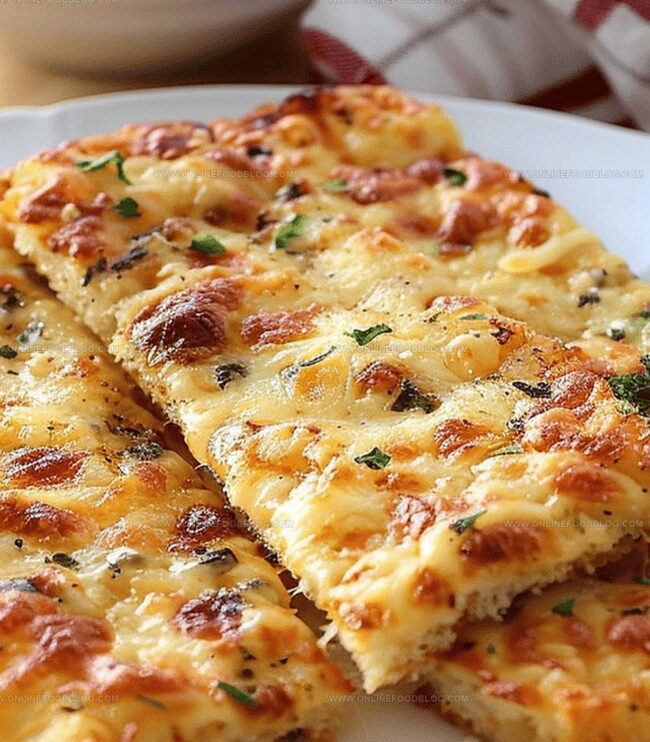
Crispy edges and soft, pillowy centers create an irresistible texture that makes you forget you’re eating a healthier alternative.
Cheese lovers and carb-conscious individuals unite around this ingenious recipe that satisfies deep comfort food cravings without compromising dietary goals.
The magic happens when carefully selected ingredients blend harmoniously, creating a surprisingly decadent experience that feels completely indulgent.
Achieving the perfect balance between rich, savory flavors and nutritional mindfulness requires strategic ingredient selection and precise preparation techniques.
Bold garlic notes intertwine with melted cheese, producing a sensory experience that tingles taste buds and challenges preconceived notions about restrictive eating.
These breadsticks represent more than just a side dish; they embody culinary creativity.
These Breadsticks Are a Low-Carb Win
What Goes into Keto Garlic Breadsticks
Main Ingredients:
Cheese Base: – Mozzarella Cheese: Soft, stretchy cheese that creates the base of the breadsticks. – Parmesan Cheese: Adds sharp, salty flavor and helps with binding the mixture.
Binding Agent: – Egg: Helps hold the ingredients together and provides structure to the breadsticks.
Flavor Enhancers:
Seasonings: – Garlic Powder: Provides a rich, aromatic garlic flavor without adding moisture.
Additional Ingredients:
Preparation Support: – Parchment Paper: Creates a non-stick surface for easy baking and clean-up.
How to Make Cheesy Keto Breadsticks
Step 1: Prepare Oven and Baking Surface
Preheat the oven to 350°F. Line a baking sheet with parchment paper, ensuring complete coverage for easy removal.
Step 2: Create Cheesy Mixture
In a mixing bowl, combine:Blend ingredients thoroughly until well integrated and smooth.
Step 3: Shape Breadstick Base
Spread the cheese mixture evenly on the parchment-lined baking sheet, forming a thin, consistent pizza crust-like layer. Aim for uniform thickness to ensure even cooking.
Step 4: Initial Baking
Place the baking sheet in the preheated oven. Bake for 15 minutes, allowing the cheese base to set and develop a golden foundation.
Step 5: Final Browning
Switch oven to broil setting. Watch carefully as the breadstick surface transforms to a gorgeous golden-brown color. This process typically takes 2-3 minutes, but monitor closely to prevent burning.
Serving Suggestion: Slice into strips or squares and serve immediately while warm and crispy. Perfect as a low-carb side or appetizer for keto enthusiasts.
Baking Tips for the Best Texture
Save and Reheat with Full Flavor
What Goes Great with Garlic Breadsticks
New Keto Toppings to Try
Print
Keto Cheesy Garlic Breadsticks Recipe
- Total Time: 25 minutes
- Yield: 4 1x
Description
Keto cheesy garlic breadsticks deliver Italian-inspired comfort without carb guilt. Crisp mozzarella and herb-infused almond flour crust make this low-carb delight perfect for satisfying pizza cravings while keeping health goals on track.
Ingredients
Main Ingredients:
- 1 cup (240 ml) shredded mozzarella
- 1 cup (240 ml) shredded parmesan cheese
- 1 egg
Seasoning Ingredients:
- 1 teaspoon garlic powder
Optional Toppings:
- Pinch of red pepper flakes
- Sprinkle of parsley flakes
Instructions
- Preheat the oven to 350°F (175°C) and carefully line a baking sheet with parchment paper, ensuring complete coverage to prevent sticking.
- In a spacious mixing bowl, blend shredded mozzarella cheese, grated parmesan cheese, a single large egg, and garlic powder until the ingredients form a smooth, cohesive mixture.
- Spread the cheese mixture evenly across the parchment-lined baking sheet, using a spatula or the back of a spoon to create a thin, uniform pizza crust-like base approximately 1/4 inch thick.
- Transfer the baking sheet to the preheated oven and bake for 15 minutes, watching carefully to ensure the edges begin to turn golden and the cheese melts completely.
- Adjust the oven setting to broil and carefully place the baking sheet under the broiler for 2-3 minutes, monitoring closely to achieve a rich, crispy golden-brown surface without burning.
- Remove from the oven and allow the cheesy garlic breadsticks to cool for 2-3 minutes, which will help them firm up and become easier to slice and serve.
Notes
- Achieve the perfect low-carb pizza base by using a mozzarella cheese dough that’s both stretchy and crispy.
- Ensure the cheese mixture is thoroughly combined to create a uniform texture and prevent uneven baking.
- Spread the dough as thinly and evenly as possible for a crisp, cracker-like consistency that mimics traditional breadsticks.
- Watch closely during broiling to prevent burning, as the top can quickly go from golden to charred.
- Net carbs are significantly lower compared to traditional breadsticks, making this an ideal keto-friendly alternative.
- Keep extra parchment paper on hand to help manipulate the sticky cheese dough without frustration.
- Prep Time: 10 minutes
- Cook Time: 15 minutes
- Category: Snacks, Appetizer
- Method: Baking, Broiling
- Cuisine: American
Nutrition
- Serving Size: 4
- Calories: 215 kcal
- Sugar: 0.5 g
- Sodium: 480 mg
- Fat: 17 g
- Saturated Fat: 10 g
- Unsaturated Fat: 5 g
- Trans Fat: 0.5 g
- Carbohydrates: 2 g
- Fiber: 0 g
- Protein: 14 g
- Cholesterol: 75 mg
Lucas Bennett
Founder & Recipe Creator
Expertise
Simple Everyday Recipes, Sustainable Cooking Practices, Creative Meal Planning, Recipe Testing and Improvement
Education
Fox Valley Technical College, Appleton, Wisconsin
Lake Superior College, Duluth, Minnesota
Lucas Bennett’s cooking journey started in his parents’ kitchen, where he learned to prepare tasty, no-fuss meals from scratch. His culinary passion led him to Fox Valley Technical College, where he gained practical cooking skills.
He then expanded his focus on sustainability at Lake Superior College. Today, Lucas shares easy, approachable recipes designed to make cooking enjoyable and stress-free for everyone.