Indulgent Coffee Ice Cream Cake Recipe

Rich Coffee Ice Cream Cake Recipe: Sweet Frozen Magic

Dive into a delightful dessert that marries the rich, bold flavors of coffee with a creamy, indulgent coffee ice cream cake that promises to tantalize your taste buds.

This decadent treat blends the warmth of freshly brewed espresso with the cool, smooth texture of homemade ice cream.

Layers of moist cake intermingle with velvety coffee-infused cream, creating a symphony of flavors that dance on your palate.

Each slice reveals a perfect balance of sweetness and robust coffee notes, making it an irresistible centerpiece for any gathering.

The recipe transforms simple ingredients into an extraordinary dessert that looks as impressive as it tastes.

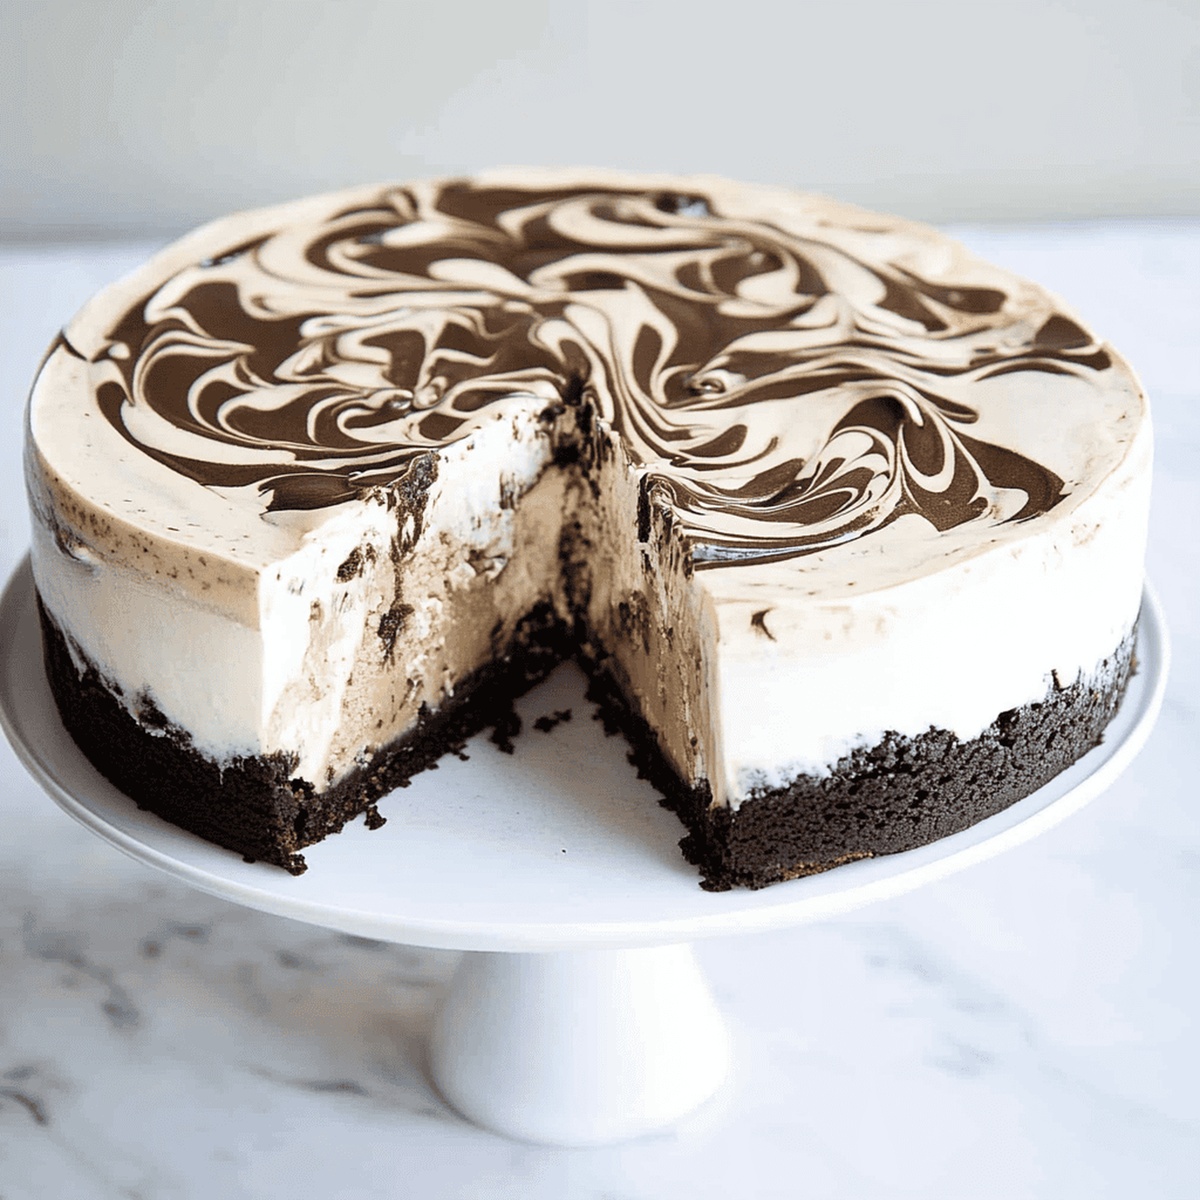
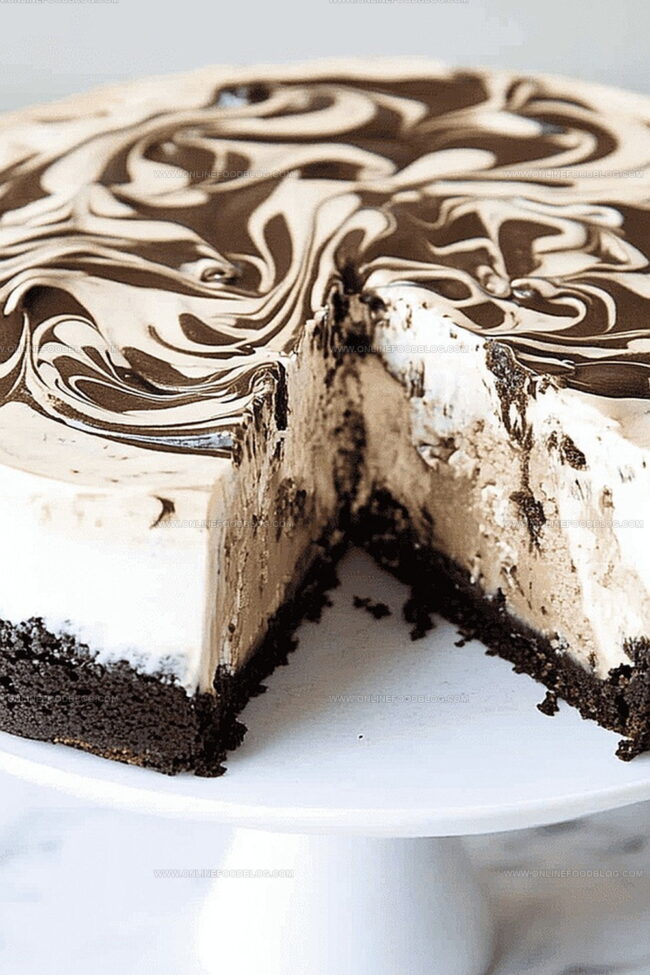
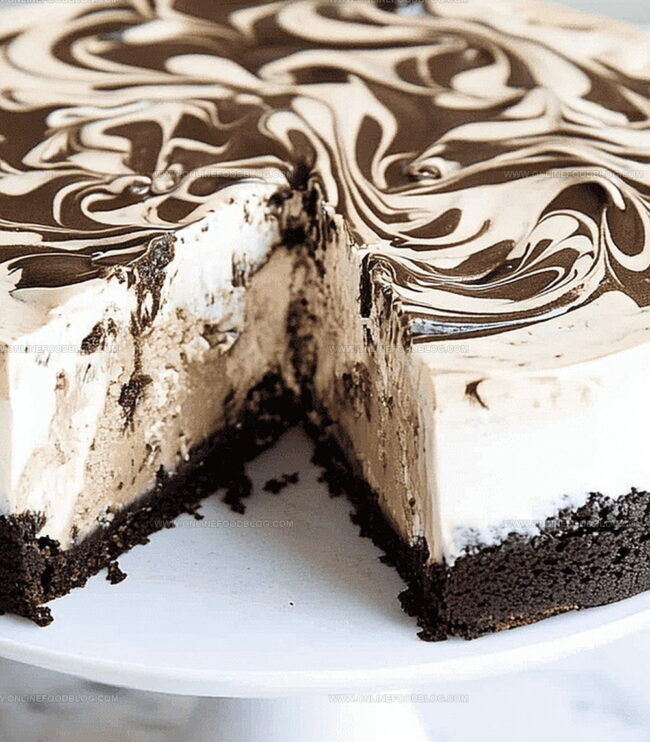
Chocolate shavings and a light dusting of cocoa powder add the final touch to this show-stopping confection.

Get ready to impress and savor every delectable bite of this ultimate coffee lover’s dream.

Step-by-Step for Making Coffee Ice Cream Cake

  • Brownie Foundation

Create a rich, chocolatey base that will serve as the delicious bottom layer of your ice cream masterpiece. This decadent foundation sets the stage for a truly memorable dessert.

  • Ice Cream Canvas

Transform store-bought or homemade coffee ice cream into a smooth, creamy layer that will blanket the brownie with incredible flavor. Softening the ice cream carefully ensures a perfect spread.

  • Vanilla Swirl Topping

Add a dreamy vanilla ice cream layer that creates visual and taste excitement. The playful chocolate fudge swirls bring extra magic to the dessert, making each slice a work of art.

  • Freezing Magic

Allow each layer to set completely in the freezer, giving the cake structure and intensity of flavor. Patience is key in creating this spectacular frozen treat.

  • Elegant Presentation

Carefully remove the cake from its mold, revealing the stunning layers of chocolate and ice cream. Slice with a warm knife to create clean, beautiful servings that will impress everyone at the table.

Quick Recipe Overview

Prep Time: 25 minutes

Cook Time: 25 minutes

Total Time: 50 minutes

Calories: 280 kcal

Servings: 9

What You’ll Need for Coffee Ice Cream Cake

For The Chocolate Base:
  • Chocolate: Rich, dark chocolate creates a decadent foundation with intense flavor depth; choose high-quality baking chocolate for best results.
  • Butter: Provides moisture and richness, ensuring a smooth and tender brownie texture; use unsalted for precise flavor control.
  • Eggs: Bind ingredients together and create structure, adding richness and helping the brownie hold its shape.
  • Flour: Gives structure and stability to the brownie layer; all-purpose flour works perfectly for a tender crumb.
  • Salt: Enhances overall chocolate flavor and balances sweetness, bringing out deeper taste notes.
For Ice Cream Layers:
  • Coffee Ice Cream: Delivers bold, aromatic coffee essence; choose premium brand or make homemade for intense flavor profile.
  • Vanilla Ice Cream: Offers creamy, classic background that complements coffee notes; select smooth, high-quality variety.
  • Chocolate Fudge: Adds luxurious swirled texture and extra chocolate intensity; use store-bought or homemade sauce.
For Optional Preparation Tools:
  • Parchment Paper: Prevents sticking and ensures easy cake removal; essential for clean release.
  • Cake Ring Mold: Creates perfect circular shape and supports layering process; allows precise assembly.
  • Acetate Strip: Provides smooth sides and helps with clean cake presentation; enables easy demolding.

Tools to Assemble a Beautiful Coffee Ice Cream Cake

  • Stand mixer with paddle attachment: Essential for softening ice cream smoothly.
  • Cake ring mold: Crucial for creating a perfect layered ice cream cake shape.
  • Acetate strip: Helps easily remove the cake from the mold.
  • 8-inch round cake pan: Needed for baking the brownie base.
  • Parchment paper: Prevents sticking and helps with easy removal.
  • Double boiler (bain-marie): Helps melt chocolate gently without burning.
  • Mini offset spatula: Perfect for releasing edges of the cake.
  • Wire rack: Allows cake to cool evenly.
  • Cake board: Provides a stable base for assembling the cake.
  • Sharp knife: Used for cutting the final cake.
  • Whisk: Necessary for mixing ingredients smoothly.
  • Plastic wrap: Helps cover and protect the cake during freezing.

Flavor Variations for Coffee Ice Cream Cake Layers

  • Transform the base by using gluten-free flour, adding nuts like chopped almonds, or incorporating cocoa nibs for extra texture and depth. Substitute some butter with applesauce for a lighter version.
  • Mix store-bought ice cream with crushed candy, chocolate chips, or caramel swirls to elevate the complexity. Freeze each layer completely before adding the next to maintain clean, distinct sections.
  • Top the cake with chocolate shavings, coffee bean crumbles, whipped cream rosettes, or drizzle homemade caramel sauce. Torched meringue peaks or chocolate ganache can add professional bakery-style elegance.
  • Wrap the entire cake tightly in plastic wrap and aluminum foil to preserve freshness for up to two weeks. Individual slices can be pre-cut and stored separately for convenient serving.

Serving Coffee Ice Cream Cake with Style

  • Dessert Companion Delights: Perfect Pairings
  • Coffee Liqueur Drizzle: Elevate each slice with a gentle pour of kahlua or amaretto, adding sophisticated adult flavor and extra moisture to the rich cake layers.
  • Whipped Cream Wonderland: Top slices with homemade fresh whipped cream featuring subtle hints of vanilla or cinnamon, creating luxurious cloud-like texture against the dense brownie base.
  • Chocolate Crunch Topping: Sprinkle finely chopped roasted almonds or delicate chocolate pearls around the edges, introducing delightful textural contrast and nutty undertones that complement the coffee and chocolate profiles.
  • Espresso Powder Finish: Dust a light layer of high-quality espresso powder across the top, intensifying the coffee essence and providing an elegant professional presentation that hints at the cake's decadent interior.

Freezing and Slicing Coffee Ice Cream Cake

  • Fridge-Friendly Storage: Wrap the entire cake tightly in plastic wrap or aluminum foil to maintain freshness. Store in the coldest part of your freezer for up to 5-7 days without losing flavor or texture.
  • Slice-and-Save Strategy: Cut individual portions before freezing them separately in airtight containers. This trick helps prevent freezer burn and makes quick dessert access super easy for spontaneous sweet cravings.
  • Temperature Transition Tips: Allow the cake to sit at room temperature for 5-10 minutes before serving. This short waiting period helps soften the ice cream layers, creating a smoother, more enjoyable eating experience without compromising the cake's structural integrity.
  • Make-Ahead Magic: Prepare the entire dessert up to 2 weeks in advance. Keeping the cake completely sealed prevents ice crystal formation and maintains the rich, creamy texture of both the brownie and ice cream layers. Pro bakers know this secret to stress-free entertaining!
Print
clock clock iconcutlery cutlery iconflag flag iconfolder folder iconinstagram instagram iconpinterest pinterest iconfacebook facebook iconprint print iconsquares squares iconheart heart iconheart solid heart solid icon
Indulgent Coffee Ice Cream Cake Recipe

Indulgent Coffee Ice Cream Cake Recipe


5 Stars 4 Stars 3 Stars 2 Stars 1 Star

4.8 from 26 reviews

  • Total Time: 50 minutes
  • Yield: 9 1x

Description

Rich chocolate ganache elevates this coffee ice cream cake to a luxurious dessert experience. Creamy layers and espresso-infused frosting blend seamlessly, promising a delightful indulgence for coffee enthusiasts who crave intense flavor combinations.


Ingredients

Scale
  • 1.5 pints/0.75 quart coffee ice cream
  • 1 pint/0.5 quart vanilla ice cream
  • 2 tbsps chocolate fudge

Instructions

  1. Preparation: Grease an 8-inch round cake pan and line with parchment paper for easy removal.
  2. Chocolate Base: Melt chocolate, sugars, and butter in a double boiler until smooth and glossy. Cool slightly, then whisk in eggs one at a time until fully incorporated.
  3. Batter Formation: Gently fold flour and salt into the chocolate mixture, incorporating chocolate chunks until the batter is uniform and no dry ingredients remain.
  4. Baking Process: Pour batter into prepared pan, spreading evenly. Bake until a toothpick inserted comes out clean. Cool completely on a wire rack.
  5. Cake Assembly: Place cake ring mold on a parchment-lined baking sheet. Wrap interior with acetate and position the cooled brownie base inside.
  6. Ice Cream Layering: Spread softened coffee ice cream evenly over the brownie base. Freeze for 2-3 hours until completely solid.
  7. Final Composition: Apply softened vanilla ice cream over the coffee layer. Create a decorative chocolate fudge swirl by dolloping and gently marbling with a knife.
  8. Freezing and Setting: Return the cake to the freezer for 3-4 hours or overnight to ensure complete solidification.
  9. Serving Preparation: Remove cake ring and acetate strip. If softening occurs, briefly return to the freezer. Use a sharp knife to slice, allowing the brownie to slightly soften for optimal texture and cutting ease.

Notes

  • Chocolate Melting Mastery: Use a double boiler to gently melt chocolate, preventing burning and ensuring a smooth, glossy texture that enhances the cake’s richness.
  • Egg Incorporation Technique: Add eggs one at a time, whisking thoroughly to create a homogeneous mixture that prevents lumps and ensures a silky, even batter.
  • Freezing Pro Tip: Allow sufficient freezing time between layers (2-3 hours) to create distinct, well-defined ice cream sections that hold their shape perfectly.
  • Serving Strategy: Let the cake soften slightly before slicing for cleaner cuts and a more luxurious texture that allows the brownie layer to be more tender and enjoyable.
  • Prep Time: 25 minutes
  • Cook Time: 25 minutes
  • Category: Desserts, Snacks, Drinks
  • Method: Baking
  • Cuisine: American

Nutrition

  • Serving Size: 9
  • Calories: 280
  • Sugar: 24 g
  • Sodium: 120 mg
  • Fat: 14 g
  • Saturated Fat: 8 g
  • Unsaturated Fat: 6 g
  • Trans Fat: 0 g
  • Carbohydrates: 36 g
  • Fiber: 1 g
  • Protein: 4 g
  • Cholesterol: 40 mg
Mia Reynolds

Mia Reynolds

Food Writer & Home Cooking Specialist

Expertise

Easy Home Baking, Recipe Writing and Storytelling, Local and Seasonal Ingredients, Baking for Beginners

Education

New England Culinary Institute (NECI), Montpelier, Vermont

  • Certificate: Baking and Pastry Arts Certificate
  • Focus: Hands-on baking skills, pastry basics, and creating delicious, approachable baked goods.

Community College of Vermont, Winooski, Vermont

  • Degree: Certificate in Food and Beverage Management
  • Focus: Essential knowledge of recipe development, ingredient sourcing, and food business basics.

Mia Reynolds fell in love with baking as a teenager experimenting in her family kitchen. Her passion took her to New England Culinary Institute, where she learned practical pastry techniques, and later to Community College of Vermont to deepen her understanding of food management.

Mia combines clear, simple baking instructions with heartwarming stories, making home baking approachable for everyone.

Leave a Reply

Your email address will not be published. Required fields are marked *

Recipe rating 5 Stars 4 Stars 3 Stars 2 Stars 1 Star