
Adorable Mini Cheesecake Bites Recipe for Sweet Snacking
Delicate and irresistible, these mini cheesecake bites dance with creamy perfection on every sweet-seeking palate.
Tiny desserts pack a serious punch of decadent flavor that melts effortlessly in your mouth.
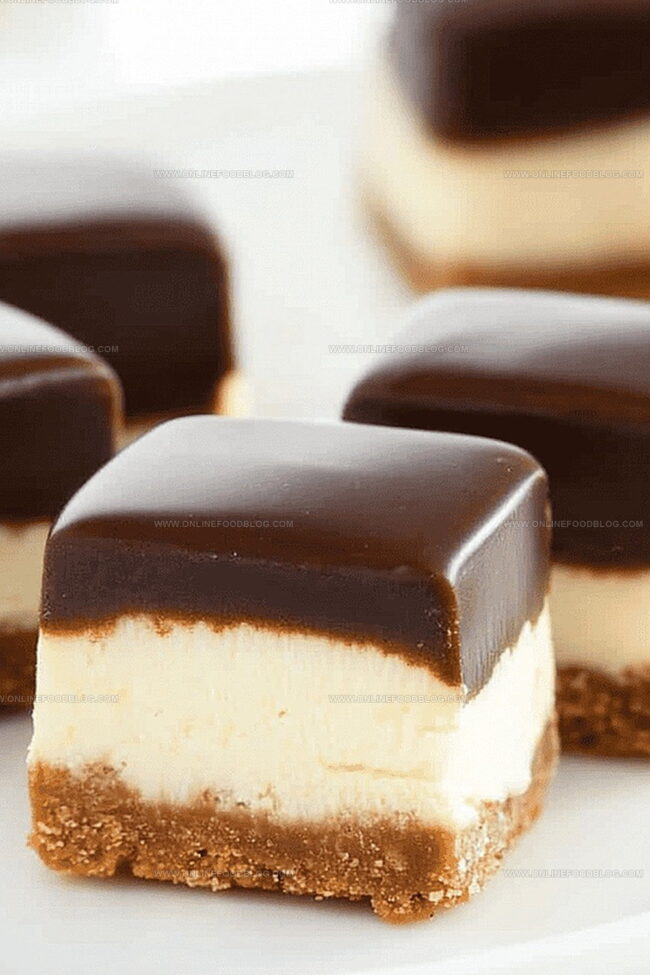
Soft cream cheese blends seamlessly with a buttery graham cracker crust, creating miniature treats that sparkle with indulgence.
Each bite-sized morsel promises a delightful explosion of rich, tangy goodness that makes dessert time absolutely magical.
Elegant yet simple, these mini cheesecake bites turn an ordinary moment into something extraordinary.
The recipe guarantees a delectable experience that will have everyone asking for seconds.
So roll up your sleeves and get ready to wow every dessert lover with these heavenly little delights.
Quick Recipe Overview
Mini Cheesecake Bites Ingredient Guide
For Crust:For Filling:For Coating:Tools You’ll Need for Mini Cheesecake Bites
How to Bake Mini Cheesecake Bites Like a Pro
Gather graham crackers and butter for a solid base. Crush crackers into fine crumbs and blend with melted butter. Press mixture firmly into baking pan creating a smooth, even layer that will support the creamy filling.
Blend cream cheese until silky and soft. Incorporate sugar and eggs gradually, mixing until smooth and velvety. The goal is a luxurious, creamy texture that will melt in your mouth.
Slide pan into preheated oven. Bake until edges are set but center remains slightly jiggly. This ensures a tender, rich consistency that defines perfect cheesecake.
Allow cheesecake to cool completely. Chill in freezer to help it firm up, making cutting and coating easier. Cold cheesecake holds its shape beautifully.
Melt chocolate with a touch of coconut oil, creating a glossy coating. Dip each cheesecake square, letting excess drip off. Place on parchment paper to set.
Arrange chocolate-covered bites on elegant serving platter. These mini treats are perfect for parties, gatherings, or a personal indulgence. Store in refrigerator to maintain their delightful texture.
Creative Variations for Mini Cheesecake Bites
Ways to Serve Mini Cheesecake Bites at Parties
Storage Tips for Mini Cheesecake Bites That Stay Fresh
Print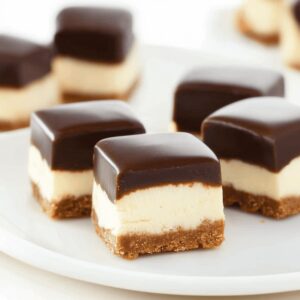
Heavenly Mini Cheesecake Bites
- Total Time: 3 hours (including chilling time)
- Yield: 22 1x
Description
Delectable mini cheesecake bites offer a delightful blend of creamy texture and sweet indulgence. Effortless preparation and perfect portion size make these treats irresistible for dessert enthusiasts who crave a quick, elegant confection.
Ingredients
- 16 oz (454 g) block cream cheese, room temperature
- 2 large eggs (100 g), room temperature
- 0.75 cup (150 g) granulated sugar
- 1.5 cups (225 g) gluten-free cookie crumbs
- 5 tbsps (70 g) unsalted butter, melted and cooled
- 8 oz bittersweet chocolate, chopped
- 2 tbsps (28 g) virgin coconut oil
- 2 tbsps (18 g) cornstarch
- 1 tsp pure vanilla extract
- 0.125 tsp kosher salt
Instructions
- Crust Creation: Combine cookie crumbs with melted butter, pressing firmly into a lined baking pan to form a compact, even base that will support the cheesecake filling.
- Filling Preparation: Whip cream cheese until smooth, gradually blending in sugar, salt, and cornstarch to create a velvety, homogeneous mixture without overmixing.
- Egg Integration: Incorporate eggs and vanilla, stirring gently until the filling achieves a silky, pourable consistency that promises a creamy final texture.
- Baking Process: Pour the filling over the prepared crust, smoothing the surface and eliminating air bubbles by gently tapping the pan against the counter, then bake in a preheated oven until the center has a subtle wobble.
- Cooling and Setting: Allow the cheesecake to cool briefly at room temperature, then wrap securely and freeze until completely firm for precise cutting.
- Portioning: Remove the chilled cheesecake using parchment edges, and slice into uniform one-inch bites with a clean, sharp knife.
- Chocolate Coating: Melt chocolate and coconut oil, creating a glossy mixture that will enrobe the cheesecake bites with a smooth, luxurious finish.
- Final Touches: Dip each cheesecake bite into the chocolate coating, ensuring complete or partial coverage, and arrange on parchment paper to set.
- Storage: Transfer the finished delicacies to a sealed container in the refrigerator, preserving their exquisite texture and flavor for maximum enjoyment.
Notes
- Prevent Cracking: Avoid overmixing batter and overbaking to maintain a smooth, crack-free cheesecake surface.
- Temperature Matters: Use room temperature ingredients for a silky, lump-free filling that blends seamlessly.
- Clean Cutting Technique: Wipe knife with hot water between cuts for precise, clean edges on mini cheesecake bites.
- Storage Wisdom: Keep chocolate-coated bites refrigerated and consume within 5-7 days for maximum freshness and flavor.
- Prep Time: 30 minutes
- Cook Time: 30 minutes
- Category: Desserts, Snacks
- Method: Baking
- Cuisine: American
Nutrition
- Serving Size: 22
- Calories: 215
- Sugar: 8 g
- Sodium: 84 mg
- Fat: 14 g
- Saturated Fat: 9 g
- Unsaturated Fat: 5 g
- Trans Fat: 0 g
- Carbohydrates: 21 g
- Fiber: 1 g
- Protein: 3 g
- Cholesterol: 48 mg
Mia Reynolds
Food Writer & Home Cooking Specialist
Expertise
Easy Home Baking, Recipe Writing and Storytelling, Local and Seasonal Ingredients, Baking for Beginners
Education
New England Culinary Institute (NECI), Montpelier, Vermont
Community College of Vermont, Winooski, Vermont
Mia Reynolds fell in love with baking as a teenager experimenting in her family kitchen. Her passion took her to New England Culinary Institute, where she learned practical pastry techniques, and later to Community College of Vermont to deepen her understanding of food management.
Mia combines clear, simple baking instructions with heartwarming stories, making home baking approachable for everyone.