
Cozy Classic Tuna Melt Recipe: The Comfort Sandwich You Need
When hunger strikes, nothing beats a classic tuna melt sandwich that delivers comfort and flavor in every bite.
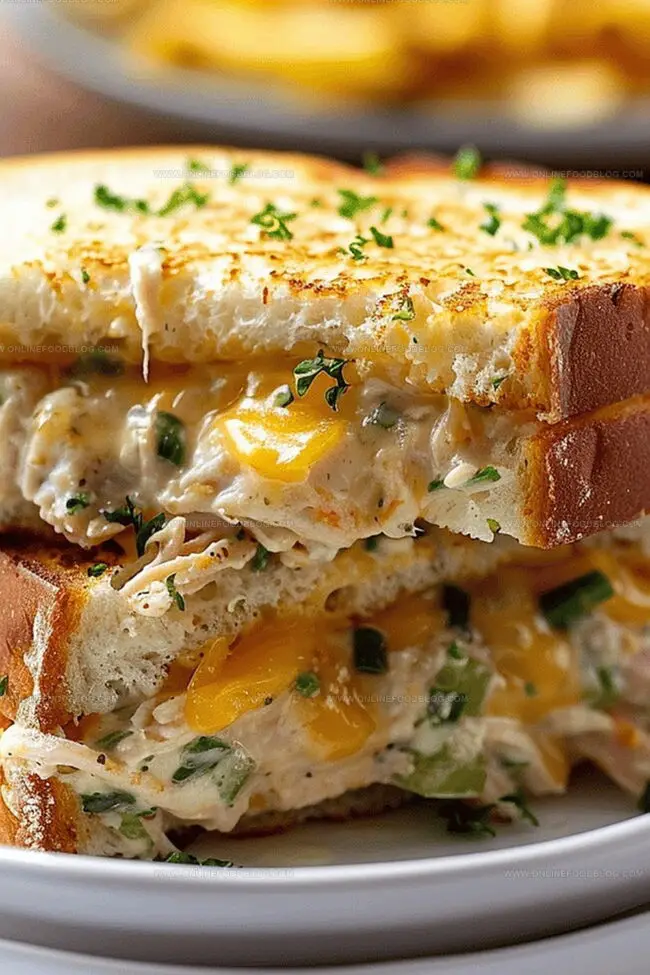
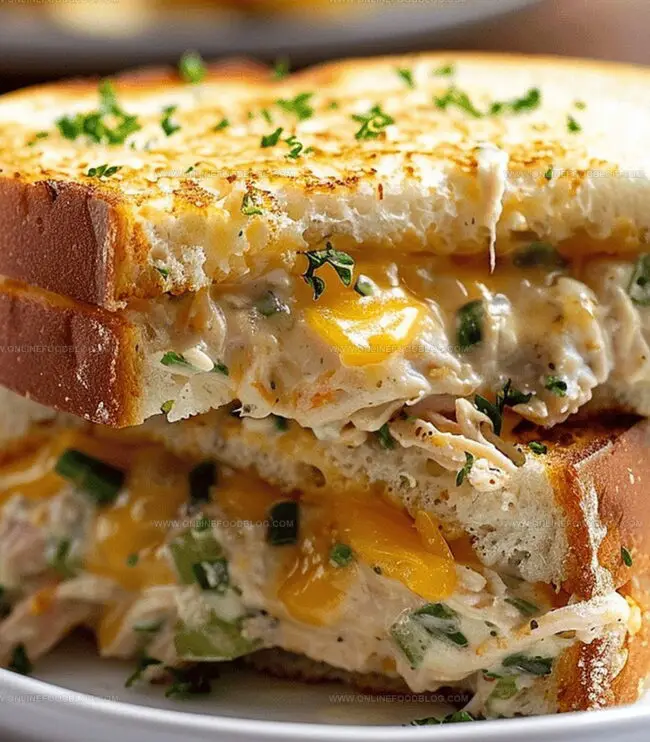
Melted cheese cascades over perfectly seasoned tuna, creating a delightful harmony of textures and tastes.
The golden-brown bread provides a crispy foundation for this beloved lunch staple.
Packed with protein and easy to assemble, this timeless recipe requires minimal effort but promises maximum satisfaction.
Each layer of the sandwich tells a story of culinary simplicity and deliciousness.
Sharp cheddar and flaky tuna combine to create a mouthwatering experience that will have you reaching for seconds.
Grab your skillet and get ready to enjoy a melt that turns an ordinary meal into something extraordinary.
Quick Recipe Overview
What You’ll Need for a Classic Tuna Melt
For Tuna Mixture:For Bread And Toasting:For Melting And Finishing:Gear for Toasting the Perfect Tuna Melt
Directions to Make a Classic Tuna Melt
Select thick, hearty bread slices that will hold up to toasting and melting.
Blend tuna with complementary ingredients to create a rich, creamy filling that adds flavor depth.
Gently brown bread in butter, creating a golden, crispy exterior that provides a satisfying crunch.
Layer tuna and cheese between toasted bread slices, ensuring even distribution of ingredients.
Place sandwiches in preheated oven, allowing cheese to melt and flavors to merge into a cohesive, warm meal.
Tuna Melt Tweaks & Seasoning Suggestions
Serving Up Classic Tuna Melt the Retro Way
Storing Leftover Tuna Melt
Print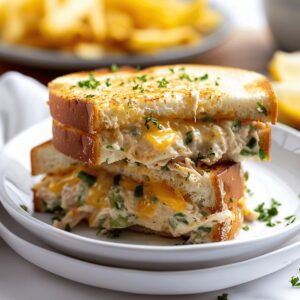
Gourmet Tuna Melt Recipe
- Total Time: 40 minutes
- Yield: 7 1x
Description
Comfort classic tuna melt delivers nostalgic diner-style satisfaction with melted cheese and crispy bread. Homemade goodness brings warmth to your plate, inviting you to savor each delicious bite.
Ingredients
- 6 slices bread
- 6 slices cheddar cheese, or American
- 2 (5 oz / 142 g) cans albacore tuna
- 6 tbsps butter
- ⅓ cup mayonnaise
- 2 tbsps white onions, minced
- 1 tbsp dill or sweet relish
- 1 tbsp lemon juice
- 1 tbsp freshly chopped parsley
- 1 stalk celery, diced
- 1 tsp yellow mustard
- ¼ tsp salt
- ¼ tsp garlic powder
- ¼ tsp dry dill weed
- ¼ tsp freshly cracked pepper
Instructions
- Tuna Preparation: Drain canned tuna and break into fine, uniform pieces using a fork, creating a smooth base for the salad mixture.
- Salad Mixing: Combine tuna with mayonnaise, chopped celery, minced onion, salt, and pepper in a medium bowl, blending until ingredients are evenly distributed and form a cohesive mixture.
- Bread Toasting: Melt unsalted butter in a large skillet over medium-low heat, then toast bread slices until golden-brown and crispy on both sides, approximately 2-3 minutes per side.
- Sandwich Assembly: Arrange toasted bread slices, layer generously with tuna salad, and top each slice with two pieces of sharp cheddar cheese, creating a rich and flavorful foundation.
- Baking Preparation: Preheat oven to 350 degrees Fahrenheit (175 degrees Celsius), line a baking sheet with aluminum foil, and place assembled sandwiches on the sheet with adequate spacing.
- Finishing Touch: Bake for 15-20 minutes until cheese melts completely and sandwiches are heated through, then remove from oven, allow to cool briefly, slice diagonally, and serve warm and crispy.
Notes
- Drain Tuna Carefully: Remove all excess liquid completely to prevent soggy sandwich texture and ensure a firm, consistent tuna mixture.
- Master Cheese Melting: Choose sharp cheddar at room temperature for optimal melting and maximum flavor distribution across the sandwich.
- Butter Technique Matters: Use unsalted butter and spread evenly to create a uniform golden-brown crisp that enhances overall sandwich crunch.
- Baking Precision: Watch sandwiches closely during final 15-20 minute baking period to prevent overcooking and maintain perfect cheese melt and bread crispness.
- Prep Time: 20 minutes
- Cook Time: 20 minutes
- Category: Lunch, Snacks
- Method: Baking
- Cuisine: American
Nutrition
- Serving Size: 7
- Calories: 498
- Sugar: 2 g
- Sodium: 708 mg
- Fat: 34 g
- Saturated Fat: 18 g
- Unsaturated Fat: 14 g
- Trans Fat: 1 g
- Carbohydrates: 30 g
- Fiber: 2 g
- Protein: 23 g
- Cholesterol: 60 mg
Mia Reynolds
Food Writer & Home Cooking Specialist
Expertise
Easy Home Baking, Recipe Writing and Storytelling, Local and Seasonal Ingredients, Baking for Beginners
Education
New England Culinary Institute (NECI), Montpelier, Vermont
Community College of Vermont, Winooski, Vermont
Mia Reynolds fell in love with baking as a teenager experimenting in her family kitchen. Her passion took her to New England Culinary Institute, where she learned practical pastry techniques, and later to Community College of Vermont to deepen her understanding of food management.
Mia combines clear, simple baking instructions with heartwarming stories, making home baking approachable for everyone.