Gooey Pop Tart Cookie Cups Recipe

Delectable Pop Tart Cookie Cups Recipe for Sweet Tooths

Baking enthusiasts always search for delightful treats that combine classic flavors, and these pop tart cookie cups deliver a nostalgic twist.

Soft, chewy cookie dough meets the iconic pop tart in a mouthwatering fusion that melts in your mouth.

Each bite promises a perfect balance of buttery cookie and sweet pastry filling that sparks joy.

The recipe combines simple ingredients with playful creativity, turning ordinary baking into an extraordinary experience.

You’ll love how quickly these treats come together, making them ideal for spontaneous dessert cravings.

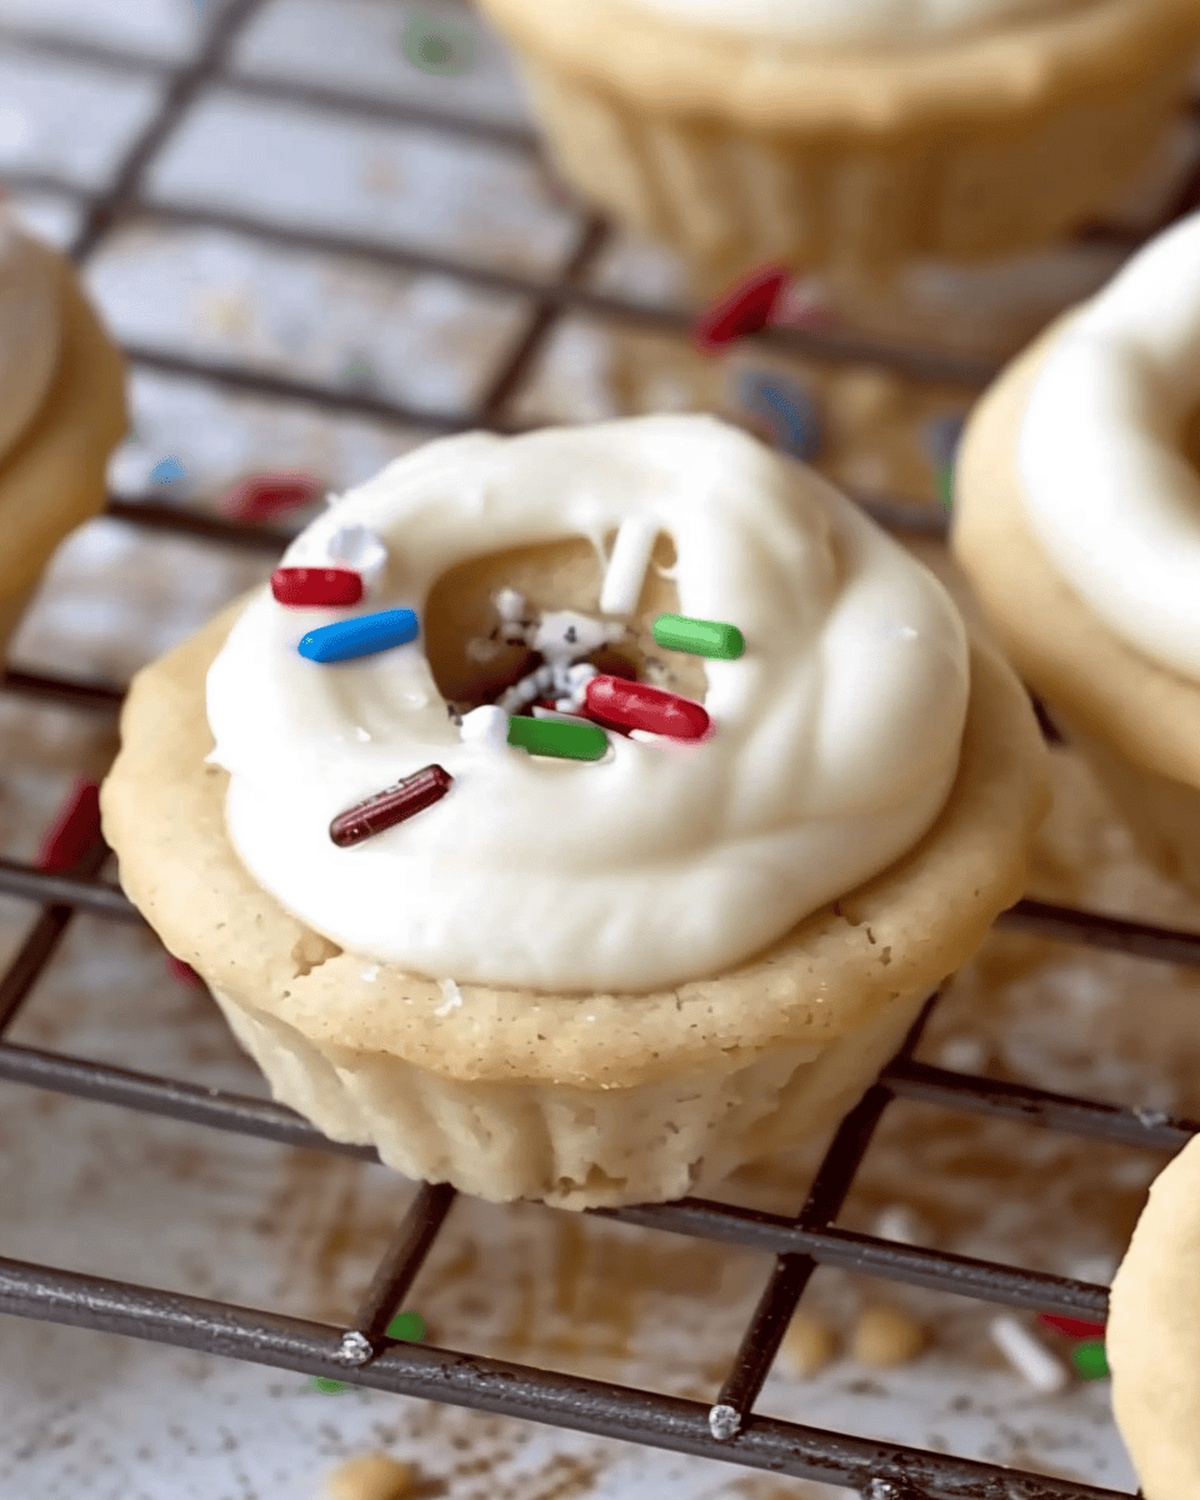
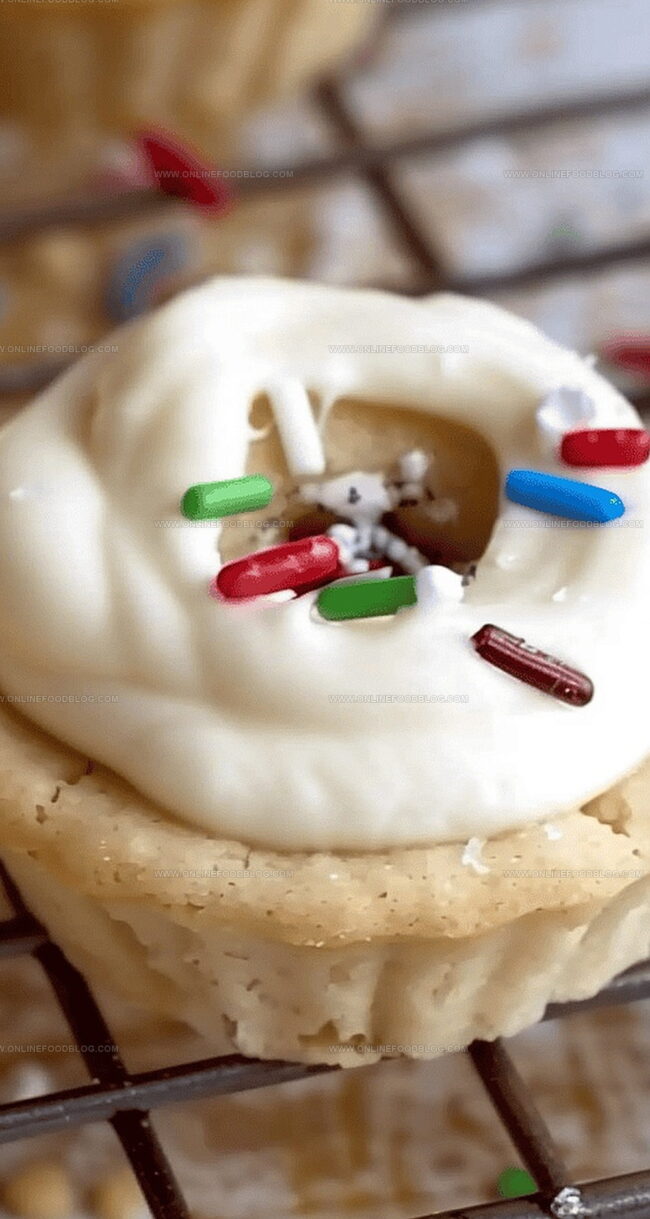
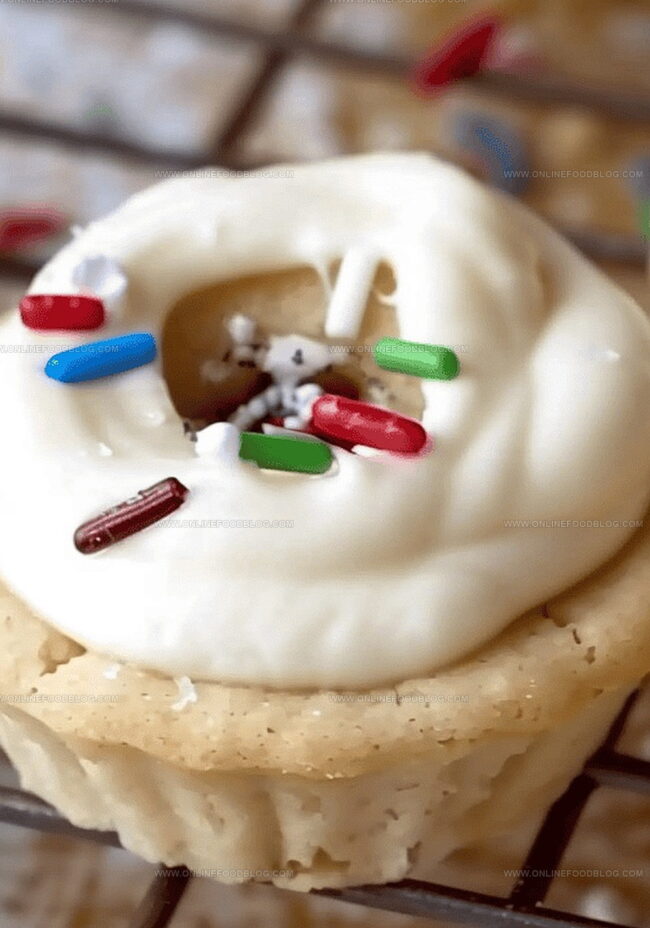
The colorful, sprinkle-topped cups add a whimsical touch that makes them irresistible to both kids and adults.

Dive into this delectable recipe and watch these irresistible treats disappear in seconds.

  • Festive Party Platter: Arrange these colorful Pop Tart Cookie Cups on a decorative tray for birthday parties or children's gatherings. Their bite-sized charm makes them perfect finger food that guests will adore.
  • Sweet Breakfast Surprise: Serve alongside morning coffee or as a delightful weekend brunch treat. Kids and adults will love these fruity, sprinkle-topped mini desserts that feel like a special morning indulgence.
  • Dessert Centerpiece: Create an elegant dessert display by positioning these cookie cups on tiered cake stands. Their vibrant appearance and strawberry filling will make them a stunning conversation starter at any gathering.
  • Gifting Delight: Package these cookie cups in clear cellophane bags tied with ribbon for a homemade gift. They're perfect for teachers, friends, or as a sweet gesture to brighten someone's day with a personal touch.
  • Fridge Fresh Strategy: Store cookie cups in an airtight container lined with parchment paper. Keep refrigerated for up to 5 days to maintain their delightful texture and flavor.
  • Make-Ahead Magic: Prepare dough balls in advance and freeze for future baking. Unbaked dough can stay frozen for 3 months, providing quick dessert options during busy weeks.
  • Party Prep Hack: Create these sweet treats 1-2 days before gatherings. They'll remain perfectly crisp and delicious, reducing last-minute kitchen stress for entertaining.
  • Smart Serving Tip: Separate cookie cups with wax paper when stacking in storage containers. This prevents sticking and keeps the icing and sprinkles looking picture-perfect.

Quick Recipe Overview

Prep Time: 15 minutes

Cook Time: 10 minutes

Total Time: 25 minutes

Calories: 210 kcal

Servings: 13

For Cookie Base:
  • All-Purpose Flour: Provides structure and tender crumb for the cookie cups.
  • Baking Powder: Helps cookies rise and creates a light, airy texture.
  • Salt: Enhances the overall flavor and balances sweetness.
For Wet Ingredients:
  • Butter: Creates rich, buttery flavor and helps bind the cookie dough.
  • Granulated Sugar, Brown Sugar: Adds sweetness and helps create a soft, chewy texture.
  • Egg: Binds ingredients together and provides moisture.
  • Vanilla Extract: Adds warm, aromatic flavor to the cookie base.
For Topping and Filling:
  • Strawberry Preserves: Adds fruity, vibrant filling with natural sweetness.
  • Powdered Sugar: Creates smooth, glossy icing with delicate sweetness.
  • Heavy Cream: Helps thin and smooth out the icing.
  • Rainbow Sprinkles: Adds fun, colorful decoration and playful crunch.
  • Mini Muffin Pan: Essential for creating perfectly shaped cookie cups.
  • Mixing Bowl: Used for combining butter, sugars, egg, and other ingredients.
  • Electric Mixer or Whisk: Helps beat butter and sugars until creamy and mix ingredients smoothly.
  • Small Ice-Cream Scoop: Perfect for creating uniform dough balls.
  • Teaspoon: Used to press down dough and create wells in cookie cups.
  • Piping Bag or Ziplock Bag: Great for adding preserves and icing to cookie cups.
  • Measuring Cups and Spoons: Ensures accurate ingredient measurements.
  • Cooling Rack: Helps cookies cool evenly after baking.

Sweet Strawberry Cookie Nests

  • Cookie Dough Preparation Blend soft butter with sugars until they become light and fluffy, creating a smooth base for your delightful treats.
  • Dough Shaping Gently roll small portions of dough into cute little balls, nestling each one into a mini muffin tin with tender care.
  • Baking Magic Place the pan in a warm oven, allowing the cookies to transform into golden cups with adorable little centers perfect for filling.
  • Strawberry Surprise Fill each delicate cookie nest with vibrant strawberry preserves, creating a burst of fruity flavor that will make taste buds dance.
  • Sparkly Finishing Touch Drizzle a smooth, silky cream glaze over the tops and sprinkle playful rainbow confetti for a celebration of color and sweetness.
  • Cooling and Serving Let your cookie nests rest and settle, then carefully transfer them to a beautiful serving plate, ready to delight friends and family.
  • Replace strawberry preserves with raspberry, blueberry, or apricot jam for a delightful flavor twist.
  • Swap regular icing with melted chocolate or add cocoa powder to the cookie dough for a rich chocolate version.
  • Adjust sprinkle colors to match holidays or special occasions like pink for Valentine's Day or red/green for Christmas.
  • Fold in mini chocolate chips, chopped nuts, or crushed graham crackers into the cookie dough for extra texture and taste.
  • Keep cookie cups fresh by storing in an airtight container at room temperature for up to 3 days, or refrigerate for extended shelf life.
Print
clock clock iconcutlery cutlery iconflag flag iconfolder folder iconinstagram instagram iconpinterest pinterest iconfacebook facebook iconprint print iconsquares squares iconheart heart iconheart solid heart solid icon
Gooey Pop Tart Cookie Cups Recipe

Gooey Pop Tart Cookie Cups Recipe


5 Stars 4 Stars 3 Stars 2 Stars 1 Star

4.7 from 27 reviews

  • Total Time: 25 minutes
  • Yield: 13 1x

Description

Homemade pop tart cookie cups blend nostalgic childhood treats with modern baking creativity. Crisp pastry edges and sweet filling promise a delightful dessert experience you can savor with friends and family.


Ingredients

Scale
  • 8 tablespoons (½ cup or 113 g) unsalted butter, softened
  • 1 large egg, at room temperature
  • ⅓ cup strawberry preserves
  • ⅓ cup (67 g) granulated sugar
  • ¼ cup (50 g) light brown sugar
  • 1 ½ cups (180 g) flour
  • ½ cup (60 g) powdered sugar
  • 2 tablespoons (30 ml) heavy cream
  • 1/8 cup (2 tablespoons or 30 g) rainbow sprinkles
  • 1 teaspoon baking powder
  • ½ teaspoon salt
  • 1 ½ teaspoons vanilla extract

Instructions

  1. Preparation: Thoroughly grease a mini muffin pan with cooking spray or butter to ensure easy release of cookie cups.
  2. Creaming: Blend softened butter with granulated and brown sugars until light and airy, creating a smooth foundational mixture.
  3. Binding: Integrate egg and vanilla extract into the butter mixture, stirring until completely uniform in texture.
  4. Dough Formation: Gently fold in flour, baking powder, and salt, mixing carefully to create a cohesive dough without overmixing.
  5. Shaping and Molding: Use a cookie scoop to portion uniform dough balls, placing each into muffin tin cavities. Press a rounded teaspoon into the center of each ball to create a well for filling.
  6. Baking: Position the muffin pan in a preheated 350°F oven, baking for 10-12 minutes until edges turn golden brown and cookies are set.
  7. Cooling and Filling: Allow cookie cups to rest in the pan for 5 minutes, then carefully fill each with strawberry preserves using a piping bag or small spoon.
  8. Finishing Touches: Whisk powdered sugar and heavy cream to create a smooth icing, drizzling over the filled cookie cups. Immediately sprinkle with colorful rainbow sprinkles while icing remains wet.
  9. Serving: Once completely cooled, delicately remove pop tart cookie cups from the muffin pan and transfer to a serving platter.

Notes

  • Prevent Sticking Carefully: Use generous cooking spray or butter in each muffin cavity to ensure easy cookie cup removal.
  • Mix Butter Technique: Cream butter and sugars until light and fluffy for a smooth, consistent cookie texture that guarantees soft, delectable results.
  • Avoid Overmixing Dough: Gently fold dry ingredients just until combined to maintain a tender, delicate cookie cup structure without becoming tough.
  • Cooling is Crucial: Allow cookie cups to rest in the pan for 5 minutes before removing, which helps them set and prevents crumbling during transfer.
  • Prep Time: 15 minutes
  • Cook Time: 10 minutes
  • Category: Desserts, Snacks
  • Method: Baking
  • Cuisine: American

Nutrition

  • Serving Size: 13
  • Calories: 210
  • Sugar: 14 g
  • Sodium: 80 mg
  • Fat: 10 g
  • Saturated Fat: 6 g
  • Unsaturated Fat: 4 g
  • Trans Fat: 0 g
  • Carbohydrates: 30 g
  • Fiber: 0 g
  • Protein: 2 g
  • Cholesterol: 30 mg
Mia Reynolds

Mia Reynolds

Food Writer & Home Cooking Specialist

Expertise

Easy Home Baking, Recipe Writing and Storytelling, Local and Seasonal Ingredients, Baking for Beginners

Education

New England Culinary Institute (NECI), Montpelier, Vermont

  • Certificate: Baking and Pastry Arts Certificate
  • Focus: Hands-on baking skills, pastry basics, and creating delicious, approachable baked goods.

Community College of Vermont, Winooski, Vermont

  • Degree: Certificate in Food and Beverage Management
  • Focus: Essential knowledge of recipe development, ingredient sourcing, and food business basics.

Mia Reynolds fell in love with baking as a teenager experimenting in her family kitchen. Her passion took her to New England Culinary Institute, where she learned practical pastry techniques, and later to Community College of Vermont to deepen her understanding of food management.

Mia combines clear, simple baking instructions with heartwarming stories, making home baking approachable for everyone.

Leave a Reply

Your email address will not be published. Required fields are marked *

Recipe rating 5 Stars 4 Stars 3 Stars 2 Stars 1 Star