
The Fluffiest Butter Biscuits Recipe You’ll Ever Bake
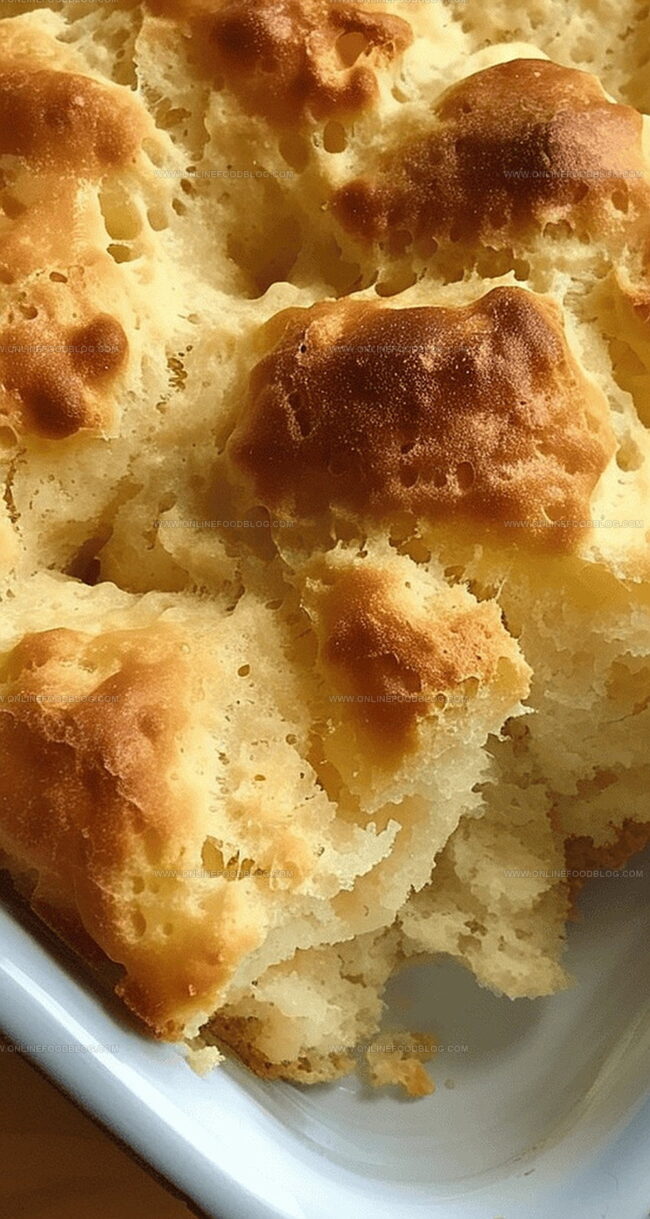
Golden, flaky butter biscuits that melt in your mouth have been a Southern staple for generations.
These irresistible butter biscuits recipe bring comfort and warmth to any table.
Layers of buttery goodness create a tender, mouthwatering treat that feels like a warm hug.
Perfectly crisp on the outside and soft on the inside, these biscuits require just a few simple ingredients.
No fancy techniques or complicated steps stand between you and bakery-worthy results.
Each bite promises a rich, nostalgic flavor that connects you to cherished culinary traditions.
Grab a hot cup of coffee and get ready to bake these delectable biscuits that will make everyone at the table smile.
Quick Recipe Overview
Butter Biscuits: Everything You’ll Need
For Base and Moisture:For Dry Mixture:For Finishing Touch:Baking Tools for Buttery Biscuits
Instructions for Fluffy Butter Biscuits

Crank up the heat to a toasty 450°F, getting ready for some golden, buttery magic.
Mix together the powdery components in a roomy bowl, creating a soft, fluffy foundation for your biscuits.
Pour in the tangy buttermilk and gently fold until the mixture transforms into a delightful, sticky dough.
Zap the butter in the microwave until it turns into a liquid golden pool, spreading it generously across your baking dish.
Lovingly spread the soft dough over the melted butter, making sure it kisses the edges of the pan.
Slice the dough into nine perfect squares, each one promising a crispy, buttery bite.
Slide the dish into the hot oven and let the biscuits dance and transform for 20-25 minutes until they turn a beautiful, sun-kissed golden brown.
Flavor Twists to Try in Butter Biscuits
Serving Butter Biscuits for Any Meal
Best Way to Keep Butter Biscuits Soft
Print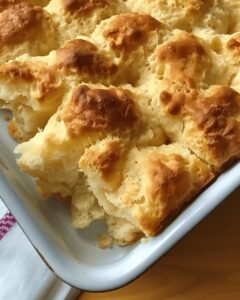
Golden Butter Biscuits Recipe
- Total Time: 30-35 minutes
- Yield: 13 1x
Description
Grandma’s butter biscuits promise a nostalgic journey through Southern kitchens with golden, flaky perfection. Warm memories and buttery comfort embrace hungry souls craving homemade goodness you’ll savor with each delightful bite.
Ingredients
- 2 ½ cups (312.5 g) all-purpose flour
- 1 stick (113 g) butter
- 2 cups (480 ml) buttermilk
- 4 teaspoons (20 ml) baking powder
- 4 teaspoons (20 ml) sugar
- 2 teaspoons (10 ml) salt
Instructions
- Prep Oven: Preheat oven to 450°F, positioning rack in center for optimal heat circulation and even baking.
- Mix Dry Ingredients: Combine flour, baking powder, salt, and sugar in a large mixing bowl, whisking thoroughly to distribute leavening agents and prevent clumping.
- Create Dough: Pour buttermilk into dry ingredients, folding gently with a spatula until a shaggy, soft dough forms without overmixing, which can lead to tough biscuits.
- Butter Preparation: Melt butter and generously brush across the bottom and sides of a 9-inch baking dish, ensuring complete coverage for a rich, golden exterior.
- Shape and Cut: Transfer dough into buttered dish, pressing softly to fill corners, then slice into nine equal squares using a sharp knife for uniform baking.
- Bake to Perfection: Place baking dish in preheated oven and bake 20-25 minutes, watching for a deep golden-brown top and crisp edges that signal complete cooking.
- Final Touch: Remove biscuits from oven, let rest 3-5 minutes to set, then serve warm, revealing a tender, flaky interior that epitomizes classic comfort baking.
Notes
- Optimize Butter Temperature: Use cold, cubed butter for the flakiest texture, ensuring it remains chilled until just before mixing to create delicate, layered biscuits.
- Master Mixing Technique: Handle the dough minimally to prevent tough biscuits; mix just until ingredients combine, keeping a light touch for maximum tenderness.
- Check Oven Accuracy: Verify your oven’s true temperature with a reliable thermometer, as slight variations can dramatically impact baking results and golden-brown perfection.
- Serve Immediately Fresh: Enjoy biscuits warm from the oven for the ultimate taste experience, as they quickly lose their crisp exterior and soft interior when cooled.
- Prep Time: 10 minutes
- Cook Time: 20-25 minutes
- Category: Breakfast, Snacks, Desserts
- Method: Baking
- Cuisine: American
Nutrition
- Serving Size: 13
- Calories: 162
- Sugar: 1.2 g
- Sodium: 119 mg
- Fat: 7.6 g
- Saturated Fat: 4.5 g
- Unsaturated Fat: 3.1 g
- Trans Fat: 0 g
- Carbohydrates: 22.5 g
- Fiber: 0.6 g
- Protein: 3.5 g
- Cholesterol: 18 mg
Mia Reynolds
Food Writer & Home Cooking Specialist
Expertise
Easy Home Baking, Recipe Writing and Storytelling, Local and Seasonal Ingredients, Baking for Beginners
Education
New England Culinary Institute (NECI), Montpelier, Vermont
Community College of Vermont, Winooski, Vermont
Mia Reynolds fell in love with baking as a teenager experimenting in her family kitchen. Her passion took her to New England Culinary Institute, where she learned practical pastry techniques, and later to Community College of Vermont to deepen her understanding of food management.
Mia combines clear, simple baking instructions with heartwarming stories, making home baking approachable for everyone.