Cheesy Garlic Pizza Dip Sliders Recipe: Party Snack Magic
Dive into a mouthwatering world where classic garlic pizza dip meets irresistible sliders, creating a flavor explosion that’ll make taste buds dance.
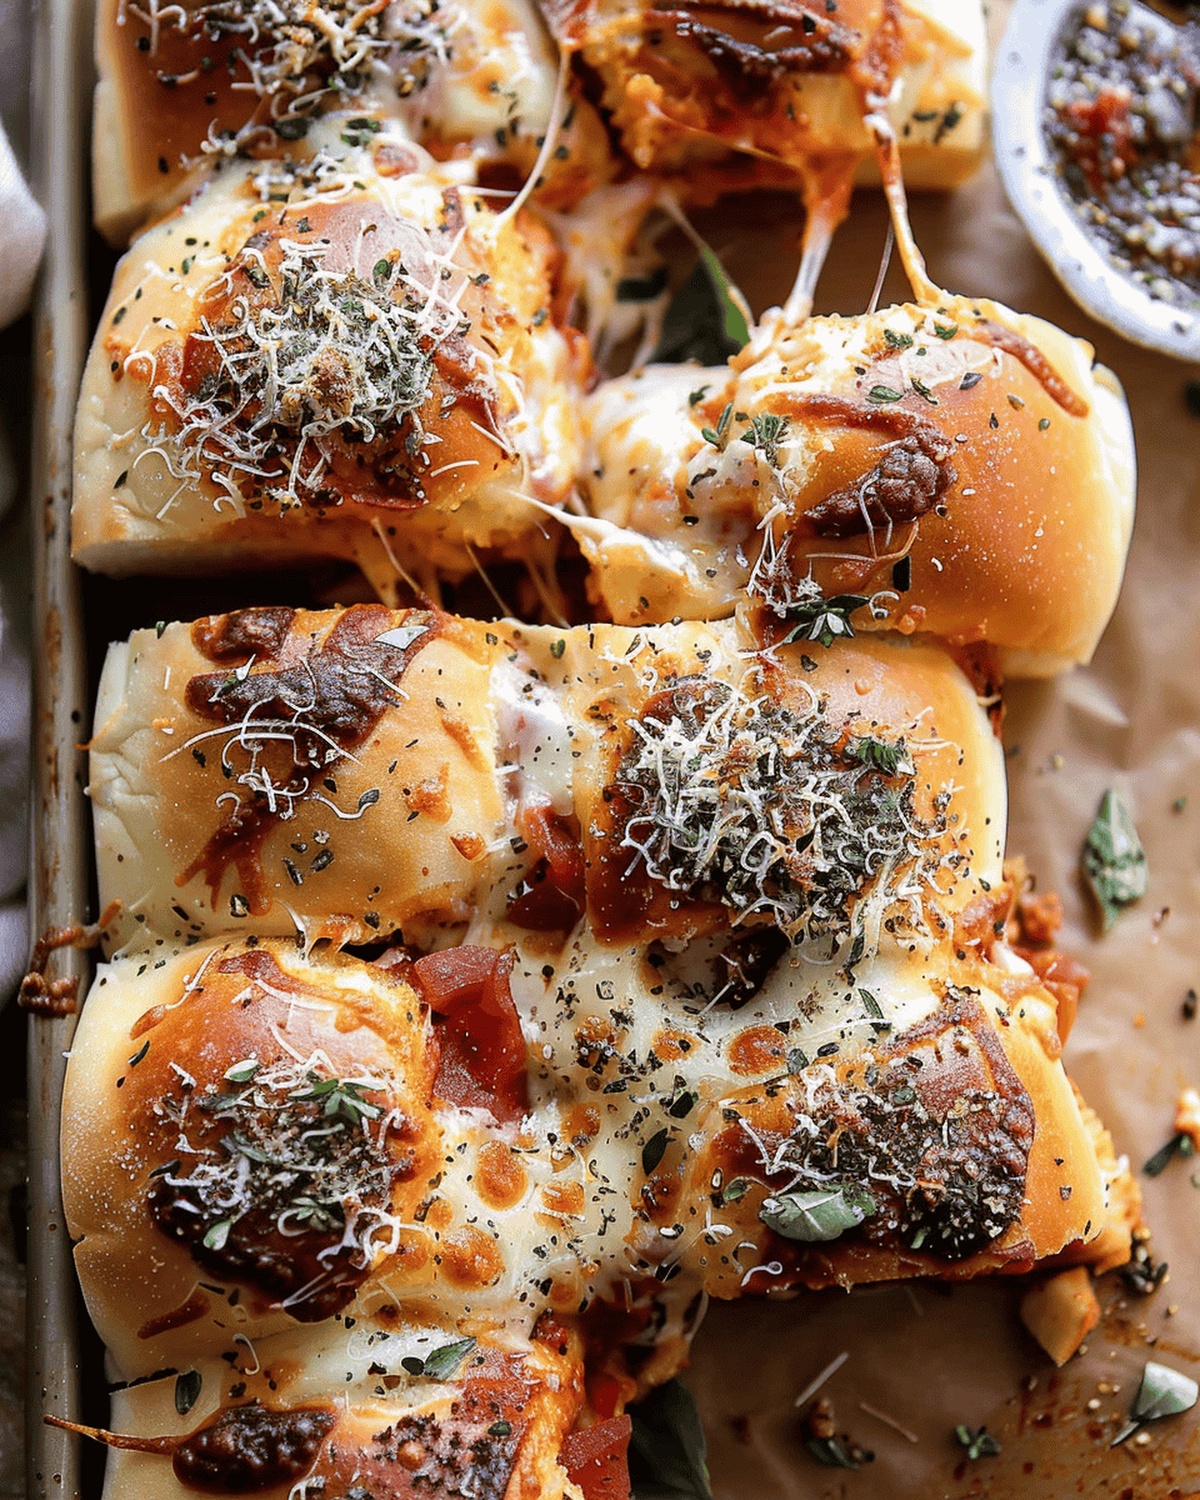
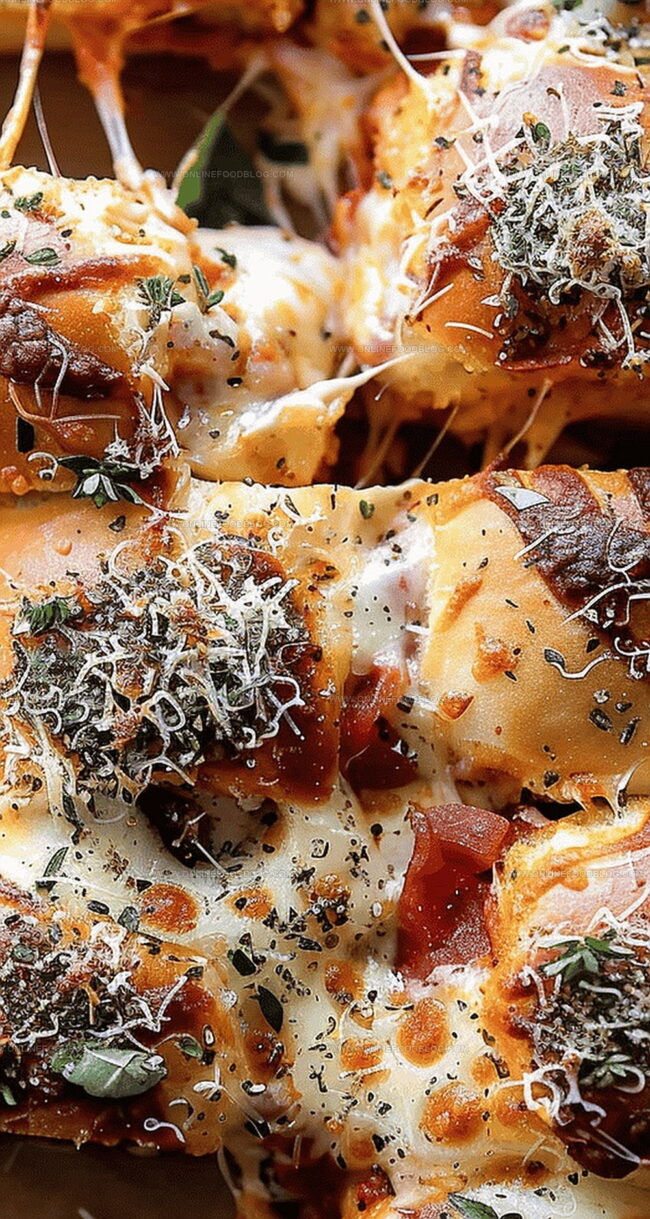
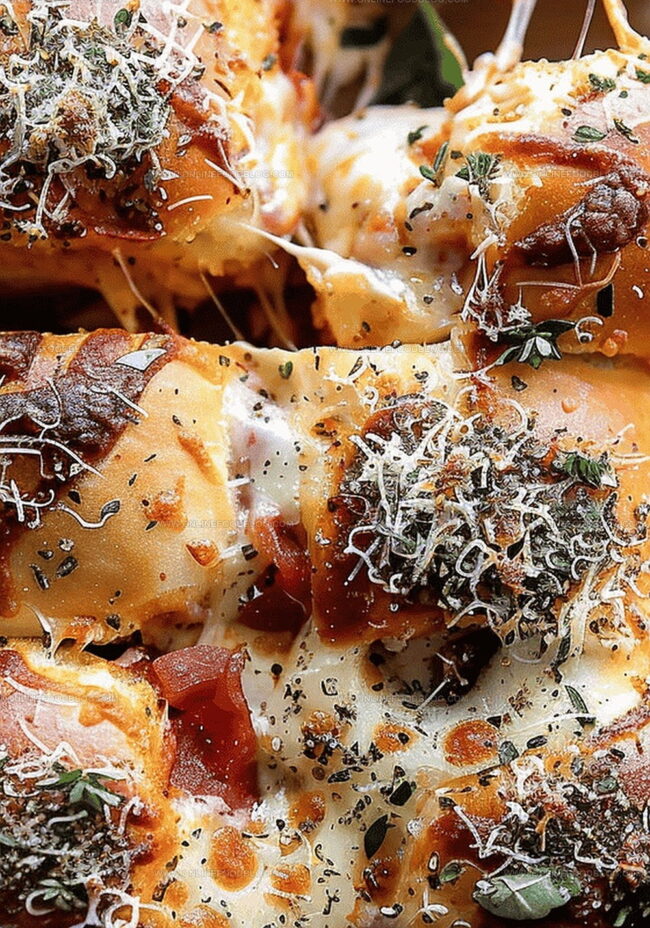
These little sandwiches pack a serious punch of cheesy, garlicky goodness.
Melted cheese, zesty marinara, and tender meat combine in a handheld delight that screams comfort food.
Perfectly toasted buns cradle a savory filling that’ll have everyone asking for seconds.
Weekend gatherings or game nights just found their ultimate star player.
Each bite delivers a delicious blend of pizza-inspired magic that’s impossible to resist.
Grab your ingredients and get ready to become the ultimate party hero.
Quick Recipe Overview
Garlic Pizza Dip Sliders—Ingredient Scoop
For Bread Base:For Cheese and Sauce:For Flavor Enhancers:Slider Tools for Melty Layers & Toasted Buns
How to Build, Bake, and Serve These Sliders
Garlic Pizza Dip Sliders
Gently expose the heart of each garlic bulb by slicing off its crown, letting those precious cloves peek out. Nestle the bulb onto a soft foil blanket and drizzle with golden olive oil, creating a delicious protective wrap.
Slide the garlic package into a toasty 400-degree oven, allowing it to transform into a mellow, caramelized treasure over 40-55 minutes. Look for a beautiful golden hue and irresistible softness.
Arrange dinner roll bottoms on a lined baking sheet like a cozy blanket. Lavish them with vibrant marinara sauce, a blanket of melty mozzarella and provolone, and scattered pepperoni. Sprinkle a generous dusting of parmesan across this flavor landscape.
Once cooled, gently coax the roasted garlic cloves from their papery homes. Blend them into soft butter with a symphony of herbs – sage, basil, oregano, parsley – and a whisper of chili flakes for excitement.
Crown the sliders with their matching tops, then generously paint the herbal garlic butter across the surface. First, cover with foil and bake for 10 minutes, then unveil and bake another 10 until cheese reaches molten perfection.
Brush any remaining garlic butter over the golden sliders and serve immediately, inviting everyone to dive into this flavor adventure.
Twists on Cheese, Garlic, and Pizza Sauce
Sliders That Serve as Snacks or Mains
Reheat and Store Without Soggy Buns
Print
Garlicky Pizza Dip Sliders
- Total Time: 80 minutes
- Yield: 13 1x
Description
Savory garlic pizza dip sliders offer a mouthwatering fusion of classic Italian and American comfort cuisine. Melted cheese, zesty marinara, and herb-infused garlic spread create an irresistible experience you’ll crave again and again.
Ingredients
- 1 (12-count) package dinner rolls, halved lengthwise
- 1 – 1 ½ cups marinara sauce
- ½ cup pepperoni, thinly sliced
- ¾ cup mozzarella cheese, shredded (about 85 grams)
- ¾ cup provolone cheese, shredded (about 85 grams)
- ¼ cup parmesan cheese, grated (about 25 grams)
- 3 tbsps salted butter, at room temperature or melted
- 1 head garlic
- 1 tbsp fresh sage, chopped
- 2 teaspoons dried basil
- 1 teaspoon dried oregano
- 1 teaspoon dried parsley
- 1 pinch chili flakes
- Extra virgin olive oil for drizzling
Instructions
- Roast Garlic: Trim the top of a whole garlic head, drizzle with olive oil, wrap in aluminum foil, and bake at 400°F for 40-55 minutes until cloves are golden and caramelized.
- Prepare Base: Arrange dinner roll bottoms on a parchment-lined baking sheet, spread marinara sauce evenly, then layer mozzarella, provolone, and pepperoni slices. Sprinkle half the parmesan cheese over the pepperoni.
- Assemble Sliders: Place dinner roll tops over the prepared base. Extract cooled roasted garlic cloves and blend with melted butter, remaining parmesan, sage, basil, oregano, parsley, and chili flakes.
- Bake and Finish: Spread the garlic herb butter mixture across the roll tops. Cover with foil and bake for 10 minutes, then remove foil and continue baking for another 10 minutes until cheese melts and edges turn golden brown. Brush with remaining garlic butter and serve immediately while hot and bubbling.
Notes
- Roast Garlic Carefully: Trim the top of the garlic head just enough to expose cloves, preventing burning and ensuring even caramelization.
- Cheese Coverage Tip: Layer cheeses generously to create a complete, gooey melted surface that connects all slider components.
- Herb Butter Blend: Mix roasted garlic with herbs and butter when it’s slightly cooled to maximize flavor infusion and prevent burning delicate herbs.
- Foil Technique: Use aluminum foil for the first baking stage to trap steam and create perfectly melted cheese without excessive browning.
- Prep Time: 15 minutes
- Cook Time: 65 minutes
- Category: Appetizer, Snacks
- Method: Baking
- Cuisine: American
Nutrition
- Serving Size: 13
- Calories: 290
- Sugar: 2 g
- Sodium: 680 mg
- Fat: 17 g
- Saturated Fat: 10 g
- Unsaturated Fat: 5 g
- Trans Fat: 0 g
- Carbohydrates: 26 g
- Fiber: 1 g
- Protein: 12 g
- Cholesterol: 45 mg
Mia Reynolds
Food Writer & Home Cooking Specialist
Expertise
Easy Home Baking, Recipe Writing and Storytelling, Local and Seasonal Ingredients, Baking for Beginners
Education
New England Culinary Institute (NECI), Montpelier, Vermont
Community College of Vermont, Winooski, Vermont
Mia Reynolds fell in love with baking as a teenager experimenting in her family kitchen. Her passion took her to New England Culinary Institute, where she learned practical pastry techniques, and later to Community College of Vermont to deepen her understanding of food management.
Mia combines clear, simple baking instructions with heartwarming stories, making home baking approachable for everyone.