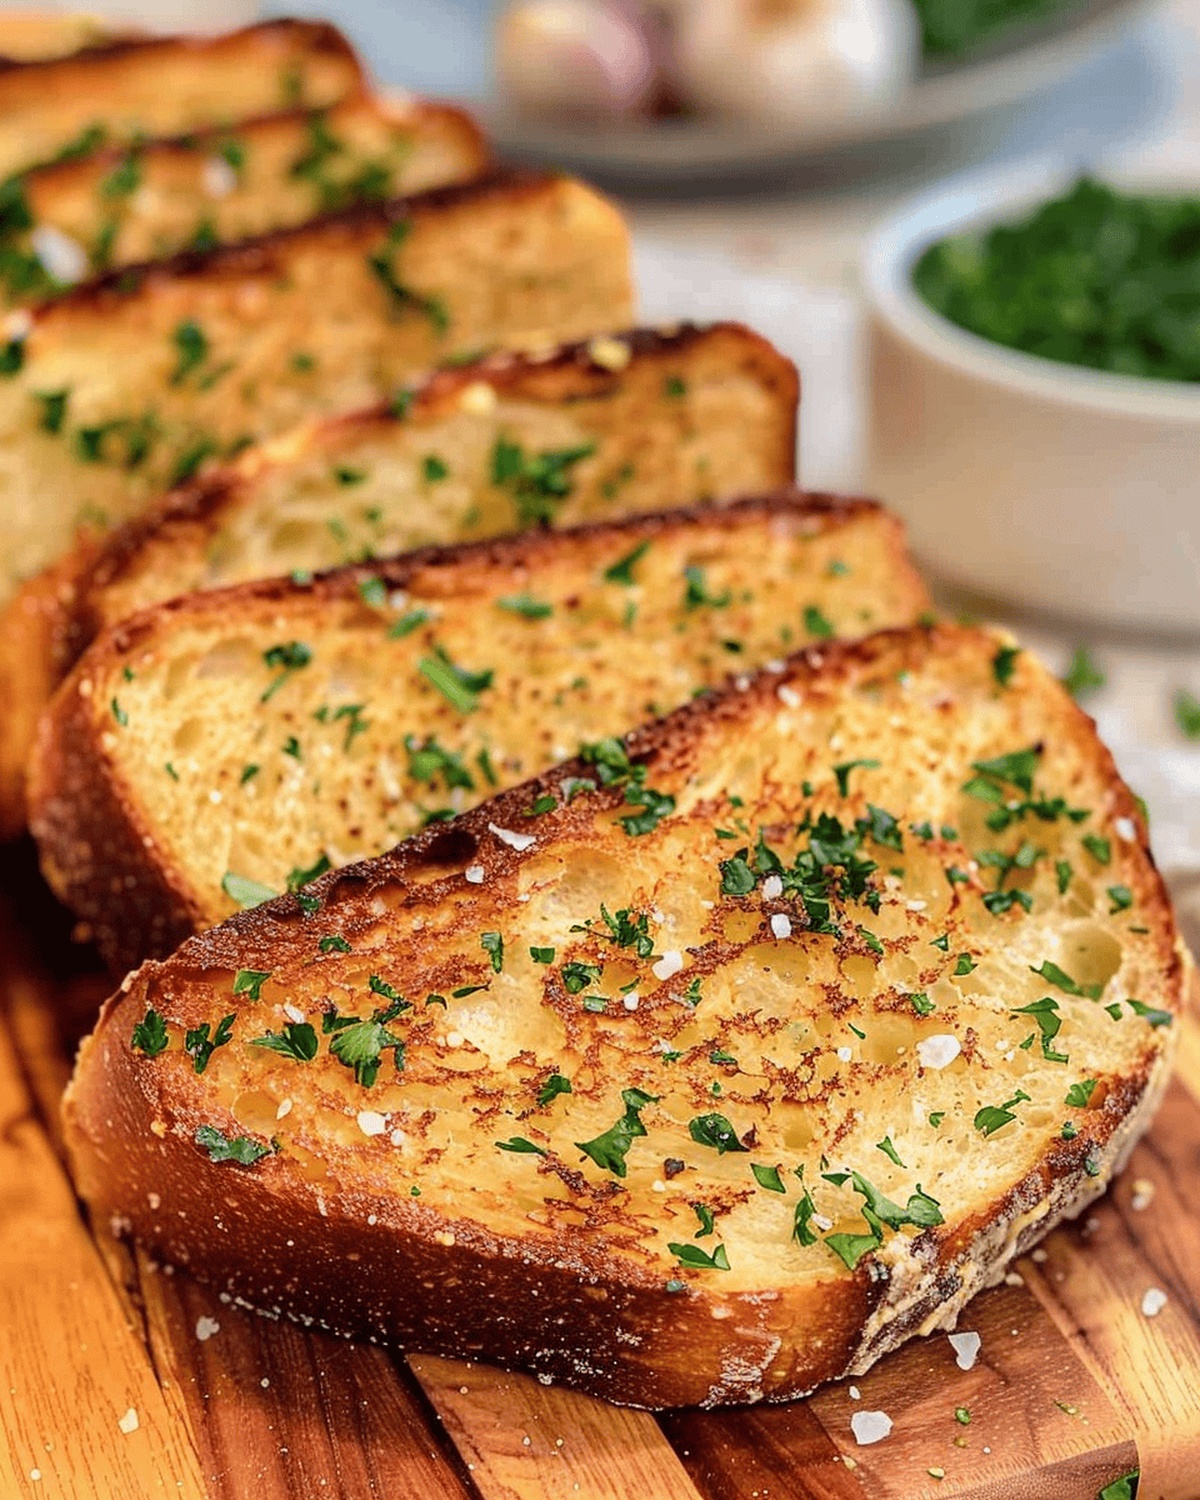
Try This Garlic Herb Delight Bread Recipe Today
Garlic herb delight bread changes ordinary loaves into extraordinary culinary experiences with its aromatic blend of savory ingredients.
Fragrant herbs dance through soft, pillowy dough, creating a sensory symphony that awakens taste buds.
Each slice promises a journey of rich, complex flavors that elevate simple dining moments.
Skilled bakers understand how strategic herb combinations can dramatically enhance bread fundamental character.
Crisp edges and tender interiors offer a delightful textural contrast that makes this recipe irresistible.
Mediterranean and European baking traditions inspire this remarkable creation, celebrating centuries of bread-making artistry.
Warm, freshly baked slices promise comfort and connection around any dining table.
Garlic Herb Bread Overview
Ingredients for Garlic Herb Bread
Main Base Ingredients:Garlic Ingredients:Herb and Garnish:Bake Garlic Herb Bread with Ease
Step 1: Warm Up the Oven
Crank up your oven to 180ºC (350°F), getting it toasty and ready for baking magic.
Step 2: Slice the Bread
Grab a French loaf and slice it carefully, keeping the bottom intact like a bread accordion.
Step 3: Create Garlic Magic
Crush garlic cloves with these ingredients:Smash and slide the knife to transform garlic into a smooth, fragrant paste.
Step 4: Blend Garlic Mixture
In a small bowl, whisk together:Mix until super smooth and lump-free.
Step 5: Craft Heavenly Butter Spread
Combine these delicious ingredients:Stir until everything becomes a creamy, aromatic blend.
Step 6: Dress the Bread
Generously slather the garlic butter mixture between each bread slice, making sure every crevice gets some love.
Step 7: Bake to Perfection
Slide the bread into the preheated oven and bake for 12-15 minutes until it turns golden and crispy.
Step 8: Add Final Flourish
Pull the bread out and immediately shower it with chopped parsley for a burst of color and fresh flavor.
Garlic Herb Bread Helpful Tips
Save Garlic Herb Bread for Later
What to Serve with Garlic Herb Bread
Garlic Herb Bread Swaps
Print
Garlic Herb Delight Bread Recipe
- Total Time: 25 minutes
- Yield: 8 1x
Description
Garlic herb delight bread offers a symphony of Mediterranean flavors that dance across your palate. Fragrant rosemary, thyme, and roasted garlic blend into a rustic loaf promising comforting warmth and irresistible aroma you cannot resist.
Ingredients
Bread
- 1 French loaf (large)
Herbs and Seasonings
- ¼ cup fresh parsley (chopped)
- 2 tablespoons garlic powder
- Salt flakes
Wet Ingredients and Fats
- ¼ cup butter (softened)
- 2 garlic cloves
- 2 tablespoons water
Instructions
- Warm the oven to 180 degrees Celsius (350 degrees Fahrenheit) to create an ideal baking environment.
- Carefully slice the French loaf horizontally, maintaining connectivity at the base to preserve the bread’s structural integrity.
- Create a fragrant garlic foundation by crushing fresh garlic cloves with sea salt using the broad side of a knife, transforming them into a smooth, aromatic paste.
- Whisk together water and garlic powder in a small mixing vessel until a uniform consistency is achieved.
- Blend softened butter with the freshly prepared garlic paste and garlic powder mixture, ensuring thorough incorporation of flavors.
- Generously distribute the herbed butter mixture between each bread slice, allowing the flavors to penetrate deeply.
- Transfer the prepared loaf to the preheated oven, baking for 12-15 minutes until the edges develop a golden, crisp exterior.
- Upon removing from the oven, immediately embellish with finely chopped fresh parsley, adding a vibrant herbaceous touch and visual appeal.
Notes
- Prep Ahead: Have all ingredients at room temperature for smooth mixing and easier spreading of the garlic butter.
- Slice Smart: Cut the French loaf carefully without slicing completely through, creating a connected accordion-style design for maximum flavor absorption.
- Garlic Crushing Tip: Using sea salt while crushing garlic helps break down the cloves more effectively and enhances the overall flavor profile.
- Butter Blend: Ensure butter is softened but not melted to achieve the perfect creamy consistency for spreading.
- Baking Watch: Keep an eye on the bread during the last few minutes of baking to prevent burning and achieve a perfect golden-brown color.
- Fresh Finish: Sprinkle fresh parsley immediately after baking to preserve its vibrant color and release maximum aromatic oils.
- Prep Time: 10 minutes
- Cook Time: 15 minutes
- Category: Snacks, Appetizer, Breakfast
- Method: Baking
- Cuisine: American
Nutrition
- Serving Size: 8
- Calories: 135 kcal
- Sugar: 1 g
- Sodium: 220 mg
- Fat: 7 g
- Saturated Fat: 4 g
- Unsaturated Fat: 2 g
- Trans Fat: 0 g
- Carbohydrates: 16 g
- Fiber: 1 g
- Protein: 3 g
- Cholesterol: 15 mg
Lucas Bennett
Founder & Recipe Creator
Expertise
Simple Everyday Recipes, Sustainable Cooking Practices, Creative Meal Planning, Recipe Testing and Improvement
Education
Fox Valley Technical College, Appleton, Wisconsin
Lake Superior College, Duluth, Minnesota
Lucas Bennett’s cooking journey started in his parents’ kitchen, where he learned to prepare tasty, no-fuss meals from scratch. His culinary passion led him to Fox Valley Technical College, where he gained practical cooking skills.
He then expanded his focus on sustainability at Lake Superior College. Today, Lucas shares easy, approachable recipes designed to make cooking enjoyable and stress-free for everyone.