
Quick & Fluffy Garlic Cheddar Biscuits Recipe for Cozy Evenings
Garlic cheddar biscuits tantalize taste buds with their irresistible blend of savory flavors and buttery texture.
Cheese lovers find themselves drawn to these delectable treats that promise comfort in every bite.
The kitchen fills with an aromatic symphony when these golden-brown delights emerge from the oven.
Crisp edges and soft, pillowy centers create a textural masterpiece that melts effortlessly on your tongue.
Southern kitchens have long celebrated this culinary gem that enhances simple ingredients into something extraordinary.
Flaky, rich, and packed with bold garlic notes, these biscuits elevate any meal from ordinary to memorable.
Prepare to embark on a mouthwatering journey that will make everyone at the table crave seconds.
Why Garlic Cheddar Biscuits Are Always a Hit
Must-Have Ingredients for Garlic Cheddar Biscuits
Main Ingredients:
Biscuit Dough: – Premade Biscuit Dough: Convenient base for creating cheesy filled biscuits, providing a soft and tender foundation.
Coating and Flavor Enhancers:
Butter Mixture: – Unsalted Butter, Garlic: Adds rich, aromatic flavor and helps coating stick to biscuit surface, fresh garlic preferred for more intense taste.
Cheese Coating: – Parmesan Cheese, Fresh Parsley: Provides a crispy, savory exterior with a fresh herbal note, grated parmesan works best for even coating.
Optional Seasonings:
Finishing Touch: – Salt, Black Pepper: Optional seasonings to enhance overall flavor profile, can be sprinkled lightly before or after baking.
Making Garlic Cheddar Biscuits Step by Step
Step 1: Prepare the Oven
Warm up your oven to 375°F, getting ready for some delicious baking action.
Step 2: Prepare the Biscuit Filling
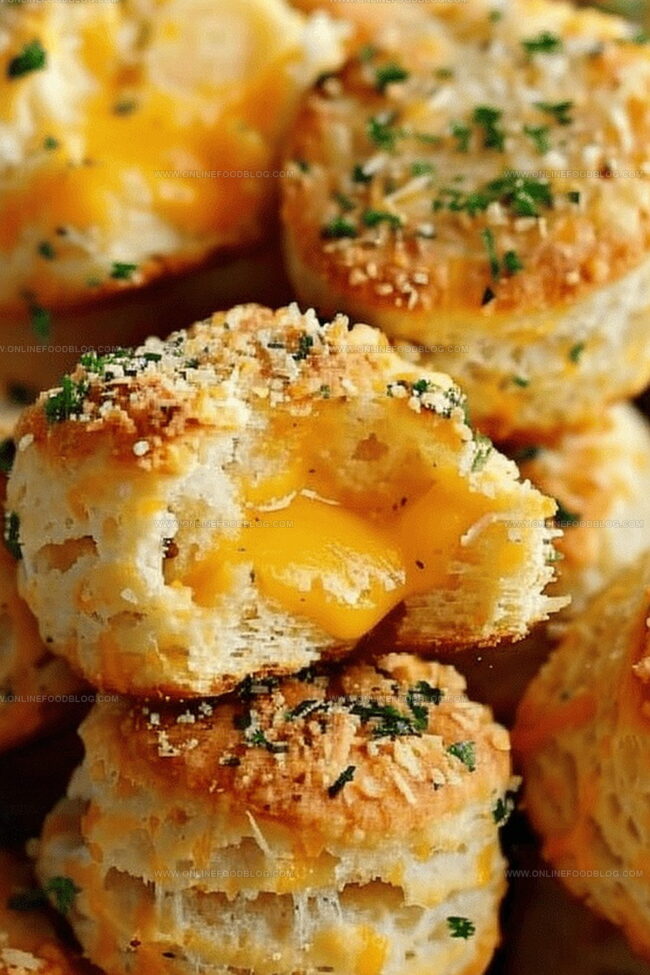
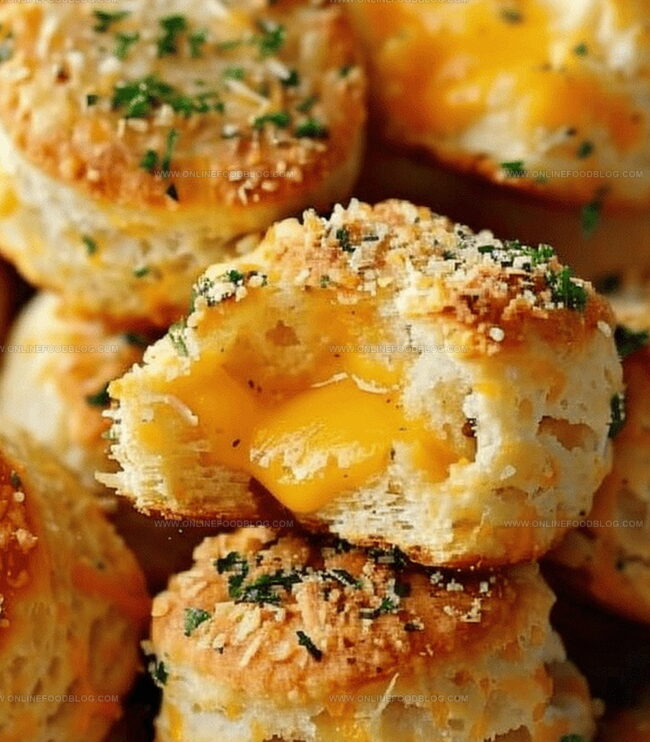
Cut each biscuit in half and gently roll it out. Place a cheese cube in the center and carefully wrap the biscuit dough around the cube, making sure the edges are completely sealed. Shape into a smooth ball.
Step 3: Create the Garlic Butter
Melt butter and garlic together in the microwave for about 12 seconds, creating a fragrant and flavorful mixture.
Step 4: Prepare the Cheese Coating
In a separate bowl, mix together:Step 5: Coat the Biscuit Balls
Dunk each biscuit ball into the warm garlic butter, then roll it in the parsley-parmesan mixture, ensuring a complete and even coating.
Step 6: Arrange for Baking
Place the coated biscuit balls on a parchment-lined baking sheet, giving each one a little space to expand.
Step 7: Bake to Golden Perfection
Slide the baking sheet into the preheated oven and bake for 10-12 minutes, or until the biscuits turn a beautiful golden brown.
Tricks for Fluffy Garlic Cheddar Biscuits
Reheating and Storing Garlic Cheddar Biscuits Right
What Pairs Well with Garlic Cheddar Biscuits
Flavorful Spins on Garlic Cheddar Biscuits
Print
Garlic Cheddar Biscuits Recipe
- Total Time: 25 minutes
- Yield: 10 1x
Description
Warm, cheesy Garlic Cheddar Biscuits deliver Southern comfort with irresistible flavor. Buttery herbs and sharp cheddar create a mouthwatering companion perfect for breakfast, brunch, or alongside your favorite comfort meal.
Ingredients
Main Ingredients:
- 1 can refrigerated biscuits (10 pieces, Country Style recommended)
- 20 cubes cheddar cheese (1.27 cm x 1.91 cm x 1.91 cm, approximately 113 grams)
- 3 tablespoons (45 milliliters) butter
Cheese and Seasoning:
- ⅓ cup (80 milliliters) parmesan cheese
- 2 teaspoons (10 milliliters) dried parsley
Aromatics:
- 1 clove garlic, crushed
Instructions
- Warm the oven to 375°F (190°C), preparing a parchment-lined baking sheet for the golden, cheesy biscuits.
- Carefully slice each refrigerated biscuit in half and gently flatten with a rolling pin to create a thin, uniform circle.
- Position a single cube of cheddar cheese precisely in the center of each biscuit round.
- Carefully fold and wrap the dough around the cheese, meticulously sealing all edges to prevent leakage during baking.
- Delicately roll each filled dough into a smooth, uniform ball, ensuring the cheese remains completely enclosed.
- Combine melted butter and minced garlic in a small ceramic bowl, microwaving for approximately 12-15 seconds until fragrant and fully integrated.
- In a separate shallow dish, blend finely chopped fresh parsley with grated parmesan cheese to create a savory coating.
- Submerge each cheese-filled biscuit ball into the warm garlic butter, ensuring complete and even coverage.
- Immediately roll the butter-coated biscuit in the parsley-parmesan mixture, creating a flavorful exterior.
- Arrange the prepared biscuit balls on the prepared baking sheet, spacing them evenly to allow proper heat circulation.
- Bake in the preheated oven for 10-12 minutes, watching carefully until the exterior turns a delicate golden brown.
Notes
- Seal biscuit dough completely around cheese to prevent melting and leaking during baking.
- Use cold butter and cheese for the best texture and easier handling of the dough.
- Ensure even coating by rolling biscuit balls thoroughly in garlic butter and cheese mixture.
- Check biscuits at 10 minutes to prevent over-browning, as ovens may vary in temperature.
- Let biscuits cool for 2-3 minutes after baking to allow cheese to set and prevent burning.
- Serve warm for maximum flavor and gooey cheese center experience.
- Prep Time: 15 minutes
- Cook Time: 10 minutes
- Category: Breakfast, Snacks, Appetizer
- Method: Baking
- Cuisine: American
Nutrition
- Serving Size: 10
- Calories: 180 kcal
- Sugar: 2 g
- Sodium: 420 mg
- Fat: 12 g
- Saturated Fat: 6 g
- Unsaturated Fat: 4 g
- Trans Fat: 0.5 g
- Carbohydrates: 15 g
- Fiber: 1 g
- Protein: 5 g
- Cholesterol: 25 mg
Lucas Bennett
Founder & Recipe Creator
Expertise
Simple Everyday Recipes, Sustainable Cooking Practices, Creative Meal Planning, Recipe Testing and Improvement
Education
Fox Valley Technical College, Appleton, Wisconsin
Lake Superior College, Duluth, Minnesota
Lucas Bennett’s cooking journey started in his parents’ kitchen, where he learned to prepare tasty, no-fuss meals from scratch. His culinary passion led him to Fox Valley Technical College, where he gained practical cooking skills.
He then expanded his focus on sustainability at Lake Superior College. Today, Lucas shares easy, approachable recipes designed to make cooking enjoyable and stress-free for everyone.