
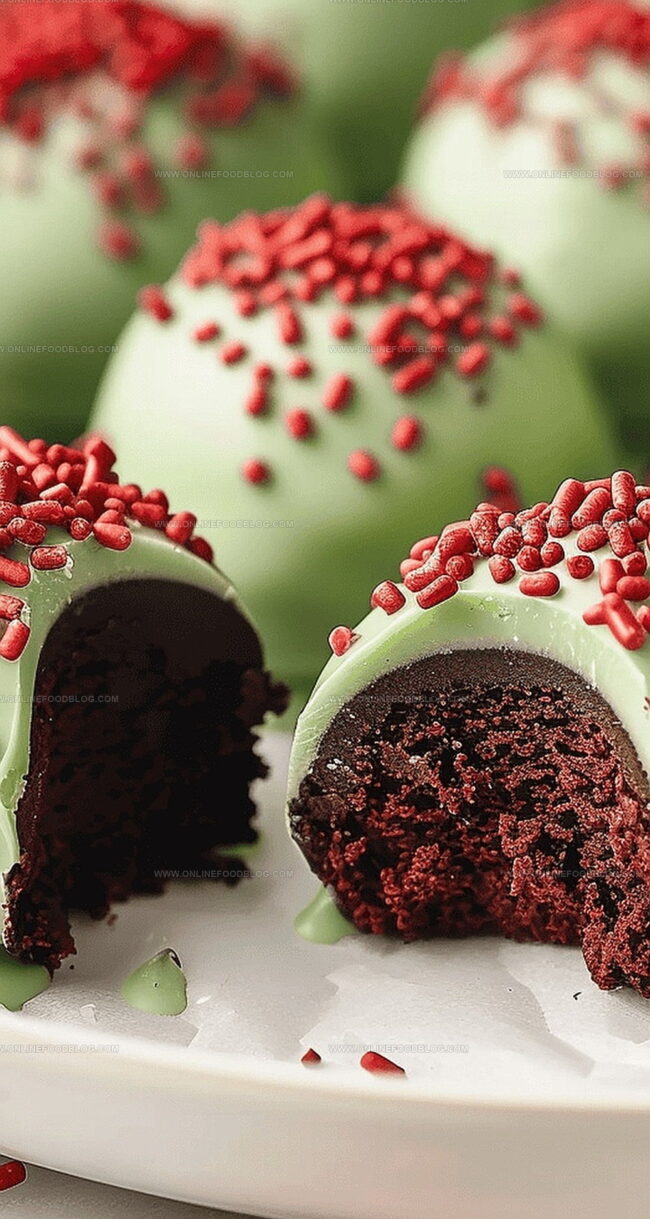
Festive Red Velvet Oreo Truffles: A Dreamy No-Bake Recipe
Red velvet Oreo truffles capture the essence of indulgent dessert magic with their rich, decadent profile.
Combining classic cookie flavor with luxurious chocolate undertones, these bite-sized delights revolutionize ordinary ingredients into extraordinary treats.
Soft, velvety textures meld seamlessly with crumbly cookie components, creating a sensational confectionery experience.
Each morsel promises a delectable blend of sweet and creamy sensations that dance across your palate.
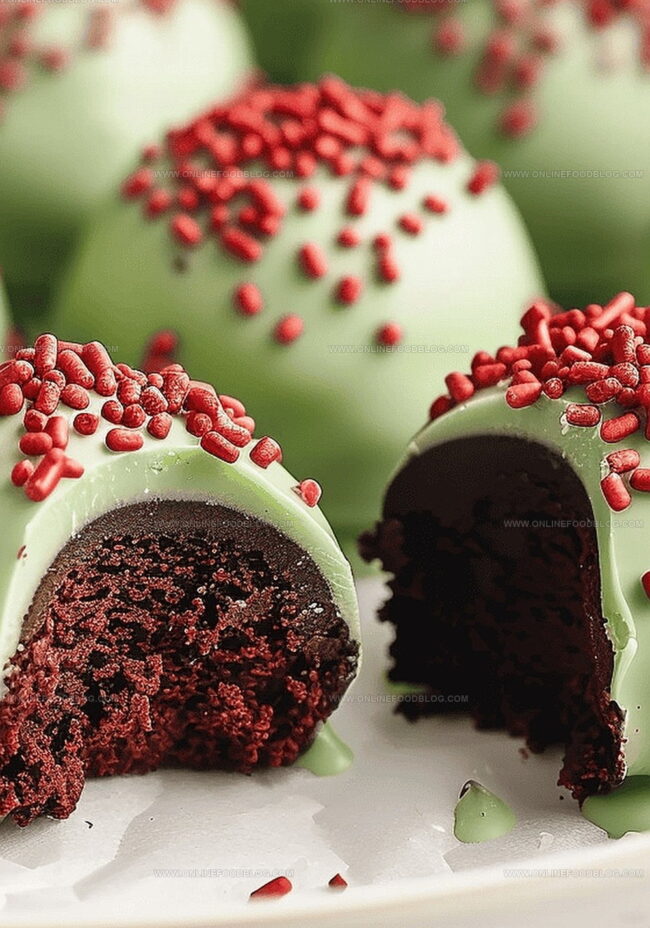
The deep crimson hue signals a festive spirit, perfect for elevating any gathering or special moment.
Sophisticated yet playful, these truffles represent a modern twist on traditional dessert expectations.
Prepare to impress guests and satisfy sophisticated sweet cravings with this irresistible confection.
Why Red Velvet Truffles Sparkle
What’s Inside Red Velvet Truffles
Main Ingredients:
Oreo Cookies: Classic sandwich cookies that form the base of the truffles, providing rich chocolate flavor and crumbly texture.
Cream Cheese: Creamy binding agent that helps hold the truffles together and adds smooth richness.
Coating and Decoration Ingredients:
Green Candy Melts: Festive coating that creates a smooth, glossy exterior for the truffles, adding visual appeal.
Red Candy Hearts: Small decorative elements that provide a cute and celebratory touch to the truffles.
Additional Ingredients:
Parchment Paper: Non-stick surface for easy preparation and chilling of truffles.
Fork or Toothpick: Essential tools for dipping and handling truffles during the coating process.
Make Oreo Red Velvet Truffles
Step 1: Prepare Baking Station
Line a large baking sheet with parchment paper for easy truffle placement.
Step 2: Crush Oreo Cookies
Crush Oreo cookies into fine crumbs using one of these methods:Step 3: Blend Cream Cheese Mixture
In a large mixing bowl, combine:Mix with an electric hand mixer until smooth and fully incorporated
Step 4: Shape Delightful Truffles
Use a 1.5-inch cookie scoop to portion the mixture. Roll each portion into perfectly round balls with clean hands. Place each ball on the prepared baking sheet.
Step 5: Chill Truffle Balls
Refrigerate the truffles for 2 hours to firm up, making coating easier.
Step 6: Melt Candy Coating
Create a smooth candy coating using a double boiler:Step 7: Coat Truffles Beautifully
Dip each truffle into melted candy coating:Step 8: Add Decorative Touches
Finish the truffles with elegant details:Step 9: Final Chilling
Return truffles to refrigerator to completely set and develop perfect texture.
Serving Tip: Best enjoyed chilled and perfect for any festive gathering!
Truffle-Making Tips
Store Your Truffles Easily
Pair Red Velvet Truffles Right
Truffle Variations to Explore
Print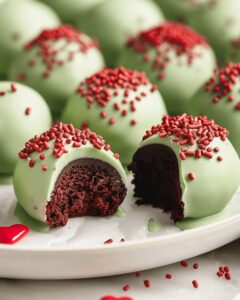
Festive Red Velvet Oreo Truffles For Any Celebration Recipe
- Total Time: 3 hours 45 minutes
- Yield: 20 1x
Description
Red Velvet Oreo Truffles bring luxurious chocolate charm to any gathering. Creamy Oreo crumbs blended with cream cheese and rolled in rich chocolate create an irresistible sweet bite that delights guests with pure indulgence.
Ingredients
Main Ingredients:
- 24.4 ounces (692 grams) red velvet oreos
- 8 ounces (227 grams) cream cheese, softened to room temperature
Coating:
- 15 ounces (425 grams) light green candy melts
Decoration:
- Red candy hearts
Instructions
- Prepare a baking surface by lining a large baking sheet (approximately 18 x 13 inches or 45 x 33 centimeters) with parchment paper, ensuring complete coverage to prevent sticking.
- Transform Oreo cookies into fine, uniform crumbs using a food processor or by placing them in a sealed plastic bag and crushing with a rolling pin until achieving a consistent texture.
- Soften cream cheese at room temperature, then whip with an electric mixer until smooth and creamy, creating a silky base for the truffle mixture.
- Gently fold Oreo crumbs into the cream cheese, mixing thoroughly until a cohesive, moldable mixture forms with no dry crumbs remaining.
- Use a small cookie scoop (1.5 inches or 3.8 centimeters) to portion the mixture, then roll between palms to create smooth, round balls approximately 1 inch (2.5 centimeters) in diameter.
- Carefully place formed truffles on the prepared baking sheet, maintaining slight separation between each ball to prevent sticking.
- Refrigerate the truffles for 2 to 3 hours, allowing them to firm up and become easier to handle during the coating process.
- Melt green candy coating using a double boiler, stirring consistently to maintain a smooth, even consistency and prevent burning.
- Carefully dip each chilled truffle into the melted coating, using a fork to ensure complete coverage and tap gently to remove excess chocolate.
- Return coated truffles to the parchment-lined baking sheet, allowing excess coating to drip off naturally.
- Melt the reserved candy coating and transfer to a piping bag with a fine tip for precise drizzling across the truffles.
- Decorate each truffle with a red candy heart before the coating completely sets, creating an elegant and festive appearance.
- Refrigerate the finished truffles for an additional 15 to 20 minutes to ensure a glossy, firm finish.
Notes
- Quick chilling transforms soft mixture into firm, dippable truffles perfect for handling and coating.
- Crushing Oreos thoroughly ensures smooth, consistent texture throughout the truffle mixture.
- Double boiler method prevents chocolate from burning, creating perfect melted coating every time.
- Fork or toothpick technique helps create clean, professional-looking chocolate-covered truffles with minimal mess.
- Drizzling additional melted candy adds elegant visual texture and professional finishing touch to each truffle.
- Refrigeration helps set candy coating quickly and maintains truffles’ shape and structural integrity.
- Prep Time: 30 minutes
- Cook Time: 3 hours 15 minutes
- Category: Desserts, Snacks
- Method: Blending
- Cuisine: American
Nutrition
- Serving Size: 20
- Calories: 155 kcal
- Sugar: 12 g
- Sodium: 85 mg
- Fat: 9 g
- Saturated Fat: 5 g
- Unsaturated Fat: 3 g
- Trans Fat: 0.5 g
- Carbohydrates: 17 g
- Fiber: 0.5 g
- Protein: 2 g
- Cholesterol: 10 mg
Lucas Bennett
Founder & Recipe Creator
Expertise
Simple Everyday Recipes, Sustainable Cooking Practices, Creative Meal Planning, Recipe Testing and Improvement
Education
Fox Valley Technical College, Appleton, Wisconsin
Lake Superior College, Duluth, Minnesota
Lucas Bennett’s cooking journey started in his parents’ kitchen, where he learned to prepare tasty, no-fuss meals from scratch. His culinary passion led him to Fox Valley Technical College, where he gained practical cooking skills.
He then expanded his focus on sustainability at Lake Superior College. Today, Lucas shares easy, approachable recipes designed to make cooking enjoyable and stress-free for everyone.