No-Bake Cookie Butter Blossoms Recipe to Surprise Everyone
Sweet, pillowy cookie butter blossoms that melt chocolate right into a no-bake sensation will make your dessert dreams come true.
These delightful treats combine creamy cookie butter with rich chocolate in a simple, irresistible way.
No oven needed means zero stress and maximum flavor.
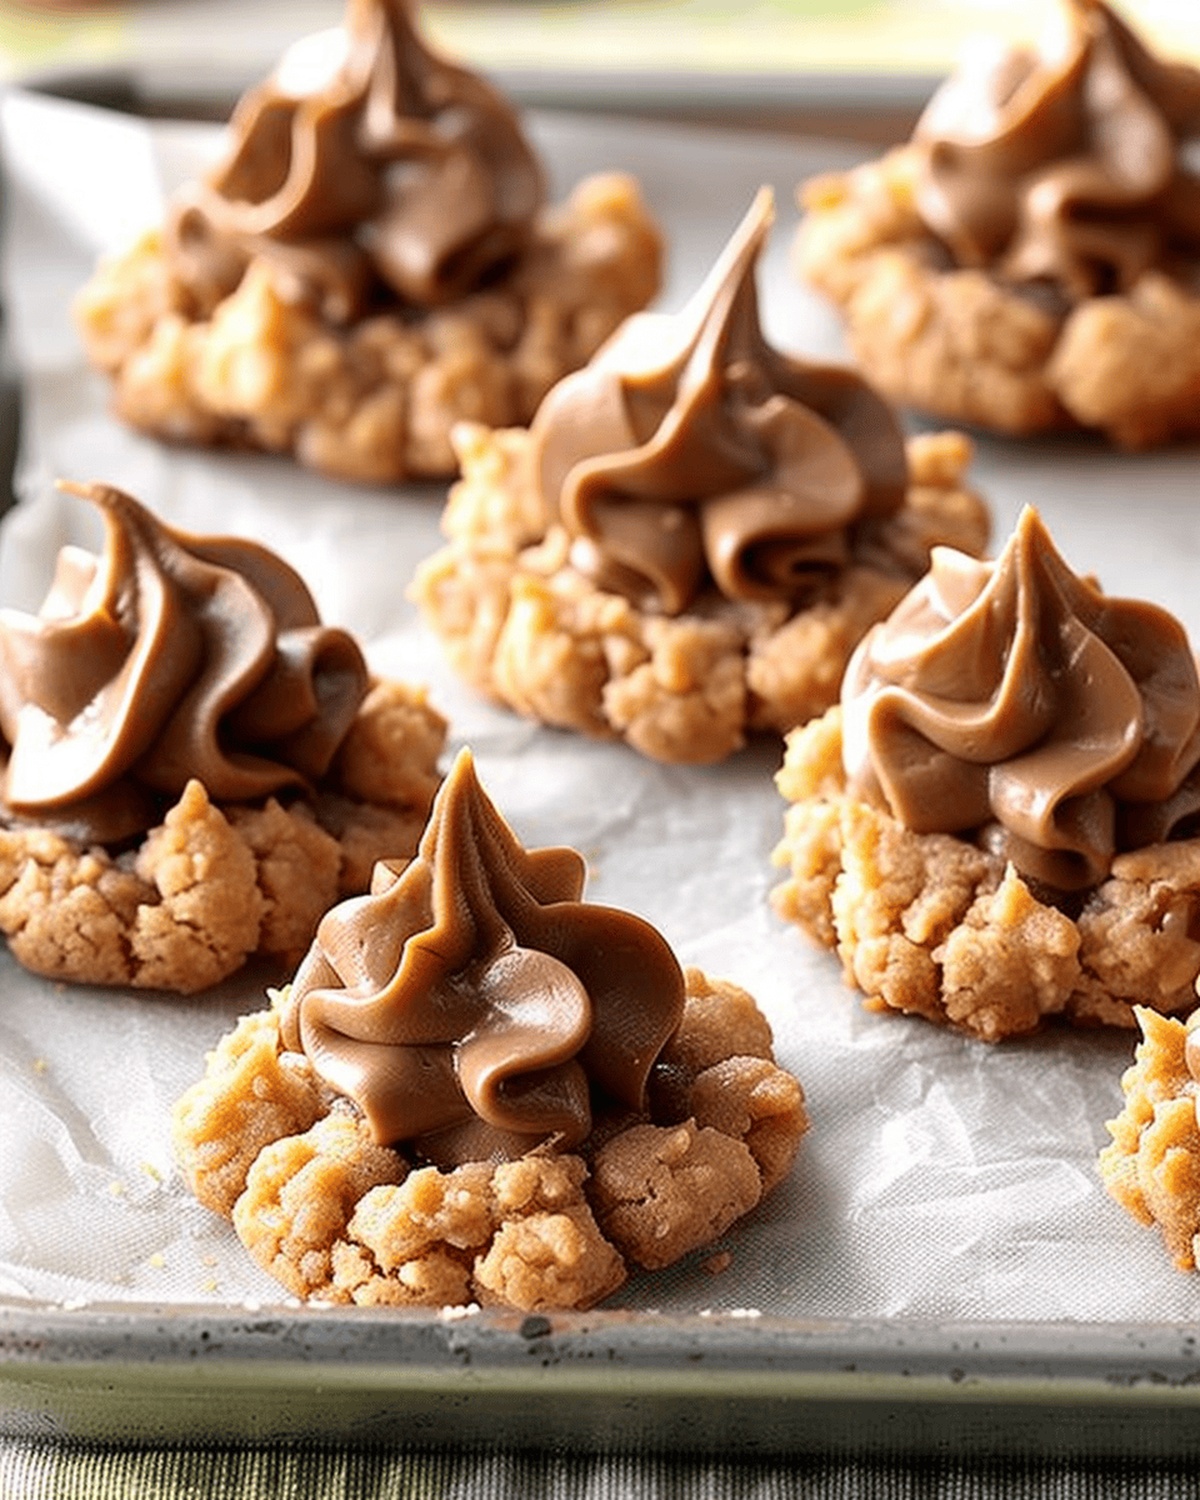
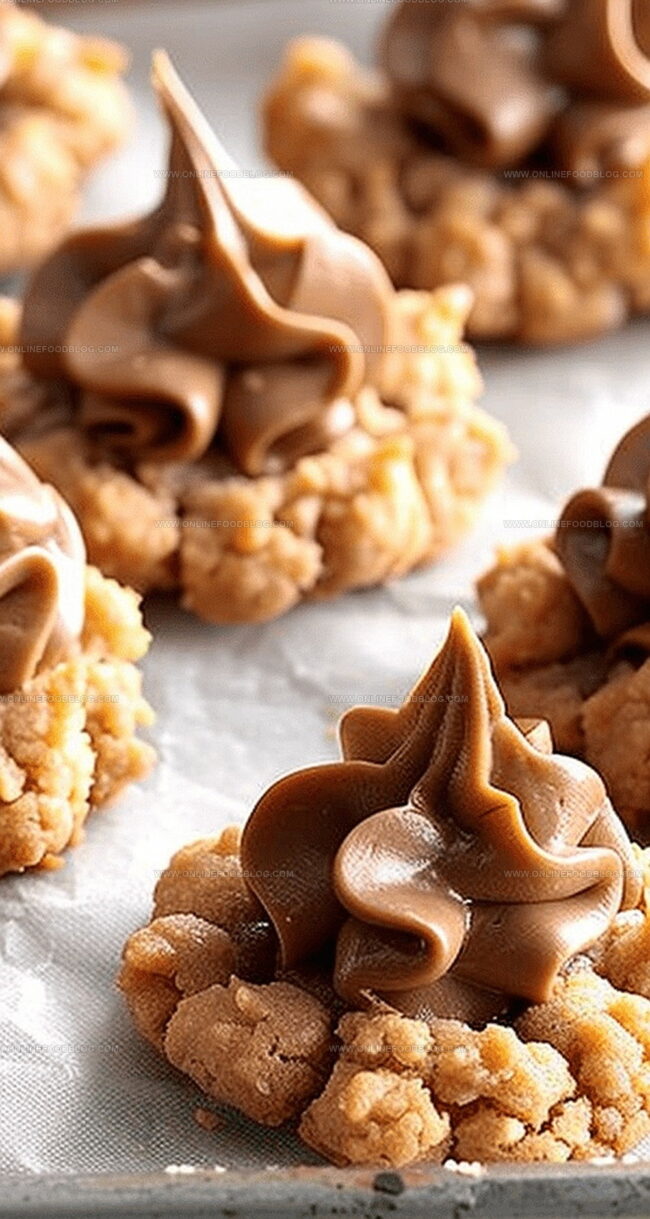
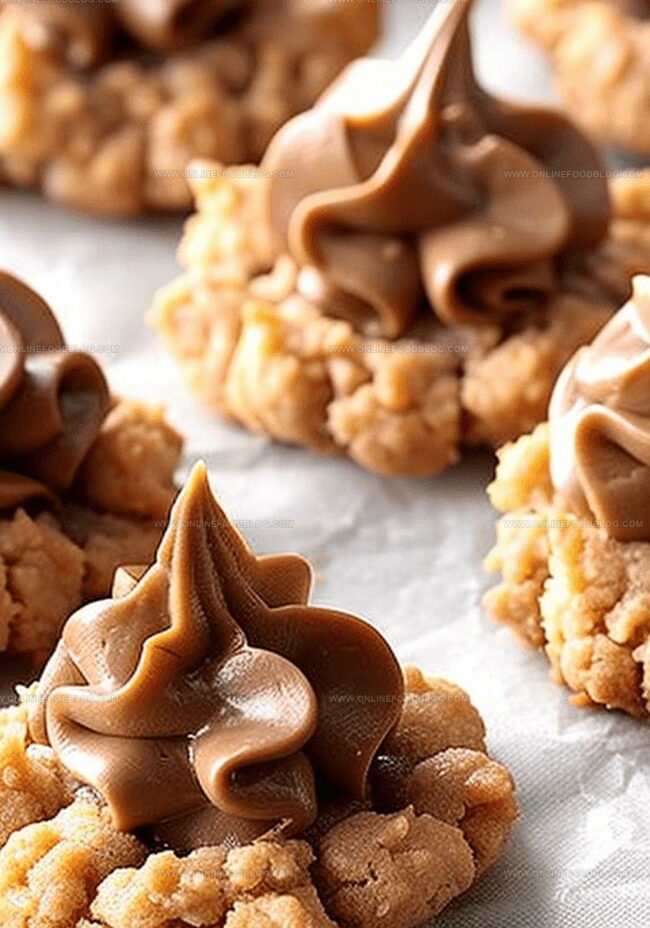
Each bite delivers a perfect balance of smooth, nutty cookie butter and decadent chocolate kisses.
The recipe comes together in minutes, making it ideal for sudden sweet cravings or last-minute gatherings.
You’ll love how effortlessly these no-bake cookies impress everyone at the table.
Grab your ingredients and get ready to indulge in a dessert that’s both easy and incredibly delicious.
Quick Recipe Overview
No-Bake Cookie Butter Blossom Ingredients
For Base and Binding:For Topping:No Oven Needed: Tools for Easy Blossom Assembly
How to Build No-Bake Cookie Butter Blossoms
Warm up the creamy cookie spread with corn syrup in a spacious pan, gently stirring until everything comes together smoothly.
Pull the pan off the heat and fold in the crunchy cereal, making sure every piece gets coated with the luscious spread.
Scoop small round portions of the mixture and roll them into delightful little balls, placing them on a clean sheet of waxed paper.
While the cookie balls are still warm, gently press a chocolate kiss right into the center of each one, creating a magical moment of chocolatey goodness.
Let your cookie creations rest and cool completely until they firm up, allowing the chocolate to nestle perfectly into each treat.
Add Flavors Like Nutella or Biscoff
Serving These Blossoms for a Sweet Treat
Tips to Keep Them Neat and Ready to Eat
Print
Dreamy No-Bake Cookie Butter Blossoms
- Total Time: 15 minutes
- Yield: 17 1x
Description
Scrumptious no-bake cookie butter blossoms bring together creamy Biscoff spread and chocolate kisses in a delightful no-bake treat. Sweet indulgence meets simple preparation, offering a quick dessert you can enjoy with minimal effort.
Ingredients
- 1 cup biscoff creamy cookie spread
- 3 cups rice krispies
- 32 milk chocolate kisses
- ½ cup (120 ml) corn syrup
Instructions
- Melting Blend: Combine cookie butter and corn syrup in a generously sized saucepan, gently heating over low flame while stirring consistently until a silky, homogeneous texture emerges.
- Cereal Integration: Remove from heat and thoroughly fold Rice Krispies into the warm mixture, ensuring each crisp kernel receives complete coating with the luxurious cookie butter blend.
- Shaping and Chocolate Infusion: While mixture remains warm, methodically craft uniform spherical morsels and immediately press a chocolate kiss into the center of each ball, creating an appealing indentation and allowing residual heat to slightly melt chocolate’s base.
- Setting Phase: Transfer delicate treats onto waxed or parchment paper, permitting them to stabilize and solidify at ambient temperature for 15-20 minutes, enabling the chocolate kiss to securely bond and the cookie butter foundation to completely set.
Notes
- Gentle Heating Technique: Melt cookie butter and corn syrup slowly over low heat to prevent burning and ensure a smooth, creamy consistency.
- Cereal Coating Trick: Stir Rice Krispies gently to guarantee each piece gets fully covered, creating a perfect crunch in every bite.
- Uniform Shaping Strategy: Use a tablespoon measure consistently to create evenly sized cookie balls for professional-looking results.
- Quick Chocolate Kiss Placement: Press chocolates into warm balls immediately after forming to help them stick perfectly and create a seamless finish.
- Prep Time: 10 minutes
- Cook Time: 5 minutes
- Category: Desserts, Snacks
- Method: Simmering
- Cuisine: American
Nutrition
- Serving Size: 17
- Calories: 150
- Sugar: 10 g
- Sodium: 50 mg
- Fat: 6 g
- Saturated Fat: 2 g
- Unsaturated Fat: 4 g
- Trans Fat: 0 g
- Carbohydrates: 22 g
- Fiber: 0 g
- Protein: 1 g
- Cholesterol: 0 mg
Mia Reynolds
Food Writer & Home Cooking Specialist
Expertise
Easy Home Baking, Recipe Writing and Storytelling, Local and Seasonal Ingredients, Baking for Beginners
Education
New England Culinary Institute (NECI), Montpelier, Vermont
Community College of Vermont, Winooski, Vermont
Mia Reynolds fell in love with baking as a teenager experimenting in her family kitchen. Her passion took her to New England Culinary Institute, where she learned practical pastry techniques, and later to Community College of Vermont to deepen her understanding of food management.
Mia combines clear, simple baking instructions with heartwarming stories, making home baking approachable for everyone.