Dreamy Bite-Sized Mini Cheesecakes Recipe for Sweet Joy
Creamy and decadent mini cheesecakes dance with delightful simplicity, promising a melt-in-your-mouth dessert that captures hearts.
These bite-sized treats pack an incredible punch of rich, smooth flavor in every single bite.
The mini cheesecakes recipe brings an elegant touch to any gathering or sweet moment.
Perfectly portioned and incredibly easy to make, these little delights require minimal effort but deliver maximum satisfaction.
Silky cream cheese blends seamlessly with sweet graham cracker crusts, creating a classic dessert that never disappoints.
With just a few simple ingredients and straightforward steps, you can craft these irresistible miniature masterpieces.
Your guests will be enchanted by these delectable personal-sized cheesecakes that look as stunning as they taste.
Quick Recipe Overview
What You’ll Need for Mini Cheesecake Bites
For The Crust:For The Cheesecake Filling:For The Whipped Topping:Tools to Bake Perfect Mini Cheesecakes
Instructions for Making Creamy Mini Cheesecakes
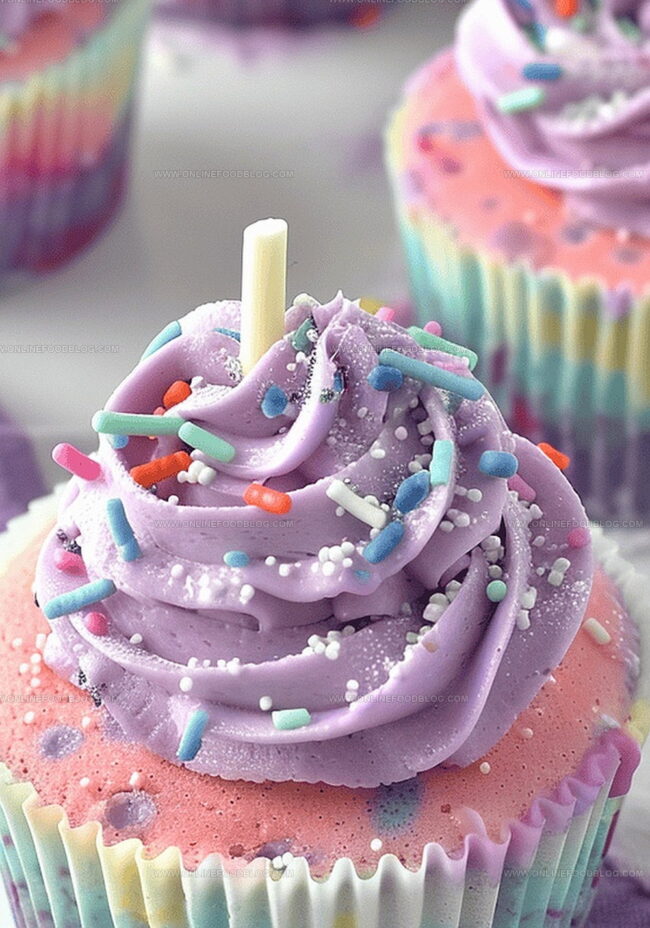
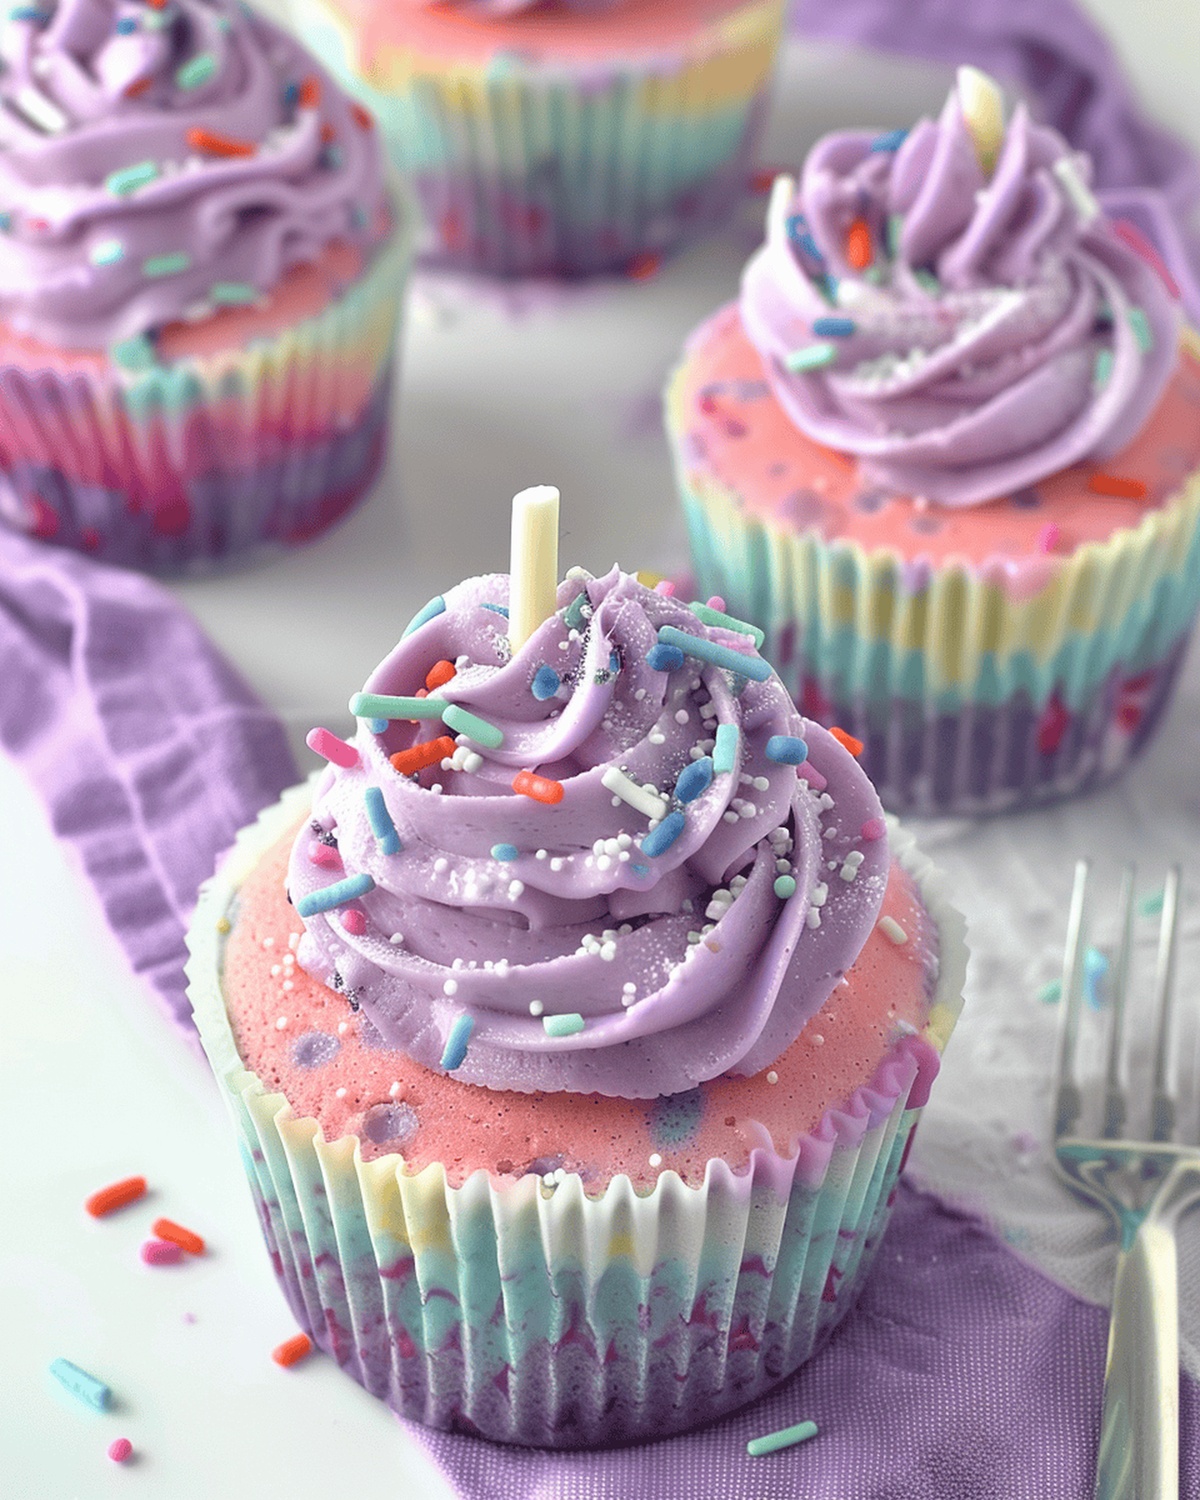
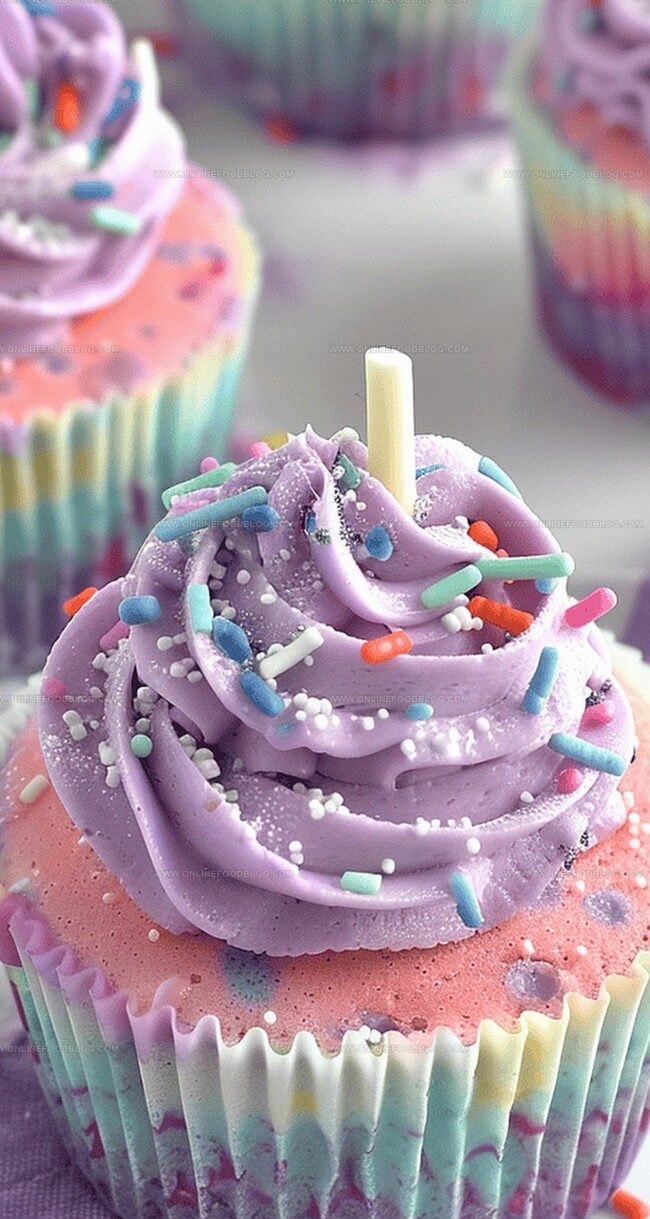
Colorful Mini Cheesecake Adventure
Grab graham crackers and transform them into a sandy texture. Mix with a touch of sweetness, then introduce melted butter to create a delightful base. Press this mixture firmly into each muffin liner, creating a solid foundation for your mini masterpieces.
Whip cream cheese until silky smooth, blending in powdered sugar. In another bowl, transform heavy cream into billowy clouds, adding a splash of vanilla for extra magic. Gently marry these two mixtures, creating a luxurious backdrop for your colorful creation.
Divide your creamy mixture into three separate bowls. Awaken each section with vibrant food coloring – blue, pink, and purple. Swirl the colors gently, creating a mesmerizing marble effect across your cheesecake base.
Tuck your mini cheesecakes into the refrigerator for several hours. This resting period allows flavors to mingle and textures to become perfectly set.
Crown your mini cheesecakes with a delicate swirl of whipped cream. Sprinkle a playful confetti of colorful toppings to complete your dessert masterpiece.
Topping Tips and Crust Variations
How to Serve Cheesecakes for Gatherings
Keeping Cheesecake Bites Fresh and Chilled
Print
Dreamy Mini Cheesecakes Recipe
- Total Time: 20 minutes
- Yield: 13 1x
Description
Delightful mini cheesecakes offer a perfect balance of creamy texture and sweet indulgence. Rich Philadelphia cream cheese blends seamlessly with graham cracker crusts, creating irresistible bite-sized desserts you’ll savor with pure delight.
Ingredients
- 16 oz (453 g) cream cheese, room temperature
- 2 cups (480 ml) heavy whipping cream
- 1 ½ cups (180 g) graham cracker crumbs
- ⅓ cup (76 g) unsalted melted butter
- ½ cup (60 g) powdered sugar
- 2 tsp sugar
- 1 tsp vanilla extract
- purple food coloring, optional
- pink food coloring, optional
- blue food coloring, optional
- sprinkles, optional
Instructions
- Crust Preparation: Pulverize graham crackers with sugar, blend thoroughly with melted butter, and press a tablespoon of the mixture into each muffin liner, compacting with a measuring cup base.
- Chill Foundation: Freeze the prepared crusts momentarily while assembling the filling components.
- Cream Cheese Mixture: Whip cream cheese and powdered sugar until achieving a velvety, seamless texture, simultaneously whipping heavy cream to soft peaks and incorporating vanilla extract until peaks become robust.
- Color Blending: Gently fold the cream cheese mixture into whipped cream, then divide into three separate bowls, introducing blue, pink, and purple food coloring and stirring until colors distribute uniformly.
- Layering Process: Systematically spoon the pastel-hued mixtures onto the chilled crusts, creating an artistic, multi-colored effect.
- Refrigeration Stage: Allow mini cheesecakes to set and solidify by refrigerating for a minimum of four hours or preferably overnight.
- Finishing Touches: Craft a decorative cream topping by whisking cream to stiff peaks, pipe delicately around the edges, and garnish with colorful sprinkles for visual appeal.
Notes
- Crust Compaction Technique: Press graham cracker mixture firmly using a measuring cup to ensure a solid, even base that won’t crumble when serving.
- Temperature Control: Briefly freeze the crust to stabilize it before adding the filling, preventing potential structural breakdown.
- Color Blending Strategy: Gently fold food coloring into separate sections of the cream cheese mixture to maintain a soft, marbled pastel appearance without overmixing.
- Chilling Crucial for Texture: Refrigerate mini cheesecakes for at least 3-4 hours, preferably overnight, to achieve a perfect set and develop rich, creamy consistency.
- Prep Time: 20 minutes
- Cook Time: 0 minutes
- Category: Desserts, Snacks
- Method: None
- Cuisine: American
Nutrition
- Serving Size: 13
- Calories: 305
- Sugar: 11 g
- Sodium: 204 mg
- Fat: 23 g
- Saturated Fat: 14 g
- Unsaturated Fat: 8 g
- Trans Fat: 1 g
- Carbohydrates: 24 g
- Fiber: 1 g
- Protein: 3 g
- Cholesterol: 70 mg
Mia Reynolds
Food Writer & Home Cooking Specialist
Expertise
Easy Home Baking, Recipe Writing and Storytelling, Local and Seasonal Ingredients, Baking for Beginners
Education
New England Culinary Institute (NECI), Montpelier, Vermont
Community College of Vermont, Winooski, Vermont
Mia Reynolds fell in love with baking as a teenager experimenting in her family kitchen. Her passion took her to New England Culinary Institute, where she learned practical pastry techniques, and later to Community College of Vermont to deepen her understanding of food management.
Mia combines clear, simple baking instructions with heartwarming stories, making home baking approachable for everyone.