
Tangy Lemon Raspberry Icebox Cake Recipe for Summer Joy
Summer calls for effortless desserts that dazzle with minimal lemon raspberry icebox cake magic.
Cool, creamy layers promise refreshing delight without turning on the oven.
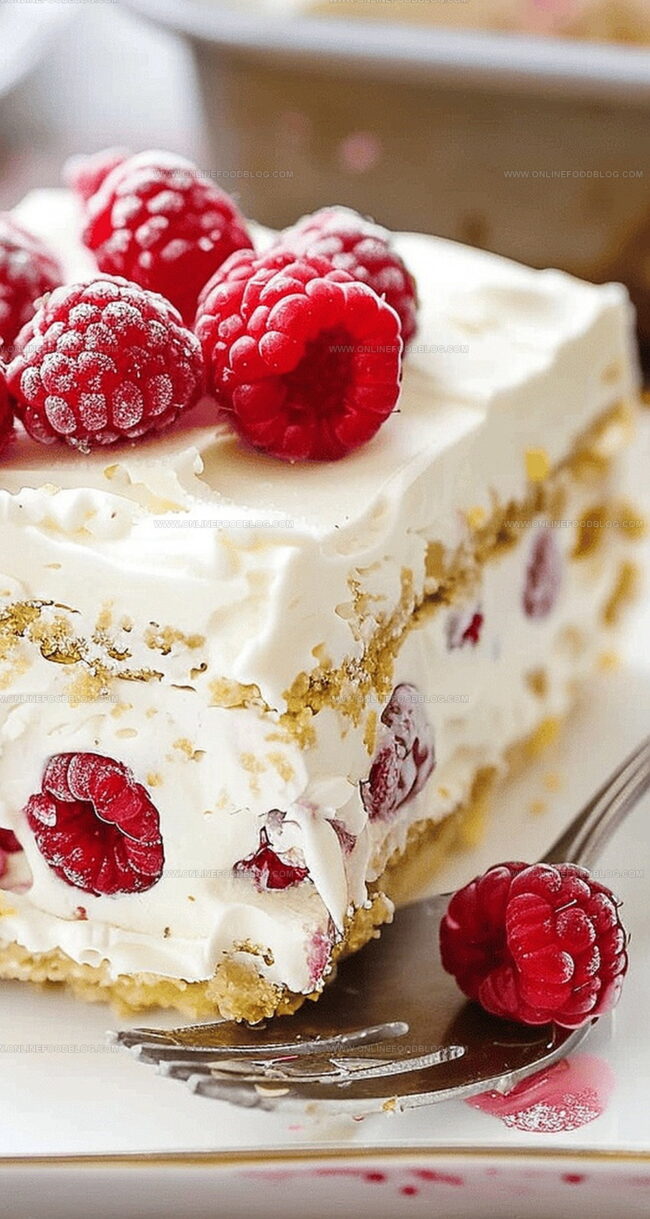
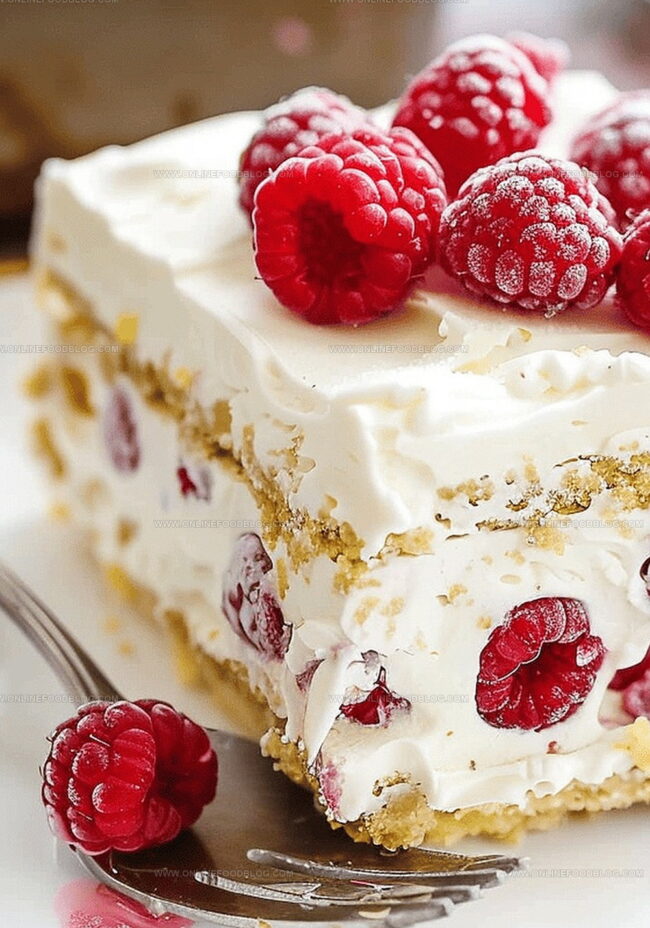
This no-bake wonder combines tangy citrus with sweet berries in a dreamy chilled treat.
Silky cream cheese and whipped topping create luscious texture between graham cracker layers.
Bright raspberries add vibrant color and bursts of juicy freshness.
Each spoonful delivers a perfect balance of zesty and sweet flavors.
You’ll fall in love with this simple yet stunning dessert that comes together in minutes.
Quick Recipe Overview
What’s in Lemon Raspberry Icebox Cake
For Whipped Cream Base:For Flavor Enhancers:For Cake Structure:Tools to Layer and Chill This Summer Dessert
How to Build a No-Bake Icebox Cake
Blend heavy cream into fluffy clouds using a hand mixer. Gently fold in sweetness and vanilla essence, creating a dreamy cream with soft, luxurious peaks. Swirl in tangy lemon curd, allowing delightful marble patterns to emerge.
Arrange a cozy layer of graham crackers across the bottom of a beautiful serving dish, creating a sturdy base for your delectable dessert. These golden rectangles will transform into tender, cake-like layers.
Generously spread the luscious whipped cream over the graham crackers. Scatter vibrant, ruby-red raspberries across the surface, creating bursts of fruity delight. Repeat the layers, gently pressing down to encourage harmony between ingredients.
Protect your creation with plastic wrap and let it rest in the refrigerator. Over several hours, the crackers will soften and merge with the cream, developing a sublime, cake-like texture. Patience rewards you with a heavenly dessert.
After 6-8 hours of chilling, your icebox cake is ready to enchant. Slice and serve this cool, creamy masterpiece that promises a symphony of textures and flavors.
Tips for Cream, Cookies, and Raspberry Layers
How to Serve Icebox Cake Cold & Clean
Fridge and Freezer Tips for Storage
Print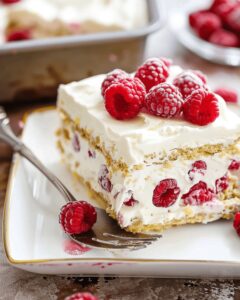
Dreamy Lemon Raspberry Icebox Cake
- Total Time: 20 minutes
- Yield: 9 1x
Description
Creamy lemon raspberry icebox cake offers a refreshing summer dessert with layered graham crackers and zesty filling. Chilled perfection merges tangy citrus and sweet berries, inviting you to savor each cool, delightful bite.
Ingredients
- 3–4 cups fresh raspberries
- 1 cup lemon curd
- 9–10 large graham crackers
- 2 cups heavy whipping cream (35% fat)
- ⅓ cup powdered icing sugar
- 1 tsp vanilla extract
Instructions
- Prepare Cream Base: Whip cream in a mixing bowl until soft peaks form, gradually adding sugar and vanilla. Continue whipping until peaks become firm and glossy.
- Incorporate Lemon Accent: Fold lemon curd into the whipped cream, creating delicate marbled swirls throughout the mixture.
- Construct First Layer: Line the bottom of an 8×8″ dish with graham crackers, ensuring complete and even coverage across the base.
- Layer Cream and Fruit: Spread half of the whipped cream mixture over the graham crackers, then generously distribute raspberries across the surface, creating a vibrant fruit layer.
- Build Second Layer: Repeat the graham cracker placement, gently pressing down to create a compact structure. Cover with remaining whipped cream and strategically arrange the final batch of raspberries on top.
- Chill and Set: Completely cover the dish with plastic wrap, refrigerate for a minimum of 6 hours or preferably overnight. This resting period allows the layers to meld and soften, creating a harmonious texture.
- Serve and Enjoy: Remove from refrigerator and slice into elegant portions, revealing the beautiful layered composition with its perfect blend of creamy, fruity, and crisp elements.
Notes
- Chill for Maximum Flavor: Refrigerate the icebox cake for at least 6 hours, preferably overnight, to allow graham crackers to soften and flavors to meld perfectly.
- Whip Cream Technique: Achieve cloud-like peaks by whipping cream slowly, watching for soft, billowy texture before adding sugar for stability.
- Raspberry Distribution: Scatter raspberries evenly across each layer to guarantee a burst of fruity flavor in every single bite.
- Lemon Curd Swirling: Fold lemon curd gently into whipped cream, creating delicate marbled streaks for a visually stunning and tangy dessert component.
- Prep Time: 20 minutes
- Cook Time: 0 minutes
- Category: Desserts, Snacks
- Method: None
- Cuisine: American
Nutrition
- Serving Size: 9
- Calories: 319
- Sugar: 21 g
- Sodium: 75 mg
- Fat: 28 g
- Saturated Fat: 17 g
- Unsaturated Fat: 11 g
- Trans Fat: 0 g
- Carbohydrates: 24 g
- Fiber: 2 g
- Protein: 3 g
- Cholesterol: 88 mg
Mia Reynolds
Food Writer & Home Cooking Specialist
Expertise
Easy Home Baking, Recipe Writing and Storytelling, Local and Seasonal Ingredients, Baking for Beginners
Education
New England Culinary Institute (NECI), Montpelier, Vermont
Community College of Vermont, Winooski, Vermont
Mia Reynolds fell in love with baking as a teenager experimenting in her family kitchen. Her passion took her to New England Culinary Institute, where she learned practical pastry techniques, and later to Community College of Vermont to deepen her understanding of food management.
Mia combines clear, simple baking instructions with heartwarming stories, making home baking approachable for everyone.