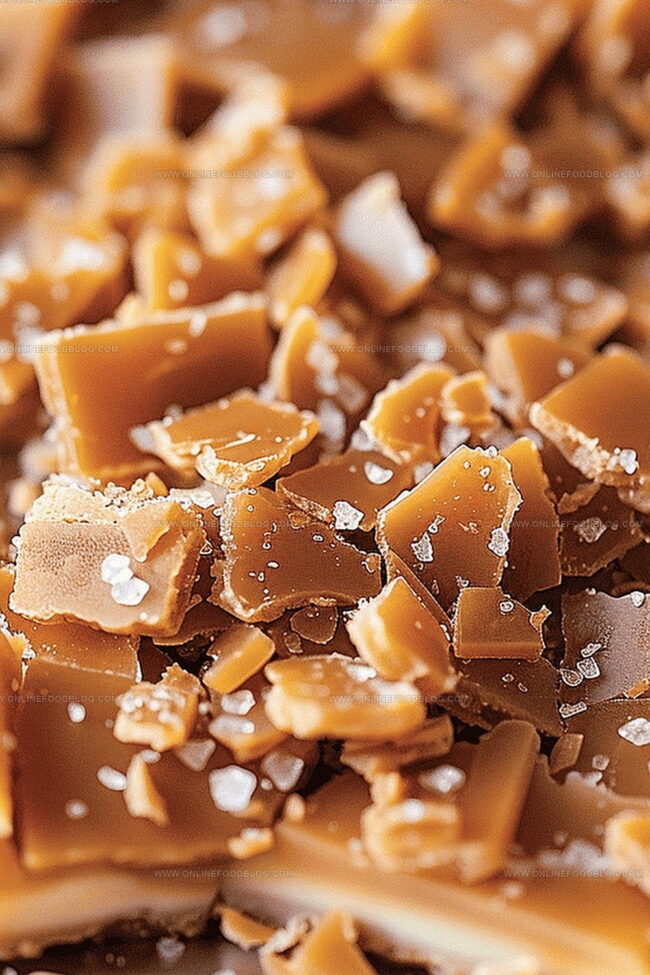
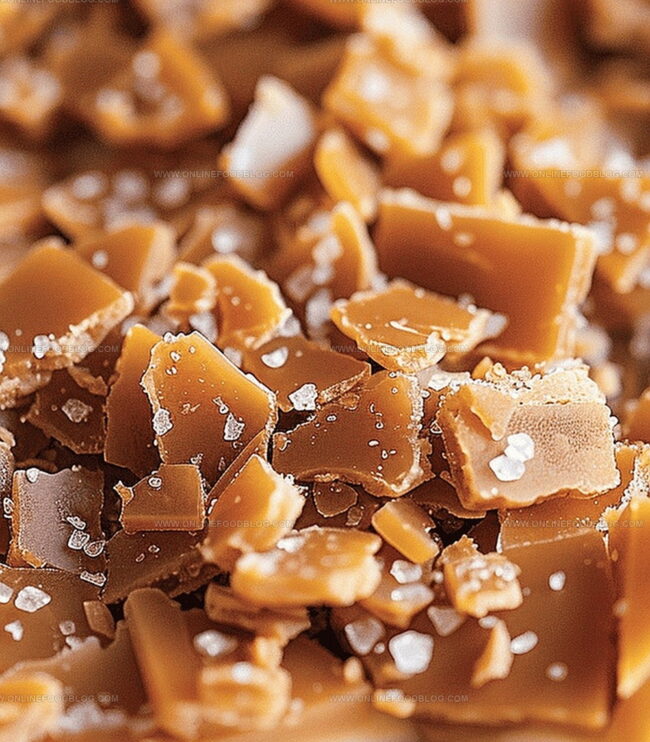
Sweet, buttery, and irresistibly golden homemade toffee bits dance across your favorite desserts like culinary confetti.
These delectable crunchy homemade toffee bits deliver a rich caramel crunch that elevates every treat they touch.
You’ll love how simple the process can be with just a few pantry staples.
The rich amber color and deep butterscotch notes create an addictive texture that melts in your mouth.
Each batch promises a delightful blend of sweet and salty that turns ordinary baked goods into extraordinary masterpieces.
The smell of caramelizing sugar will fill your kitchen with warmth and anticipation.
Sprinkle these golden gems over ice cream, fold into cookie dough, or use as a decadent topping – the possibilities are endless.
Quick Recipe Overview
Prep Time: 10 minutes
Cook Time: 10 minutes
Total Time: 20 minutes
Calories: 95 kcal
Servings: 13
Everything You Need for Homemade Toffee Bits
For Toffee Base:
Butter: Provides rich, creamy foundation that ensures smooth toffee texture and deep golden flavor.
Sugar: Creates sweet caramelization and structural backbone of the toffee with delightful amber notes.
Salt: Enhances overall taste complexity and balances the sweetness with subtle mineral undertones.
For Optional Toppings and Coating:
Chocolate: Optional drizzle or coating that adds luxurious depth and contrasting richness to toffee bits.
Nuts: Potential crunchy garnish that introduces earthy texture and complementary nutty flavor profile.
For Storage and Preparation Tools:
Parchment Paper: Critical for preventing sticky toffee from adhering to baking surface and ensuring clean release.
Silicone Baking Mat: Alternative non-stick surface that provides even heat distribution and easy cleanup.
Candy Thermometer: Precise temperature measurement tool guaranteeing perfect toffee consistency and preventing burning.
Cutting Board: Stable surface for breaking or cutting toffee into desired bite-sized pieces.
Mallet or Rolling Pin: Convenient tools for shattering toffee into rustic, irregular crunchy bits.
Zip Top Bag: Alternative method for crushing toffee while containing fragments and preventing messy preparation.
Tools to Help You Make Sweet Toffee Bits
Candy Thermometer: Essential for precise temperature monitoring during toffee making.
Heavy-Bottomed Small Saucepan: Provides even heat distribution for melting butter and sugar.
Rimmed Baking Sheet: Helps contain and spread the hot toffee evenly.
Parchment Paper or Silicone Baking Mat: Prevents sticking and makes removal easy.
Whisk: Perfect for combining butter, sugar, and salt smoothly.
Cutting Board: Supports breaking or cutting toffee into bits.
Sharp Serrated Knife: Alternative method for cutting toffee into precise pieces.
Mallet or Rolling Pin: Great for cracking toffee into small, crunchy bits.
Airtight Container: Keeps toffee bits fresh and crisp for storage.
Toffee Bits Instructions for a Golden Finish
Kitchen Prep Lay out a baking sheet with a protective liner to catch all the delicious golden goodness.
Butter Magic Warm butter in a sturdy pan, then dance in sugar and a pinch of salt, whisking until they become best friends.
Caramel Transformation Stir the mixture continuously, watching it transform from liquid to a rich, golden nectar. Keep an eye on the temperature until it reaches a deep amber color.
Toffee Canvas Gently pour the molten mixture onto your prepared sheet, letting it spread into a smooth landscape of sweetness. Allow it to cool and harden completely.
Toffee Breakdown Crack the hardened sheet into delightful bite-sized pieces using a mallet or sharp knife. Tuck these crunchy treasures into an airtight home where they’ll stay fresh and tempting.
Toffee Bit Tweaks for Extra Flavor or Texture
Watch the mixture closely during cooking, stirring constantly and using a reliable candy thermometer to ensure perfect golden-brown color without scorching.
Sprinkle sea salt, crushed nuts, or drizzle melted chocolate over the cooled toffee for gourmet variations that elevate the classic recipe.
Keep toffee bits in a cool, dry place in an airtight container with a piece of parchment between layers to maintain crunchiness and prevent sticking.
Create smoother or chunkier toffee bits by adjusting your crushing method – gentle taps for fine pieces or harder strikes for larger, rustic fragments.
Serving Up Toffee Bits – Ideas for Use
Sprinkle Over Desserts: Elevate your favorite ice cream, puddings, or fruit cobblers by adding these crunchy toffee bits for a delightful texture and rich caramel flavor.
Bake Into Cookies: Mix the toffee pieces into chocolate chip cookie dough or sprinkle on top of brownies before baking for an extra layer of sweet, buttery crunch.
Top Breakfast Treats: Scatter these homemade toffee bits over pancakes, waffles, or morning yogurt to transform an ordinary breakfast into a decadent morning indulgence.
Garnish Drinks: Rim cocktail glasses or top milkshakes and hot chocolate with these toffee bits for a gourmet touch that adds both flavor and visual appeal.
Keeping Toffee Bits Fresh and Ready to Sprinkle
Craft Strategic Storage Solutions: Keep toffee bits in an airtight glass container with a tight-fitting lid to maintain maximum crispness and prevent moisture absorption.
Freeze for Extended Freshness: Transfer crushed toffee bits to a freezer-safe sealed bag, removing excess air, and store up to 3 months for long-term enjoyment without quality degradation.
Manage Moisture Exposure: Place a small silica gel packet inside the storage container to absorb potential humidity and protect the toffee’s delicate texture and crunchiness.
Control Temperature Conditions: Store containers in a cool, dark pantry away from direct sunlight and heat sources to prevent potential melting or texture changes, ensuring consistent flavor and quality.
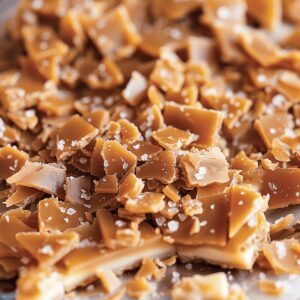
Classic homemade toffee bits deliver rich, buttery flavor in this delightful sweet treat. Crisp caramel pieces sprinkled over desserts elevate your baking with irresistible crunch and deep caramelized notes.
Ingredients
Scale
1 stick (113 grams) unsalted American butter
1 cup (200 grams) light brown sugar
1 teaspoon fine salt
Instructions
Prep Surface: Line a small rimmed baking sheet with parchment paper or silicone mat, ensuring complete coverage to prevent adhesion.
Create Butter Base: In a heavy-bottomed saucepan, gently melt butter over medium heat until smooth and liquid.
Combine Ingredients: Add sugar and salt to melted butter, whisking vigorously for one minute until fully integrated and uniform in appearance.
Monitor Cooking Process: Continuously stir mixture while cooking, observing color transformation resembling golden caramel. Watch carefully for color change and consistency, which typically develops over 10 minutes.
Temperature Precision: Use a candy thermometer to track heat, targeting 295 to 305°F (146 to 152°C). If mixture appears separated, remove from heat and whisk aggressively to recombine, then return to cooking.
Sheet Formation: Pour molten toffee onto prepared baking sheet with controlled movements, spreading into a thin, even layer.
Cooling Phase: Allow toffee to solidify completely at room temperature for approximately 20 minutes.
Fragment Toffee: Transfer hardened sheet to cutting board and break into small, irregular fragments using a mallet, rolling pin, or sharp serrated knife.
Storage: Preserve toffee bits in an airtight container, maintaining freshness for up to one week at room temperature.
Notes
Monitor Temperature Carefully: Use a reliable candy thermometer to track heat precisely between 295-305°F, which prevents burning and ensures perfect toffee texture.
Prevent Sugar Crystallization: Whisk ingredients energetically and consistently to maintain smooth mixture, avoiding grainy or separated results during cooking.
Handle Hot Toffee Safely: Use caution when transferring molten mixture, wearing heat-resistant gloves and working on a stable surface to prevent potential burns.
Achieve Desired Texture: Break toffee into varied sizes using a mallet or rolling pin for rustic bits, or use a sharp knife for uniform pieces depending on your recipe’s needs.
Degree: Certificate in Food and Beverage Management
Focus: Essential knowledge of recipe development, ingredient sourcing, and food business basics.
Mia Reynolds fell in love with baking as a teenager experimenting in her family kitchen. Her passion took her to New England Culinary Institute, where she learned practical pastry techniques, and later to Community College of Vermont to deepen her understanding of food management.
Mia combines clear, simple baking instructions with heartwarming stories, making home baking approachable for everyone.

Mia Reynolds
Food Writer & Home Cooking Specialist
Expertise
Easy Home Baking, Recipe Writing and Storytelling, Local and Seasonal Ingredients, Baking for Beginners
Education
New England Culinary Institute (NECI), Montpelier, Vermont
Community College of Vermont, Winooski, Vermont
Mia Reynolds fell in love with baking as a teenager experimenting in her family kitchen. Her passion took her to New England Culinary Institute, where she learned practical pastry techniques, and later to Community College of Vermont to deepen her understanding of food management.
Mia combines clear, simple baking instructions with heartwarming stories, making home baking approachable for everyone.