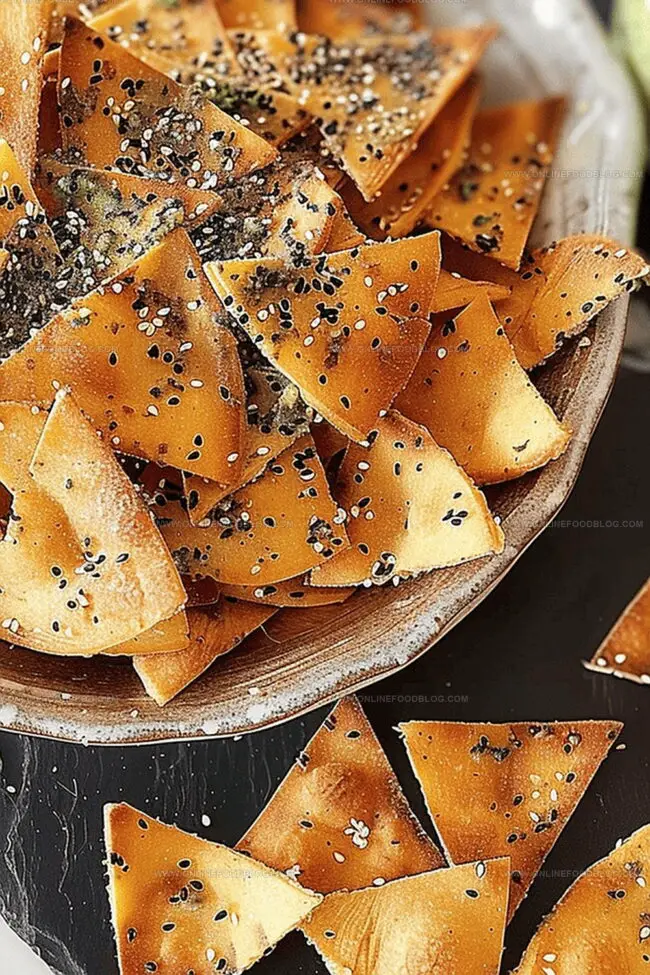
Golden, bubbling with Middle Eastern spices, these zaatar pita chips deliver a tantalizing crunch that will electrify your snack game.
The zaatar-infused pita chips dance with herbal aromatics and irresistible texture.
Fragrant sumac and sesame seeds mingle with crisp edges, creating a symphony of flavor in every bite.
Homemade chips often seem complicated, but this recipe breaks down every step with simplicity.
Drizzle with olive oil and watch these chips turn from ordinary to extraordinary in minutes.
Serve these addictive morsels at your next gathering, and watch them vanish faster than you can sprinkle zaatar.
Grab your ingredients and get ready to elevate your snacking experience.
Quick Recipe Overview
Prep Time: 10 minutes
Cook Time: 12 minutes
Total Time: 22 minutes
Calories: 150 kcal
Servings: 5
Ingredients in Crispy Za’atar Pita Chips
For Bread Base:
Pita Bread: Soft, pillowy rounds that transform into crispy, delicate chips with perfect golden edges.
Olive Oil: Rich, smooth fat that helps bread turn wonderfully crunchy and enhances overall flavor absorption.
For Seasoning Blend:
Za’atar Spice Mix: Traditional Middle Eastern herb blend that adds complex, tangy, and earthy notes with its signature herbal punch.
Salt: Enhances and balances the entire flavor profile, bringing out the subtle nuances of the spice mix.
For Optional Finishing Touch:
Sesame Seeds: Nutty, crunchy garnish that provides delightful texture and authentic Mediterranean flair, perfectly complementing the Za’atar blend.
Tools You’ll Need for Homemade Za’atar Pita Chips
Baking Tray: Essential for even baking and crispy chips.
Parchment Paper: Prevents sticking and ensures easy cleanup.
Large Bowl: Perfect for tossing pita triangles with oil and spices.
Sharp Knife: Helps slice pita bread into uniform triangles.
Measuring Spoons: Aids in precise spice and oil measurement.
How to Make Crispy Za’atar Pita Chips from Scratch
Pita Bread Prep Mediterranean-style triangles emerge from whole pita rounds. Gently separate each pita into delicate wedges that will transform into crunchy delights.
Flavor Bath Olive oil becomes the magical coating that helps spices cling to every crisp surface. Drench the pita pieces in liquid gold, ensuring each triangle glistens with potential.
Za’atar Magic Sprinkle the aromatic Middle Eastern spice blend generously across the oiled triangles. This herbal mixture will infuse each chip with complex, earthy notes that dance on your tongue.
Oven Transformation Position the seasoned wedges on a lined baking sheet, spreading them in a single relaxed layer. They’ll rest comfortably while heat works its transformative power.
Crispy Finale Bake until the edges turn a warm golden brown and the texture becomes irresistibly crunchy. Watch carefully to prevent burning, allowing the chips to reach perfect crispness in about 10-12 minutes.
Tips for Getting That Perfect Crisp with Za’atar Flavor
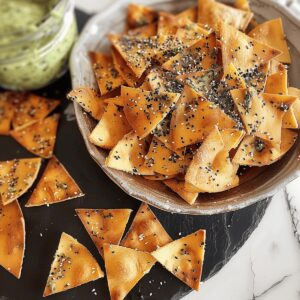
Pair these crispy chips with creamy hummus, tzatziki, or a zesty Mediterranean-style yogurt dip to elevate the snacking experience.
Pat pita bread completely dry before oiling to ensure maximum crunchiness, and avoid overcrowding the baking tray for even browning.
Keep chips fresh by storing in an airtight container at room temperature for up to 3-4 days, reheating briefly in the oven to restore crispness if needed.
Try whole wheat or multigrain pita for added nutrition, or switch za’atar with other spice blends like smoked paprika or everything bagel seasoning for exciting flavor variations.
Serving Crispy Za’atar Pita Chips for Snacks or Parties
Pair with Dips: Serve these crispy za’atar pita chips alongside creamy hummus, tzatziki, or baba ganoush for a delightful Mediterranean-style snack that’ll wow your taste buds.
Create a Mezze Platter: Arrange the chips on a large wooden board with olives, feta cheese, sliced cucumbers, and roasted vegetables for an impressive appetizer spread that’s perfect for sharing.
Quick Salad Topper: Crush the chips and sprinkle them over fresh salads for an unexpected crunch that adds texture and a burst of herbal za’atar flavor to your greens.
Movie Night Munchies: Replace traditional chips with these homemade pita chips for a healthier and more exciting snacking option during movie nights or game day gatherings.
Storing Za’atar Pita Chips So They Stay Crunchy
Store Smartly: Transfer cooled pita chips to an airtight container to maintain crispiness and prevent moisture absorption.
Maximize Freshness: Keep chips at room temperature for up to 5 days, ensuring they remain crunchy and flavorful.
Batch Preparation: Make larger quantities and store in sealed containers for quick snacking throughout the week.
Revive Crispiness: If chips lose their crunch, reheat in the oven at 300°F for 3-5 minutes to restore their original texture.
Homemade zaatar pita chips deliver Middle Eastern flavor with irresistible crunch. Crunchy herbal spices and olive oil create a simple snack perfect for sharing with friends.
Ingredients
Scale
4 pita bread
3 tbsps (45 mL) za’atar spice
2 tbsps (30 mL) extra virgin olive oil
Instructions
Preparation: Preheat oven to 350°F (175°C) and line a baking sheet with parchment paper for seamless cooking and easy cleanup.
Pita Segmentation: Slice pita bread horizontally into thin rounds, then cut each round into four triangular wedges, creating perfect chip-sized pieces.
Seasoning Technique: In a large mixing bowl, drizzle extra virgin olive oil over pita triangles, gently tossing to ensure uniform, light coating, then sprinkle Za’atar spice blend across the surface, carefully rotating to distribute the aromatic herbs and seeds evenly.
Baking Process: Arrange seasoned pita triangles in a single, uncrowded layer on the prepared baking sheet, ensuring each piece has space for optimal crispiness, and bake in the preheated oven for 10-12 minutes until edges turn golden brown and chips become delightfully crunchy.
Cooling and Serving: Remove baking sheet from oven and let Za’atar pita chips cool completely on the tray, allowing them to achieve maximum crunchiness before serving as a delectable snack or accompaniment.
Notes
Precision in Slicing: Cut pita bread evenly to ensure uniform cooking and consistent crispness across all chips.
Oil Coating Technique: Use light, even olive oil coating to prevent soggy chips and promote golden, crispy texture.
Seasoning Distribution: Tumble za’atar spices thoroughly to guarantee balanced flavor in every bite.
Baking Placement: Arrange chips in single layer without overlap to achieve maximum crunchiness and prevent steaming.
Degree: Certificate in Food and Beverage Management
Focus: Essential knowledge of recipe development, ingredient sourcing, and food business basics.
Mia Reynolds fell in love with baking as a teenager experimenting in her family kitchen. Her passion took her to New England Culinary Institute, where she learned practical pastry techniques, and later to Community College of Vermont to deepen her understanding of food management.
Mia combines clear, simple baking instructions with heartwarming stories, making home baking approachable for everyone.


Mia Reynolds
Food Writer & Home Cooking Specialist
Expertise
Easy Home Baking, Recipe Writing and Storytelling, Local and Seasonal Ingredients, Baking for Beginners
Education
New England Culinary Institute (NECI), Montpelier, Vermont
Community College of Vermont, Winooski, Vermont
Mia Reynolds fell in love with baking as a teenager experimenting in her family kitchen. Her passion took her to New England Culinary Institute, where she learned practical pastry techniques, and later to Community College of Vermont to deepen her understanding of food management.
Mia combines clear, simple baking instructions with heartwarming stories, making home baking approachable for everyone.