Quick & Tangy Crispy Sushi Rice Squares Recipe – A Family Favorite
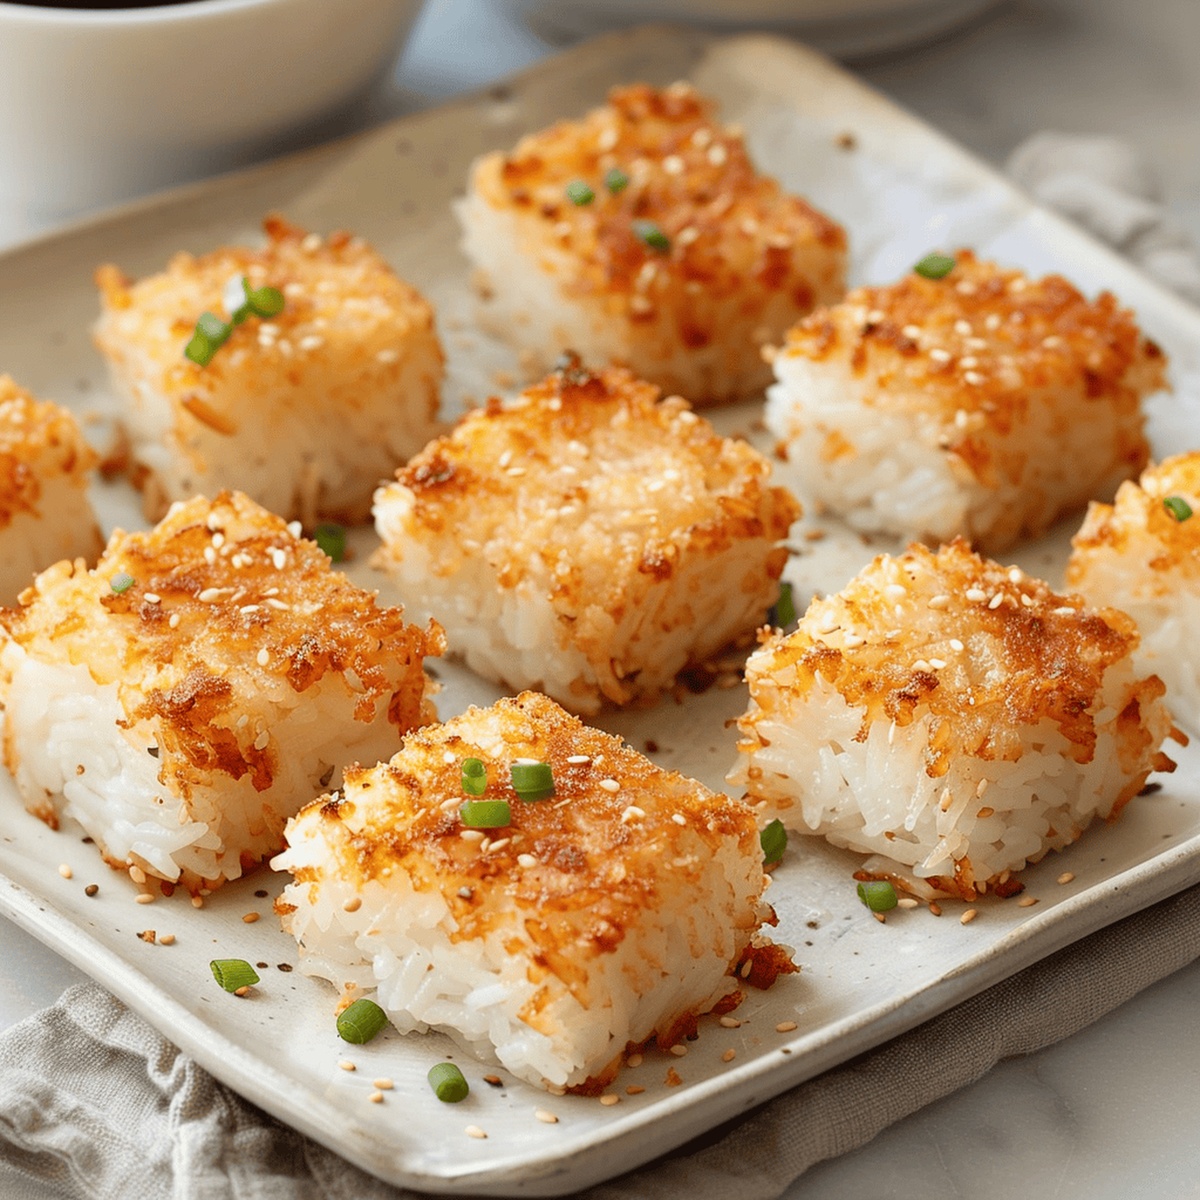
Golden crispy sushi rice squares tantalize taste buds with their irresistible texture and complex flavor profile.
These delectable morsels redefine traditional Japanese ingredients into a modern culinary experience.
Compact and crunchy, these squares offer a delightful contrast between soft inner layers and crisp exterior.
Professional chefs and home cooks alike appreciate the versatile nature of this innovative appetizer.
Bold seasonings and precise preparation techniques elevate these compact bites beyond ordinary rice dishes.
Each square represents a perfect balance of technique and creativity, promising a memorable gastronomic adventure.
Crisp edges, harmonious blending of textures, and nuanced flavors make these squares a must-try culinary creation.
What’s Special About Crispy Sushi Rice Squares
Ingredients Checklist for Crispy Sushi Rice Squares
Rice Base:Seasoning:Frying Components:Instructions for Crispy Sushi Rice Squares
Step 1: Cleanse the Rice
Thoroughly rinse rice under cold water 4-5 times until the water runs crystal clear. Cook rice using a rice cooker or stovetop method with appropriate water ratio.
Step 2: Create Flavor Blend
In a small mixing bowl, whisk together:Stir until sugar completely dissolves. Gently fold the seasoning mixture into the cooked rice, ensuring even distribution.
Step 3: Mold and Chill Rice Block
Line a small square baking tray with plastic wrap. Firmly press seasoned rice into the tray, creating a compact 1/2-inch thick layer. Refrigerate for 3 hours or overnight to set completely.
Step 4: Transform into Crispy Squares
Remove chilled rice block from refrigerator. Slice into bite-sized square pieces. Heat a large skillet with a thin layer of vegetable oil over medium-high heat. Carefully place rice squares into hot oil, frying until each side turns golden brown and crispy. Transfer fried squares to a wire rack to drain excess oil. Serve immediately for maximum crunchiness.
Crispy Sushi Rice Cooking Advice
Keeping Crispy Sushi Rice Squares Fresh
Best Matches for Crispy Sushi Rice Squares
Flavorful Alternatives for Sushi Rice Squares
Print
Crispy Sushi Rice Squares Recipe
- Total Time: 20 minutes
- Yield: 4 1x
Description
Crispy Sushi Rice Squares deliver a playful fusion of Japanese and modern culinary techniques. Crunchy exterior meets creamy inner layers, promising a delightful texture adventure that will spark conversation at any gathering.
Ingredients
Main Ingredients:
- 1 ½ cups (375 ml) dry sushi rice, rinsed until water is clear
- 2 cups (480 ml) water
Rice Seasoning:
- 1 teaspoon salt
- 3 tablespoons (45 ml) rice vinegar
- 1 tablespoon (15 ml) granulated sugar
Flavor Enhancer:
- 1 teaspoon (5 ml) toasted sesame oil
Instructions
- Meticulously rinse short-grain rice under cool running water 4-5 times, ensuring the water becomes crystal clear, which removes excess starch and prevents clumping.
- Cook the rice using either a rice cooker or stovetop method, following precise water-to-rice ratio for optimal texture and consistency.
- Craft a delicate seasoning blend by whisking together kosher salt, rice vinegar, granulated sugar, and fragrant sesame oil in a small mixing bowl until sugar completely dissolves.
- Gently fold the seasoning mixture into the warm cooked rice, ensuring even distribution and allowing flavors to meld thoroughly.
- Line a small square baking tray with plastic wrap, then carefully spread the seasoned rice into a uniform 1/2-inch thick layer, using gentle pressure to create a compact block.
- Refrigerate the rice block for a minimum of 3 hours or preferably overnight, which helps the rice firm up and makes cutting and frying easier.
- Once chilled, remove the rice block and slice into uniform bite-sized squares using a sharp knife that has been lightly oiled to prevent sticking.
- Heat a thin layer of vegetable oil (approximately 1/4 inch or 6 millimeters deep) in a large skillet over medium-high heat until shimmering but not smoking.
- Carefully place rice squares into the hot oil, frying until each side develops a golden-brown, crispy exterior, approximately 2-3 minutes per side.
- Transfer the fried rice squares to a wire rack lined with paper towels to drain excess oil and maintain crispiness, allowing them to cool slightly before serving.
Notes
- Perfect rice preparation requires multiple rinses to remove excess starch, ensuring a clean and fluffy texture.
- Precise seasoning blend transforms plain rice into a delectable base with balanced sweet, tangy, and nutty flavors.
- Chilling the rice helps it firm up, making it easier to handle and achieve an incredibly crispy exterior when fried.
- Use a sharp knife to cut uniform squares for consistent cooking and an appealing presentation.
- High heat and thin oil layer are crucial for creating a golden, crispy crust without making the rice greasy.
- Let the fried rice squares rest on a wire rack to maintain crunchiness and prevent sogginess.
- Prep Time: 5 minutes
- Cook Time: 15 minutes
- Category: Snacks, Appetizer
- Method: Frying
- Cuisine: Japanese
Nutrition
- Serving Size: 4
- Calories: 215 kcal
- Sugar: 3.5 g
- Sodium: 300 mg
- Fat: 2.5 g
- Saturated Fat: 0.4 g
- Unsaturated Fat: 2.1 g
- Trans Fat: 0 g
- Carbohydrates: 44 g
- Fiber: 0.5 g
- Protein: 4 g
- Cholesterol: 0 mg
Lucas Bennett
Founder & Recipe Creator
Expertise
Simple Everyday Recipes, Sustainable Cooking Practices, Creative Meal Planning, Recipe Testing and Improvement
Education
Fox Valley Technical College, Appleton, Wisconsin
Lake Superior College, Duluth, Minnesota
Lucas Bennett’s cooking journey started in his parents’ kitchen, where he learned to prepare tasty, no-fuss meals from scratch. His culinary passion led him to Fox Valley Technical College, where he gained practical cooking skills.
He then expanded his focus on sustainability at Lake Superior College. Today, Lucas shares easy, approachable recipes designed to make cooking enjoyable and stress-free for everyone.