Sizzling Oven-Baked Chicken Tacos Recipe: Fiesta on a Plate
Sizzling spices and golden-brown shells make this oven-baked chicken tacos recipe a weeknight dinner superstar that never disappoints.
Packed with zesty flavors and crispy textures, these tacos bring restaurant-quality excitement right to your kitchen table.
The oven method ensures each taco shell turns perfectly crunchy without the mess of traditional frying.
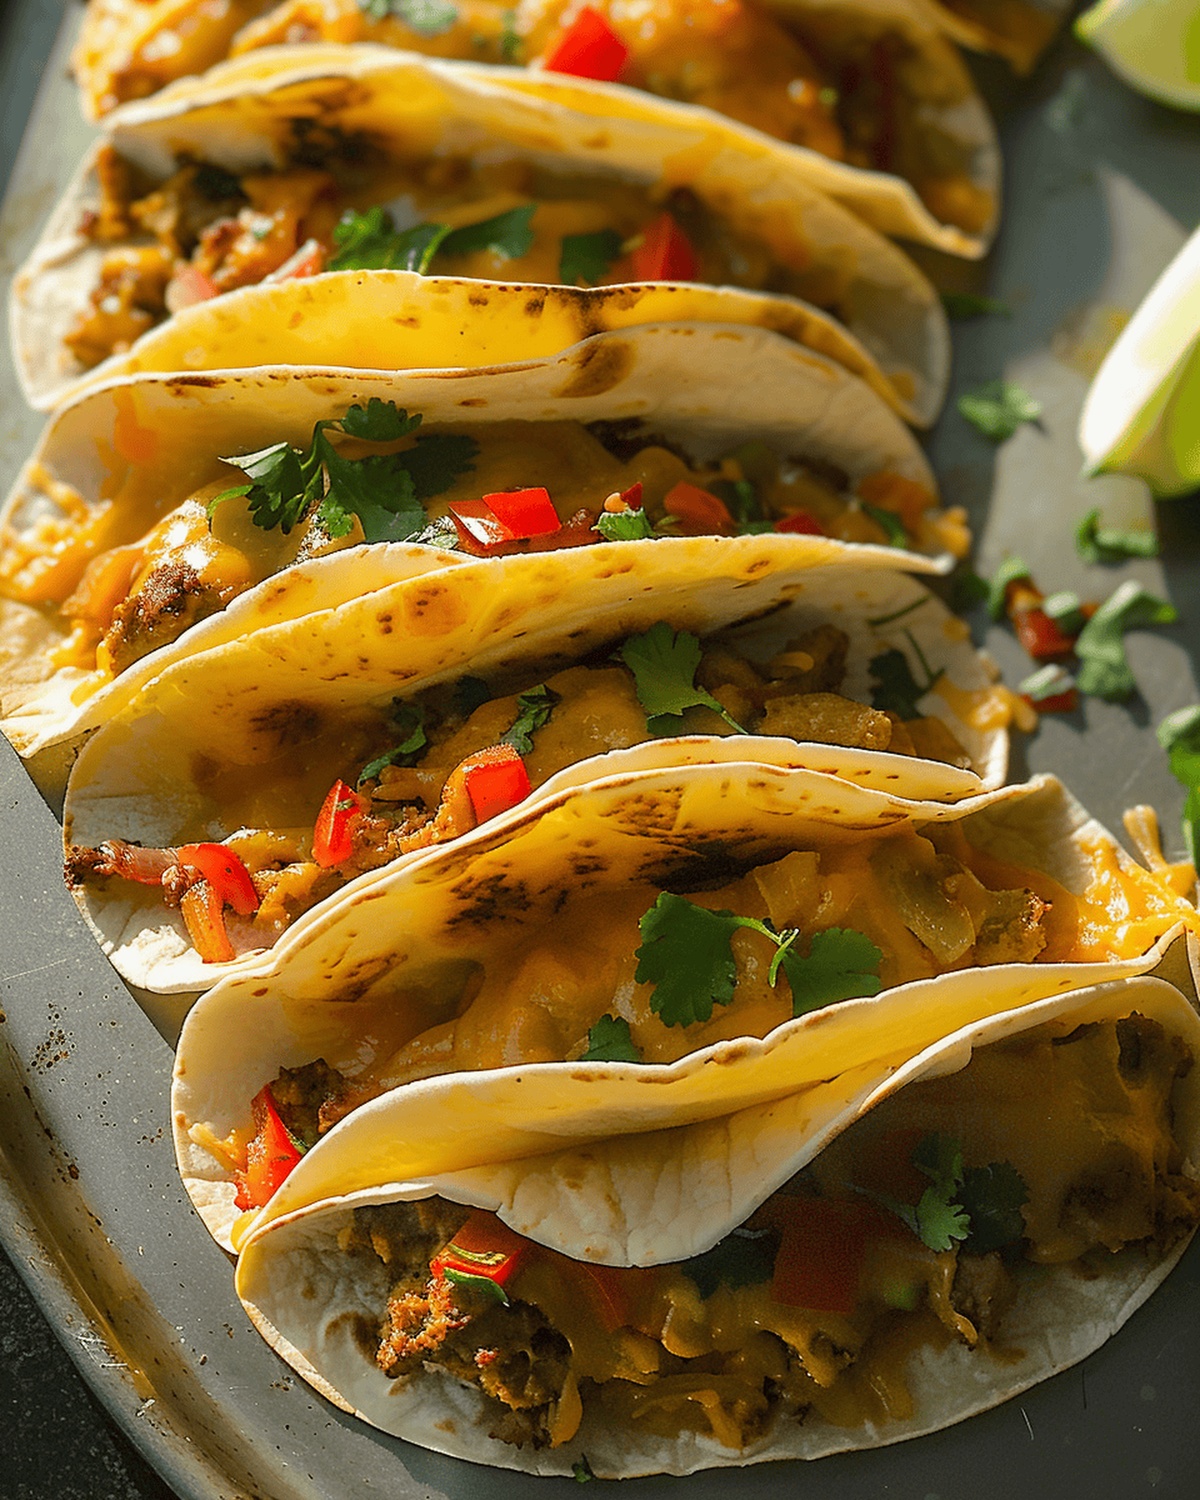
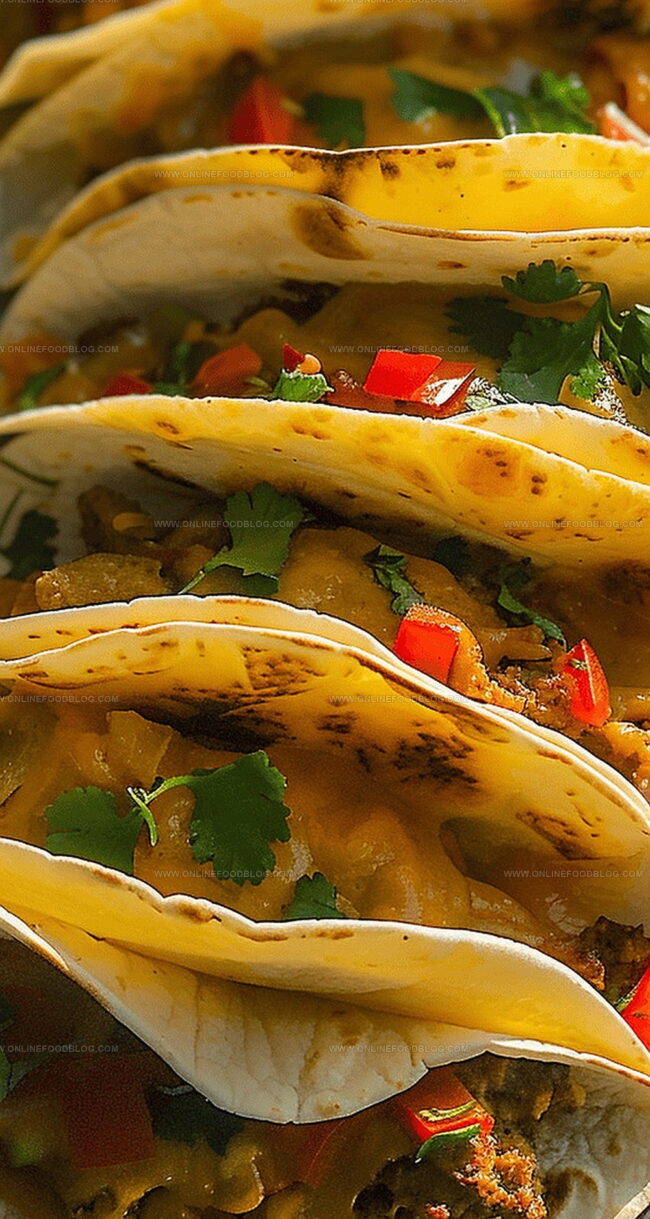
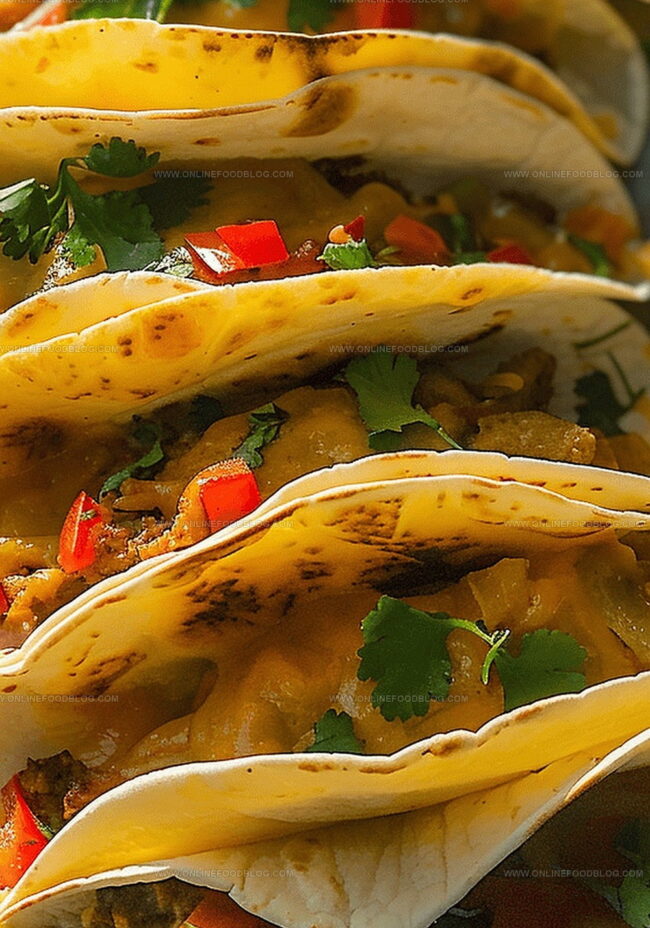
Tender, seasoned chicken nestles inside corn tortillas, creating a mouthwatering meal that takes minimal effort.
Layers of melted cheese, fresh toppings, and bold seasonings turn ordinary ingredients into an extraordinary dinner experience.
You’ll love how quickly these tacos come together, making them ideal for busy evenings when hunger strikes.
This recipe guarantees a delicious meal that will have everyone asking for seconds.
Quick Recipe Overview
What You’ll Need for Oven-Baked Chicken Tacos
For The Protein:For The Flavor Enhancers:For The Supporting Cast:Tools That Make Baked Chicken Tacos Simple
Directions for Crispy Oven-Baked Chicken Tacos
Warm up the oven to create a toasty cooking environment perfect for crispy tacos.
Cook chicken pieces in a hot skillet until they transform from raw to deliciously white, creating amazing flavor.
Toss colorful bell peppers and onions into the skillet, letting them soften and mingle with the chicken.
Sprinkle in zesty taco seasoning and a splash of fresh lime juice, coating everything in mouthwatering goodness.
Lay out soft tortillas and create flavor-packed pockets by adding cheese and chicken mixture to one half.
Carefully fold each tortilla into a perfect half-moon shape, creating little pockets of deliciousness.
Slide the tacos into the preheated oven, letting them turn golden and crunchy while the cheese melts into pure comfort.
Remove the tacos when they’re perfectly crisp and golden, ready to be devoured and enjoyed with friends and family.
Tips for Spicing Up Baked Chicken Tacos
How to Serve Chicken Tacos Family-Style
Oven-Baked Taco Storage Know-How
Print
Crispy Oven-Baked Chicken Tacos Recipe
- Total Time: 40 minutes
- Yield: 5 1x
Description
Mexican-inspired Oven-Baked Chicken Tacos combine crispy shells with juicy seasoned chicken and melted cheese. Delicious comfort finds its perfect balance, inviting you to savor each bite of this crowd-pleasing meal.
Ingredients
- ½ lb (227 g) chicken thighs, skinless and boneless
- ½ lb (227 g) chicken breast, skinless and boneless
- 3 tbsps taco seasoning (homemade or store-bought)
- 1 bell pepper, cut into small strips
- ½ white onion, diced (about ½ cup)
- 3 tbsps olive oil
- 1 lime, juiced
- 16 corn tortillas (6 inch)
- 1 cup Mexican cheese
- Cooking spray or oil
Instructions
- Preheat Preparation: Set oven to 400°F (204°C), ensuring rack is centered for uniform heating.
- Protein Preparation: Dice chicken thighs and breast into consistent, bite-sized cubes to guarantee even cooking.
- Skillet Searing: Heat olive oil in a large skillet over medium flame, sautéing chicken until completely opaque and white.
- Vegetable Integration: Incorporate diced bell peppers and onions into the skillet, cooking until vegetables soften and become slightly translucent.
- Seasoning Infusion: Reduce heat to medium-low, sprinkle taco seasoning across the mixture, and drizzle fresh lime juice, thoroughly tossing to distribute flavors evenly.
- Taco Assembly: Lightly spray baking sheet, arrange tortillas, layer with cheese, spoon seasoned chicken-vegetable mixture, and top with additional cheese.
- Folding Technique: Carefully fold tortillas into half-moon shapes, pressing edges to seal filling inside.
- Baking Process: Place second baking sheet atop folded tacos, bake 10-12 minutes until tortillas transform into crispy, golden-brown shells.
- Serving Finale: Remove top baking sheet, transfer tacos to serving plate, and repeat process with remaining ingredients.
Notes
- Slice Evenly: Cut chicken into uniform bite-sized pieces to ensure consistent cooking and prevent dry or undercooked sections.
- Sauté Technique: Cook vegetables briefly to maintain crispness and prevent soggy taco fillings while developing deep flavor profiles.
- Cheese Distribution: Place cheese on both sides of the filling to create a melty, gooey interior that enhances overall taco texture and taste.
- Pressing Method: Using a second baking sheet helps seal tacos, prevents filling from spilling, and creates a crispy, uniform exterior during baking.
- Prep Time: 15 minutes
- Cook Time: 25 minutes
- Category: Lunch, Dinner
- Method: Baking
- Cuisine: Mexican
Nutrition
- Serving Size: 5
- Calories: 360
- Sugar: 1 g
- Sodium: 550 mg
- Fat: 18 g
- Saturated Fat: 6 g
- Unsaturated Fat: 10 g
- Trans Fat: 0 g
- Carbohydrates: 36 g
- Fiber: 3 g
- Protein: 22 g
- Cholesterol: 75 mg
Mia Reynolds
Food Writer & Home Cooking Specialist
Expertise
Easy Home Baking, Recipe Writing and Storytelling, Local and Seasonal Ingredients, Baking for Beginners
Education
New England Culinary Institute (NECI), Montpelier, Vermont
Community College of Vermont, Winooski, Vermont
Mia Reynolds fell in love with baking as a teenager experimenting in her family kitchen. Her passion took her to New England Culinary Institute, where she learned practical pastry techniques, and later to Community College of Vermont to deepen her understanding of food management.
Mia combines clear, simple baking instructions with heartwarming stories, making home baking approachable for everyone.