
Sweet Mini Cannoli Cups Recipe: Tiny Bites of Italian Bliss
Delicate pastry shells cradle a silky cannoli filling that whispers sweet secrets of Sicily in this mini cannoli cups recipe.
These bite-sized delights pack an irresistible punch of creamy goodness into every single morsel.
Ancient Sicilian traditions meet modern dessert innovation with each delectable cup.
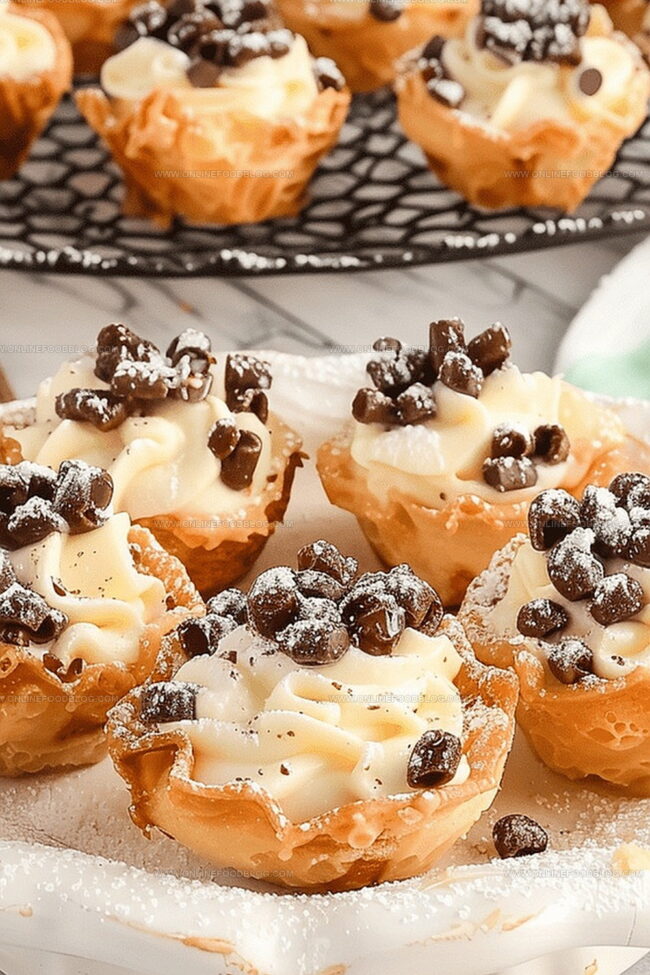
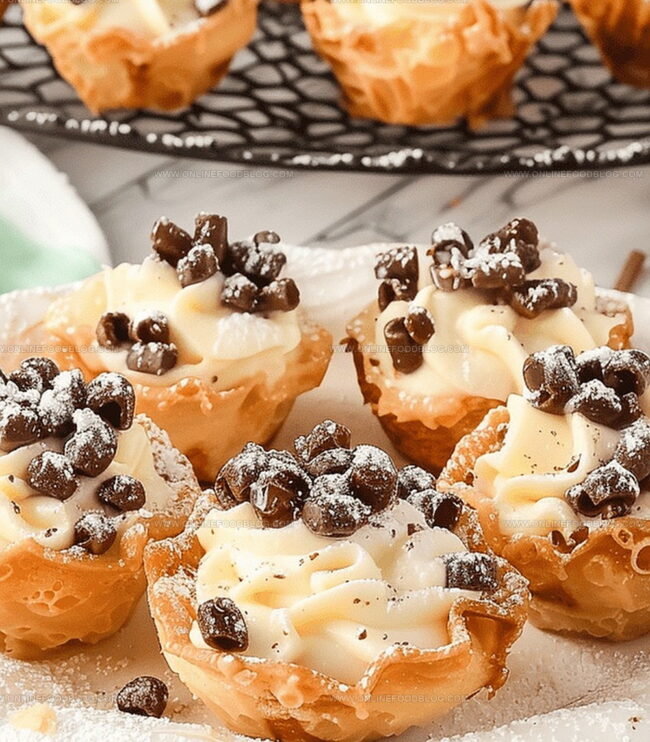
Crisp, golden shells provide the perfect crunch against the smooth ricotta center.
Powdered sugar dusts these miniature treats like a delicate winter snowfall, adding a touch of elegance to your dessert spread.
The rich combination of chocolate chips and ricotta creates a symphony of flavors that dance across your palate.
Serve these miniature marvels at your next gathering, and watch as they disappear in moments of pure culinary bliss.
Quick Recipe Overview
Mini Cannoli Cups Ingredient List for Quick Prep
For Pastry Base:For Creamy Filling:For Garnish and Finishing:Utensils for Assembling Mini Cannoli Cups
How to Fill and Bake Mini Cannoli Cups
Start by warming your kitchen oven to a toasty temperature. Gently unfold delicate pie dough and sprinkle with sparkling sugar crystals and warm cinnamon. Press sugar into dough with a light touch, creating a sweet crust.
Cut circular shapes from the dough using a small round cutter. Nestle these delicate circles into mini muffin cavities, creating tiny edible vessels for your creamy filling.
Slide the muffin tin into the heated oven. Watch carefully as the pastry transforms into golden, crispy shells with delicate edges. Allow the cups to rest and cool completely after baking.
Blend rich ricotta with sweet sugars, bright citrus zest, and smooth vanilla. Mix until silky and luxurious. Transfer the filling into a piping bag, keeping it chilled until serving time.
When ready to serve, pipe the dreamy filling into each crisp pastry cup. Sprinkle with crunchy chocolate bits or vibrant green pistachios. Dust lightly with powdered sugar for a elegant finish.
Flavor Ideas for Mini Cannoli Cream and Shells
Serving Mini Cannoli Cups at Gatherings
Storage Tips to Keep Mini Cannoli Cups Crisp
Print
Crispy Mini Cannoli Cups Recipe
- Total Time: 30 minutes
- Yield: 13 1x
Description
Sicilian cannoli get a modern twist with mini cannoli cups that pack authentic flavor into bite-sized treats. Crisp pastry shells cradle creamy ricotta filling, offering a delightful experience you’ll savor from first to last bite.
Ingredients
- 15 oz (425 g) whole-milk ricotta cheese
- 2 refrigerated pie crusts
- ½ cup powdered sugar
- 2 tbsps granulated sugar
- 3 tbsps turbinado sugar (raw sugar)
- 1 tsp ground cinnamon
- ¼ cup miniature semisweet chocolate chips or finely chopped pistachios
- 1 tsp finely grated orange or lemon zest
- ½ tsp vanilla extract
- Additional powdered sugar for dusting
Instructions
- Dough Preparation: Unroll pie crusts and lavishly coat with turbinado sugar and ground cinnamon, pressing spices gently into the pastry for maximum flavor infusion.
- Shaping Technique: Utilize a 2½-inch circular cutter to create uniform dough rounds, then meticulously press each circle into mini muffin tin cavities, ensuring seamless integration.
- Baking Process: Preheat oven to 425°F and bake pastry cups until achieving a lustrous golden-brown appearance, approximately 10 minutes, then allow to rest in the tin for 15 minutes for structural stabilization.
- Cooling Protocol: Transition pastry cups to a wire rack, permitting complete cooling while maintaining their delicate architectural integrity.
- Filling Creation: Blend ricotta cheese, sugars, citrus zest, and vanilla extract, whipping until the mixture transforms into a silky, luxurious cream.
- Filling Deployment: Refrigerate the prepared filling in a pastry bag, then pipe generously into cooled pastry cups with elegant precision.
- Finishing Touches: Adorn the filled cups with chocolate chips or chopped pistachios, and conclude by dusting with a gossamer layer of powdered sugar for a sophisticated presentation.
Notes
- Precision Matters: Use a 2½-inch circular cookie cutter for uniform dough rounds, ensuring consistent cup sizes and professional presentation.
- Sugar Secret: Press turbinado sugar and cinnamon gently into pie crust to maximize flavor infusion and create a delightful caramelized texture.
- Cooling Technique: Allow pastry cups to rest in the muffin tin for 15 minutes after baking, preventing structural collapse and maintaining delicate shape.
- Filling Finesse: Refrigerate ricotta mixture before piping to enhance flavor melding and maintain optimal cream consistency for smooth, elegant filling.
- Prep Time: 20 minutes
- Cook Time: 10 minutes
- Category: Desserts, Snacks
- Method: Baking
- Cuisine: Italian
Nutrition
- Serving Size: 13
- Calories: 220
- Sugar: 12 g
- Sodium: 150 mg
- Fat: 10 g
- Saturated Fat: 4 g
- Unsaturated Fat: 5 g
- Trans Fat: 0 g
- Carbohydrates: 29 g
- Fiber: 1 g
- Protein: 4 g
- Cholesterol: 20 mg
Mia Reynolds
Food Writer & Home Cooking Specialist
Expertise
Easy Home Baking, Recipe Writing and Storytelling, Local and Seasonal Ingredients, Baking for Beginners
Education
New England Culinary Institute (NECI), Montpelier, Vermont
Community College of Vermont, Winooski, Vermont
Mia Reynolds fell in love with baking as a teenager experimenting in her family kitchen. Her passion took her to New England Culinary Institute, where she learned practical pastry techniques, and later to Community College of Vermont to deepen her understanding of food management.
Mia combines clear, simple baking instructions with heartwarming stories, making home baking approachable for everyone.