
Heavenly Buttery Garlic Pizza Recipe for Pizza Lovers
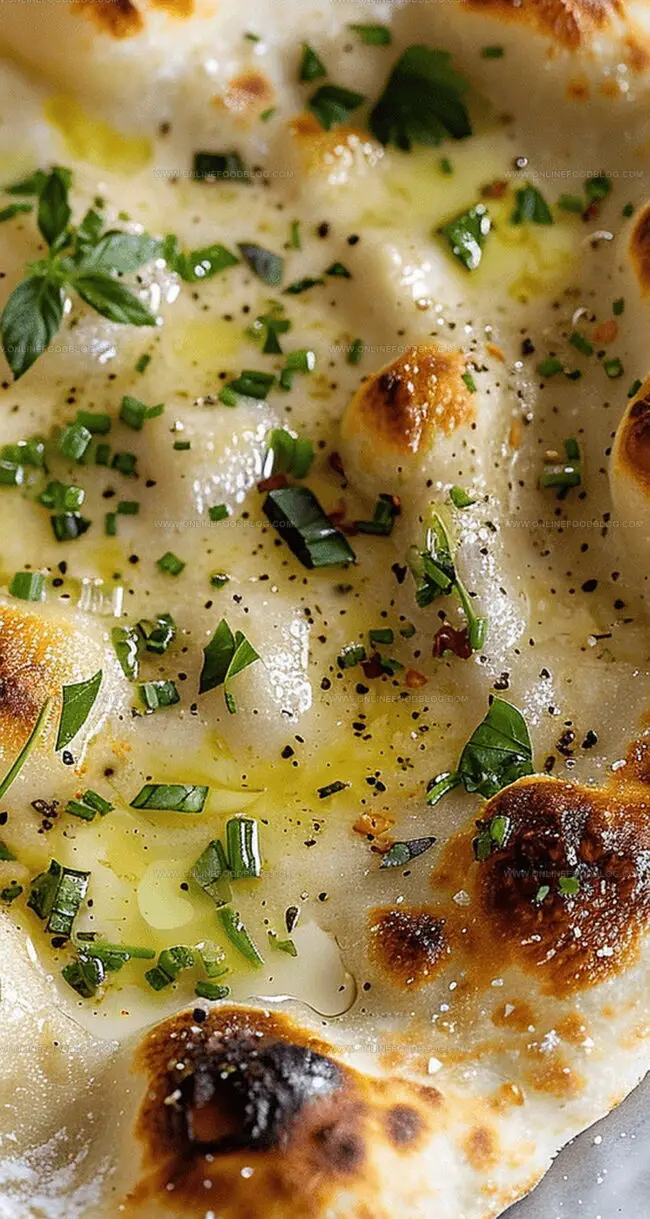
Melted cheese, crispy edges, and a golden pizza dough bring pure comfort right to your plate with this buttery garlic pizza recipe that promises restaurant-quality deliciousness.
The aroma of garlic and butter will fill your kitchen with mouthwatering anticipation.
Every slice promises a perfect balance of rich, savory flavors that dance across your taste buds.
Homemade pizzas beat takeout any day, especially when you can control the ingredients and customize to your heart’s content.
Each bite delivers a delightful crunch and a burst of garlic-infused goodness.
Professional chefs and home cooks alike will appreciate how simple yet extraordinary this recipe becomes.
Get ready to master a pizza that will have everyone asking for seconds.
Quick Recipe Overview
Buttery Garlic Pizza Must-Have Ingredients
For Base Ingredients:For Flavor Enhancers:For Seasoning Ingredients:What You’ll Need to Make Garlic Pizza
Steps to Cook Buttery Garlic Pizza

Cozy Kitchen Garlic Pizza Adventure
Get your kitchen ready for a delicious journey. Place a pizza steel or stone inside the oven and crank up the heat to a blazing 500°F. Let the stone soak up that warmth for a solid 45 minutes to create the perfect crispy base.
Melt butter with minced garlic in a small pan, letting the aroma fill your kitchen. Chop up a handful of fresh green onions, rosemary, and thyme to create a herb blend that’ll make your taste buds dance.
On a flour-dusted surface, gently stretch your dough into a beautiful circle. Use your hands to coax it into a gorgeous 12-inch round, letting gravity help you shape it perfectly. Slide the dough onto a prepared pizza peel.
Drizzle the golden garlic butter across the dough, then sprinkle your herb mixture generously. Add a pinch of flaky salt, a dash of black pepper, and some spicy red pepper flakes for extra excitement.
Carefully slide the pizza onto the sizzling hot steel. Bake for 5 minutes, then switch to broil for 2-4 minutes until the crust turns a gorgeous golden brown with delightful blistered spots.
Pull the pizza from the oven and shower it with fresh chives. Slice, serve, and watch everyone’s eyes light up with pure culinary joy.
Fun Garlic Pizza Customization Ideas
Tips to Serve Buttery Garlic Pizza
Ways to Save Your Garlic Pizza
Print
Crispy Garlic Pizza Recipe
- Total Time: 30 minutes
- Yield: 3 1x
Description
Homemade buttery garlic pizza delivers a luxurious Italian-inspired experience with crisp golden crust and rich herb-infused flavors. Melted cheese and fragrant garlic make each slice an irresistible comfort for pizza enthusiasts.
Ingredients
- 2 artisan pizza dough balls (1 recipe)
- 1 stick (113 g/4 oz) salted butter
- 3 garlic cloves, chopped
- 2 tbsps minced green onion
- 1 tbsp minced rosemary
- 1 tbsp fresh thyme
- 2 tbsps minced chives
- Flaky salt, to taste
- Freshly ground black pepper, to taste
- Red pepper flakes, to taste
Instructions
- Preheat Preparation: Position pizza steel or stone in the oven, elevating temperature to 500°F and allowing thorough heating for 30 minutes to create optimal cooking environment.
- Garlic Butter Infusion: Gently melt butter with minced garlic in a small saucepan, stirring until aromatic and fully integrated, developing a rich flavor base.
- Herb Ensemble: Combine green onion, rosemary, and thyme in a small bowl, crafting a vibrant seasoning blend that will enhance the pizza’s complexity.
- Dough Transformation: On a flour-dusted surface, delicately stretch the dough into a 12-inch circular shape, maintaining a slightly thicker perimeter and ensuring smooth, even distribution.
- Pizza Assembly: Transfer dough to a well-floured pizza peel, meticulously brushing the surface with garlic-infused butter, then generously sprinkle herb mixture, flaky salt, black pepper, and red pepper flakes across the canvas.
- Baking Technique: Slide pizza onto the scorching hot steel or stone, baking for 5 minutes until the crust begins to evolve, then activate the broiler for an additional 2-4 minutes to develop golden-brown blisters and intense coloration.
- Finishing Touch: Carefully extract the pizza from the oven, garnishing with freshly chopped chives to add a final layer of flavor and visual appeal, then repeat the entire process for subsequent pizzas.
Notes
- Optimize Oven Heat: Preheat pizza steel or stone at 500°F for 45 minutes to achieve a crispy, restaurant-quality crust that’s perfectly golden and crunchy.
- Master Dough Stretching: Handle dough gently and use gravity to naturally expand, avoiding aggressive pulling that can tear or thin the delicate surface.
- Control Broiler Timing: Watch pizza closely during final 2-4 minutes under broiler to prevent burning, aiming for beautiful golden-brown blisters without charring.
- Flavor Layer Strategy: Apply garlic butter first, then herbs and seasonings to ensure maximum flavor absorption and even distribution across the pizza surface.
- Prep Time: 20 minutes
- Cook Time: 10 minutes
- Category: Dinner, Appetizer, Snacks
- Method: Baking
- Cuisine: Italian
Nutrition
- Serving Size: 3
- Calories: 383
- Sugar: 0.5 g
- Sodium: 530 mg
- Fat: 30 g
- Saturated Fat: 18 g
- Unsaturated Fat: 10 g
- Trans Fat: 1 g
- Carbohydrates: 28 g
- Fiber: 1 g
- Protein: 4 g
- Cholesterol: 70 mg
Mia Reynolds
Food Writer & Home Cooking Specialist
Expertise
Easy Home Baking, Recipe Writing and Storytelling, Local and Seasonal Ingredients, Baking for Beginners
Education
New England Culinary Institute (NECI), Montpelier, Vermont
Community College of Vermont, Winooski, Vermont
Mia Reynolds fell in love with baking as a teenager experimenting in her family kitchen. Her passion took her to New England Culinary Institute, where she learned practical pastry techniques, and later to Community College of Vermont to deepen her understanding of food management.
Mia combines clear, simple baking instructions with heartwarming stories, making home baking approachable for everyone.