
Cheerful Spring Oreo Pops Recipe to Sweeten Your Season
Whipping up delightful spring Oreo pops brings a burst of sweetness to any celebration.
These charming treats combine classic Oreo cookies with a playful, seasonal twist that delights both kids and adults.
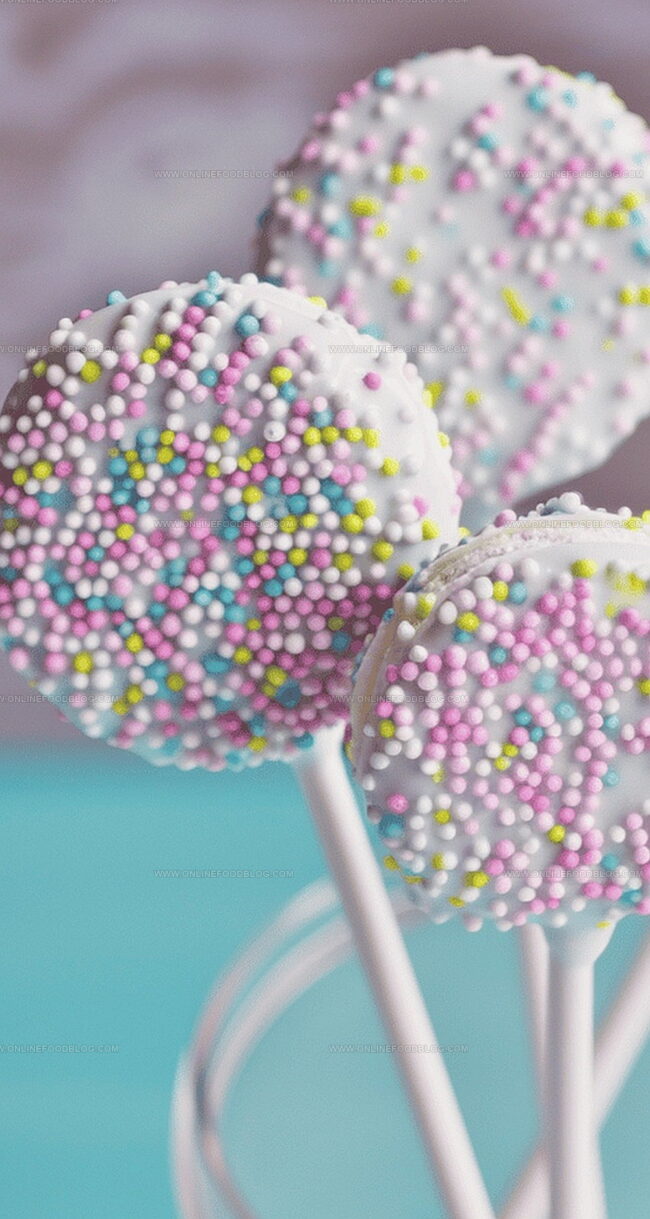
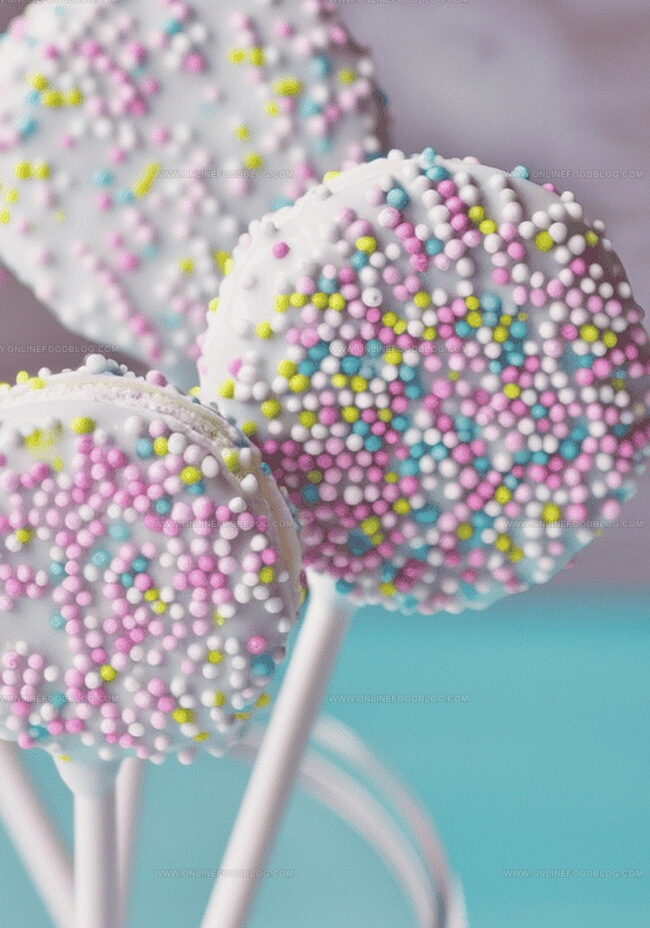
Colorful candy melts and sprinkles turn simple Oreo pops into edible works of art that sparkle with springtime joy.
Effortless to create and impossible to resist, these Oreo pops promise to be the star of your next gathering.
The decorative process becomes a fun activity you can enjoy with loved ones, creating memories as delicious as the treats themselves.
Grab your ingredients and get ready to craft a dessert that’s sure to bring smiles and sweet moments to your spring celebration.
Quick Recipe Overview
Ingredients for Spring Oreo Pops
For Base Of Cookie:For Binding And Coating:For Decoration And Finishing:Tools to Make Oreo Pops at Home
Quick Steps for Colorful Oreo Treats
Spring Oreo Pops
Gently twist apart each Oreo cookie, keeping the cream center intact.
Warm white chocolate in a microwave-safe container until smoothly melted. Carefully insert a lollipop stick into the creamy center, pressing the cookie halves back together to secure.
Dip each cookie pop into the melted white chocolate, ensuring complete and even coverage. Softly tap the stick to remove extra chocolate drips.
Roll the chocolate-covered cookie pop through colorful spring-themed sprinkles. Create playful patterns by sprinkling different shapes and colors across the surface.
Place decorated Oreo pops on a parchment-lined tray. Refrigerate for 15-20 minutes until chocolate becomes firm and glossy.
Arrange the completed spring Oreo pops on a decorative serving platter. Wrap individually in clear cellophane with pastel ribbons for charming gifts or party favors.
Tips for Decorating Spring-Themed Pops
Fun Ways to Serve Oreo Pops
Storage Plan for Oreo Pops That Last
Print
Colorful Spring Oreo Pops
- Total Time: 30 minutes
- Yield: 22 1x
Description
Refreshing spring oreo pops combine creamy chocolate and pastel decorations for a delightful treat. Guests will adore these charming desserts that blend festive colors with classic cookie flavors.
Ingredients
- 24 oz (680 g) white chocolate melts
- 1 bag oreo cookies
- 24 lollipop sticks
- spring-themed sprinkles
Instructions
- Cookie Separation: Delicately twist Oreo cookies to expose the creamy center, separating top and bottom halves with precision.
- Stick Anchoring: Dip lollipop stick’s tip into melted white chocolate, then insert firmly into cookie cream. Press cookie halves together, securing stick centrally.
- Chocolate Preparation: Melt white chocolate in a microwave-safe container, stirring until achieving a silky, uniform texture. Choose a tall, narrow vessel for optimal dipping.
- Coating Technique: Fully immerse each cookie pop in melted chocolate, allowing excess to cascade off by gently tapping the stick. Ensure a uniform, thin chocolate layer envelops the entire surface.
- Decorative Embellishment: While chocolate remains glossy, adorn pops with spring-inspired accents like pastel sprinkles, shimmering edible glitter, or delicate sugar flowers. Apply decorations immediately for maximum adhesion.
- Setting and Hardening: Arrange decorated pops vertically on a parchment-lined baking sheet. Accelerate solidification by refrigerating for 15-20 minutes or allow to set naturally at room temperature.
- Serving Presentation: Once chocolate coating has completely hardened and decorations are securely attached, the Oreo pops are primed for delightful springtime enjoyment or elegant packaging.
Notes
- Twist with Care: Gently separate Oreo cookies to keep the cream intact, avoiding cracking or breaking the delicate cookie.
- Stick Stability Matters: Dip lollipop stick tip in white chocolate before inserting into cream for a secure, reliable anchor that prevents cookie separation.
- Chocolate Melting Mastery: Use a microwave-safe container and stir frequently to create smooth, lump-free white chocolate coating that ensures perfect coverage.
- Decoration Timing is Critical: Add sprinkles, glitter, or sugar flowers immediately after dipping while chocolate remains wet to guarantee decorations stick perfectly.
- Prep Time: 10 minutes
- Cook Time: 0 minutes
- Category: Snacks, Desserts
- Method: Blending
- Cuisine: American
Nutrition
- Serving Size: 22
- Calories: 180
- Sugar: 15g
- Sodium: 50mg
- Fat: 9g
- Saturated Fat: 5g
- Unsaturated Fat: 3g
- Trans Fat: 0g
- Carbohydrates: 23g
- Fiber: 1g
- Protein: 2g
- Cholesterol: 0mg
Mia Reynolds
Food Writer & Home Cooking Specialist
Expertise
Easy Home Baking, Recipe Writing and Storytelling, Local and Seasonal Ingredients, Baking for Beginners
Education
New England Culinary Institute (NECI), Montpelier, Vermont
Community College of Vermont, Winooski, Vermont
Mia Reynolds fell in love with baking as a teenager experimenting in her family kitchen. Her passion took her to New England Culinary Institute, where she learned practical pastry techniques, and later to Community College of Vermont to deepen her understanding of food management.
Mia combines clear, simple baking instructions with heartwarming stories, making home baking approachable for everyone.