
The Sweetest Funfetti Cheesecake Cake Recipe Ever Created
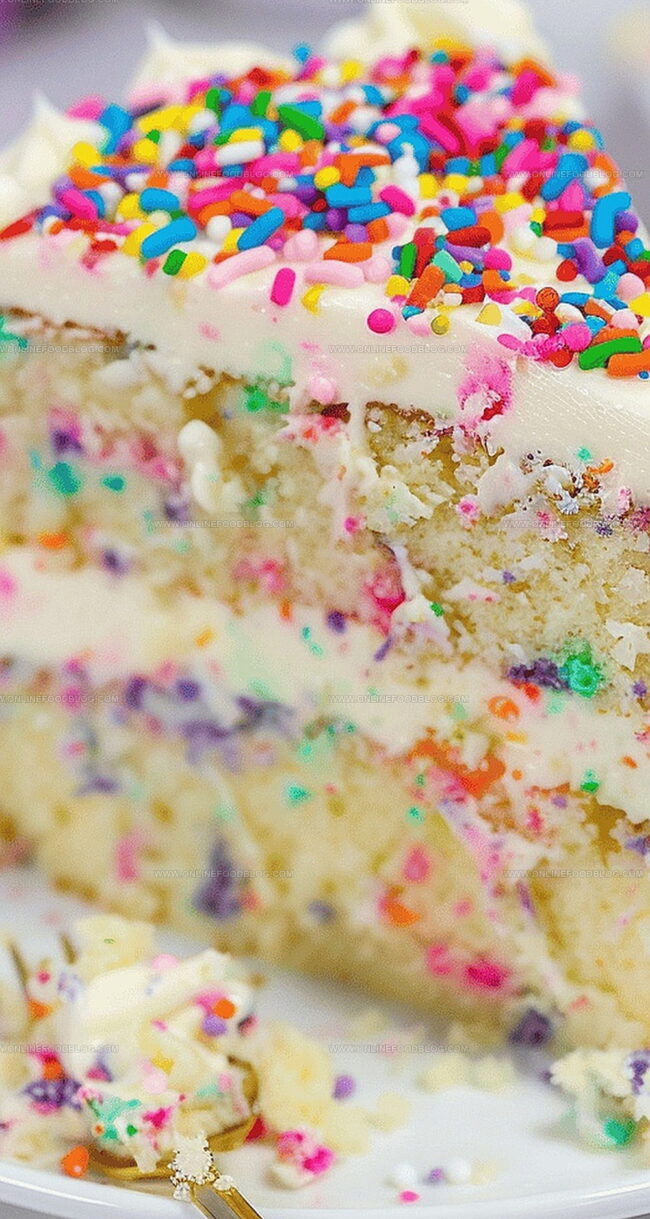
Bursting with colorful sprinkles and creamy decadence, this funfetti cheesecake cake recipe delivers pure joy on a plate.
Layers of soft vanilla cake mingle with rich, velvety cheesecake filling that promises to dazzle every sweet tooth.
The vibrant sprinkles scattered throughout create a festive celebration in each delightful bite.
Birthdays, parties, or spontaneous dessert cravings find their perfect match with this show-stopping treat.
Creamy, tender, and impossibly fun, this dessert brings whimsy and indulgence together in one unforgettable creation.
Whip up this crowd-pleasing masterpiece and watch eyes light up with pure delight.
Quick Recipe Overview
Ingredient Rundown for Funfetti Cheesecake Cake
For Cheesecake Base:For Cake Base:For Frosting and Decoration:Kitchen Tools for Funfetti Cheesecake Cake Assembly
Steps for Making Funfetti Cheesecake Cake

Create a smooth, creamy cheesecake base that will become the heart of this magical dessert. Gently blend cream cheese until silky, then incorporate sweetness and a touch of flour. Introduce eggs carefully, ensuring a velvety texture that will set perfectly when baked.
Craft a soft, fluffy cake layer that will embrace the cheesecake. Mix butter and sugar until they transform into a light, dreamy mixture. Fold in rainbow sprinkles to create bursts of color and excitement throughout the cake.
Whip up a pillowy cream cheese frosting that will bind the layers together. Beat cream cheese and butter until they create a smooth backdrop, then gradually add sweetness. Sprinkle in colorful confetti to make the frosting dance with joy.
Assemble the dessert like an artist creating a masterpiece. Start with a cake layer, add a gentle spread of frosting, then carefully place the frozen cheesecake on top. Crown with the second cake layer and enrobe the entire creation in a blanket of sprinkle-studded frosting.
Chill the cake to let the flavors mingle and settle. When ready to serve, watch as friends and family marvel at the colorful, playful dessert that combines the best of cheesecake and cake in one spectacular creation.
Flavor Ideas for Frosting or Crust
Serving Funfetti Cheesecake Cake with Flair
Best Storage for Funfetti Cheesecake
Print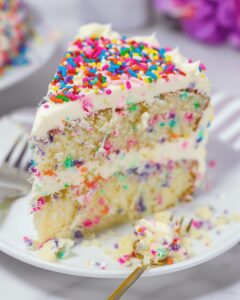
Colorful Funfetti Cheesecake Cake Recipe
- Total Time: 1 hour 45 minutes plus overnight freezing
- Yield: 13 1x
Description
Funfetti cheesecake cake blends childhood nostalgia with sophisticated dessert crafting. Colorful sprinkles dance through creamy layers, creating a playful celebration of flavor and texture that delights guests at any gathering.
Ingredients
- 16 oz (454 g) cream cheese, room temperature
- 16 oz (454 g) cream cheese, room temperature
- 1 cup (227 g) unsalted butter, room temperature
- 10 tbsps (142 g) unsalted butter, room temperature
- 3–3.5 cups powdered sugar
- 1.33 cups granulated sugar
- ⅔ cup granulated sugar
- ⅔ cup whole milk
- ⅓ cup sour cream
- 2 tbsps sour cream
- 2 large eggs
- 3 large egg whites
- 1 large egg
- 1 large egg yolk
- 2 cups all-purpose flour
- 1.5 tbsps all-purpose flour
- 1 tbsp baking powder
- ½ tsp almond extract
- 1 tsp vanilla extract
- 1.5 tsp vanilla extract
- 1 tbsp vanilla extract
- ¼ tsp salt
- ⅔ cup rainbow sprinkles
- ½ cup rainbow sprinkles, plus more for topping
Instructions
- Prepare Cheesecake Base: Whip cream cheese until velvety, gradually incorporating sugar and flour for a uniform texture. Gently integrate eggs, ensuring complete blending without overmixing.
- Finalize Cheesecake Batter: Fold in sour cream and vanilla, meticulously scraping bowl edges. Transfer to a parchment-lined springform pan nestled in a warm water bath.
- Bake Cheesecake: Cook at 325°F until center shows a delicate, slightly jiggly consistency. Immediately chill overnight for complete stabilization.
- Craft Cake Layers: Sift dry ingredients and cream butter with sugar until light and airy. Incorporate eggs sequentially at low speed, alternating between dry ingredients and liquids.
- Add Sprinkle Dimension: Fold rainbow sprinkles throughout cake batter. Bake at 350°F until golden and a testing probe emerges clean.
- Develop Frosting: Whip cream cheese and butter into a pillowy consistency. Gradually introduce powdered sugar, folding additional sprinkles for vibrant visual appeal.
- Assemble Celebration Cake: Layer alternating cake and cheesecake sections with frosting between each. Enrobe entire cake with remaining frosting, creating smooth coverage.
- Final Touches: Embellish top with sprinkle decoration. Refrigerate until serving to maintain structural integrity and enhance flavor melding.
Notes
- Whip with Precision: Cream cheese must be room temperature and whipped until ultra-smooth to prevent lumpy cheesecake texture.
- Temperature Control: Allow ingredients to reach room temperature before mixing to ensure seamless blending and consistent batter quality.
- Water Bath Technique: Wrap springform pan entirely in foil to prevent water seepage, which protects delicate cheesecake from moisture damage.
- Chill for Success: Overnight refrigeration is crucial for cheesecake setting and flavor development, so patience yields the most decadent results.
- Prep Time: 45 minutes
- Cook Time: 1 hour
- Category: Desserts
- Method: Baking
- Cuisine: American
Nutrition
- Serving Size: 13
- Calories: 495
- Sugar: 42 g
- Sodium: 320 mg
- Fat: 26 g
- Saturated Fat: 16 g
- Unsaturated Fat: 8 g
- Trans Fat: 0 g
- Carbohydrates: 58 g
- Fiber: 1 g
- Protein: 5 g
- Cholesterol: 95 mg
Mia Reynolds
Food Writer & Home Cooking Specialist
Expertise
Easy Home Baking, Recipe Writing and Storytelling, Local and Seasonal Ingredients, Baking for Beginners
Education
New England Culinary Institute (NECI), Montpelier, Vermont
Community College of Vermont, Winooski, Vermont
Mia Reynolds fell in love with baking as a teenager experimenting in her family kitchen. Her passion took her to New England Culinary Institute, where she learned practical pastry techniques, and later to Community College of Vermont to deepen her understanding of food management.
Mia combines clear, simple baking instructions with heartwarming stories, making home baking approachable for everyone.