
Quick & Festive Cinnamon Roll Christmas Tree Recipe for Holiday Joy
Cinnamon roll Christmas trees bring festive magic to holiday baking with their whimsical spiral design and sweet, warm aroma.
Bakers who love crafting classic treats into seasonal masterpieces will adore this playful pastry creation.
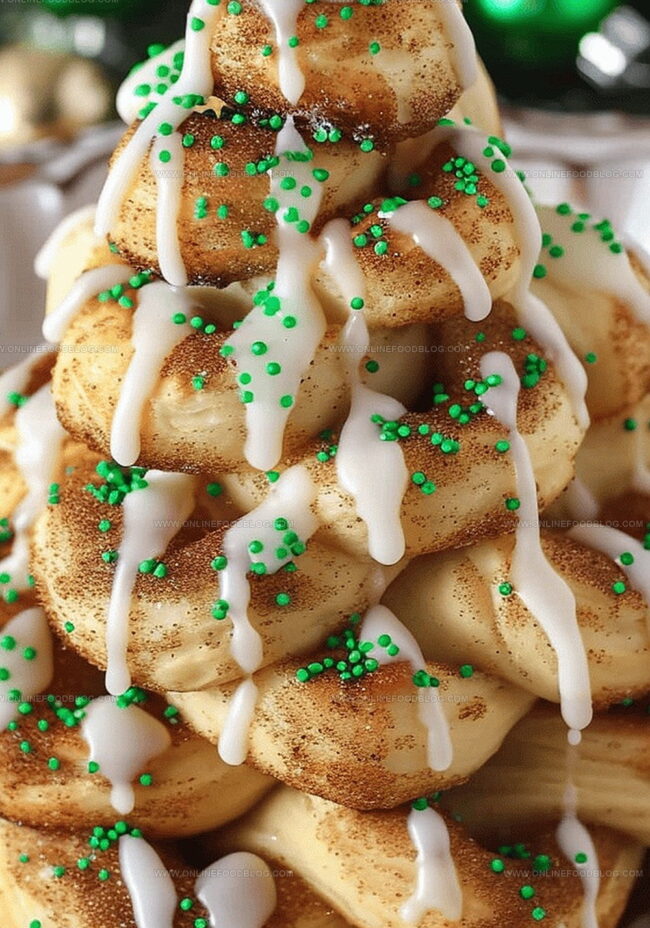
Delicate swirls of dough twist into a triangular shape, mimicking evergreen branches draped in sugary delight.
Soft, pillowy layers promise a melt-in-your-mouth experience that captures the essence of winter comfort.
Intricate details and careful shaping craft an ordinary breakfast staple into a stunning centerpiece for holiday gatherings.
Families and friends will marvel at the unexpected twist on traditional cinnamon rolls, making this recipe a delightful conversation starter.
Prepare to wow your loved ones with a dessert that combines culinary creativity and festive cheer.
Why Cinnamon Roll Tree’s a Hit
Inside the Cinnamon Tree Recipe
Main Dough:Decoration Ingredients:Baking Preparation:How to Shape a Roll Tree
Step 1: Create the Base of the Christmas Tree
Carefully unroll the first cinnamon roll on a clean surface. Shape the pastry into a zigzag pattern, starting from the bottom. Gently press the segments together to form a sturdy base for your edible tree.
Step 2: Build the Tree Layers
Take the second cinnamon roll and connect it to the end of the previous layer. Continue creating the zigzag pattern, making each new tier slightly shorter than the last. This technique will give your tree its classic triangular shape.
Step 3: Complete the Christmas Tree Design
Continue adding cinnamon rolls, connecting and shaping them carefully. Work your way up until you’ve used all the rolls in the can. Make sure each layer is securely attached to maintain the tree’s structure during baking.
Step 4: Prepare for Baking
Transfer the shaped dough carefully onto the parchment-lined baking sheet. Ensure the tree is stable and maintains its shape.
Step 5: Bake to Golden Perfection
Place the baking sheet in the preheated oven. Bake according to the instructions on the cinnamon roll package until golden brown and fully cooked.
Step 6: Add Festive Decorations
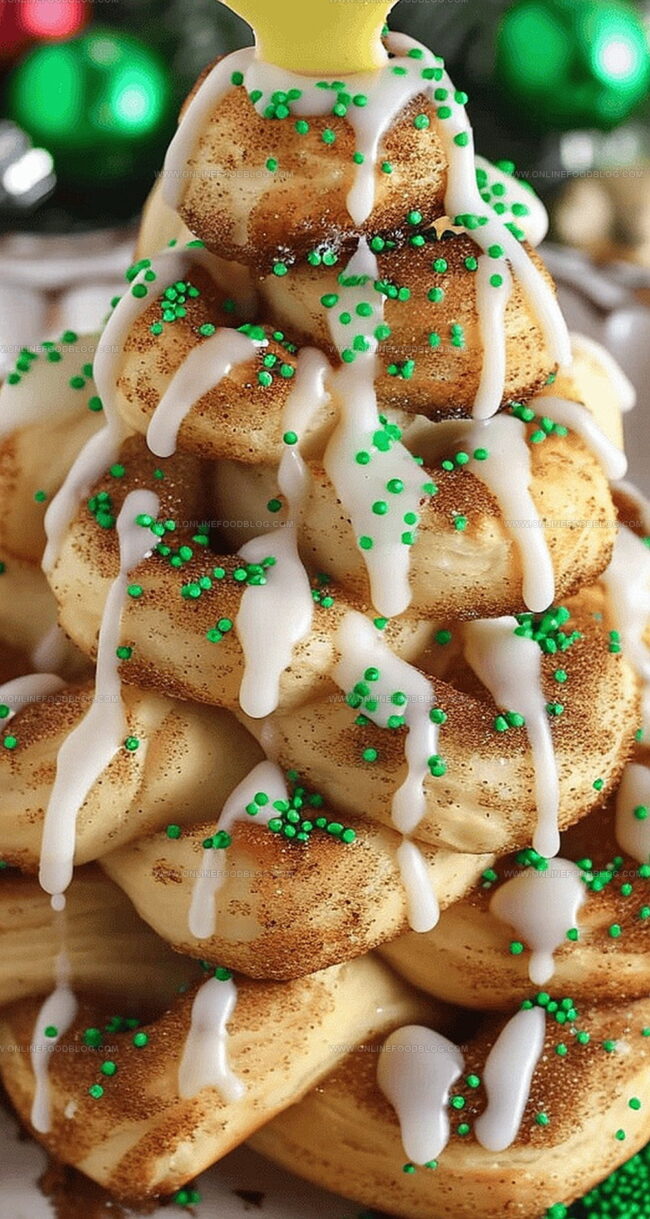
Remove the baked tree from the oven. While still warm, drizzle the included icing over the entire surface. Sprinkle green sugar and non-pareils to create a festive look. Top the tree with a star sprinkle at the very tip for a magical finishing touch.
Step 7: Serve and Enjoy
Let the cinnamon roll Christmas tree cool slightly. Slice and serve to delight friends and family with this creative holiday treat!
Tips for Tree-Shaped Cinnamon Rolls
Store Your Cinnamon Roll Tree
What Goes with Roll Trees
Tree Style Cinnamon Swaps
Print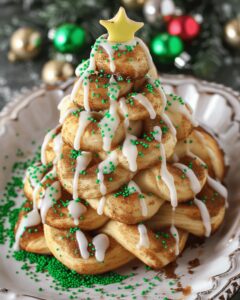
Cinnamon Roll Christmas Tree Recipe
- Total Time: 30 minutes
- Yield: 8 1x
Description
Festive Cinnamon Roll Christmas Tree brings holiday magic to breakfast tables with spiraling dough shaped like a whimsical evergreen. Pillowy sweet rolls cascade in delightful layers, promising delicious cheer that welcomes winter celebrations with warmth and joy.
Ingredients
Main Ingredients:
- 1 can cinnamon rolls with icing
Decoration:
- 1 package green sparkling sugar sprinkles
- 1 package non-pareils sprinkles
- 1 package star sprinkles
Instructions
- Warm the oven to the temperature indicated on the cinnamon roll packaging. Cover a baking sheet with parchment paper to ensure smooth release and prevent sticking.
- Extract the cinnamon rolls from the container. Carefully unroll the first pastry, positioning it into a multi-tiered zigzag configuration that will form the foundational section of the tree.
- Methodically connect subsequent rolls, pressing their edges together to create a seamless, tapering silhouette that mimics an evergreen’s natural triangular shape.
- Progressively construct each tier slightly narrower than the previous one, ensuring the entire structure maintains a cohesive and symmetrical Christmas tree outline.
- Gently press all segments together, securing their connections to preserve the intricate design during the baking process.
- Transfer the elaborate pastry formation onto the prepared baking sheet, positioning it centrally to allow even heat distribution.
- Bake according to the package instructions, monitoring the color and texture to achieve a golden-brown finish.
- Immediately after removing from the oven, generously drizzle the accompanying white icing across the warm surface, allowing it to cascade naturally.
- Embellish the festive creation with green sugar sprinkles, non-pareils, and a star-shaped topping to complete the whimsical holiday design.
Notes
- Quickly transform store-bought cinnamon rolls into a festive holiday centerpiece with minimal effort and maximum visual impact.
- Carefully reshape each roll in a zigzag pattern, gradually decreasing tier sizes to create an authentic Christmas tree silhouette.
- Press roll segments gently but firmly together to maintain structural integrity during baking, ensuring a cohesive tree design.
- Work strategically from bottom to top, connecting roll segments to build a tree that looks professionally crafted.
- Use provided icing and colorful sprinkles to add whimsical decoration, turning a simple pastry into a show-stopping dessert.
- Serve immediately after baking for optimal taste and visual appeal, making it a delightful surprise for family and friends.
- Prep Time: 15 minutes
- Cook Time: 15 minutes
- Category: Breakfast, Snacks, Desserts
- Method: Baking
- Cuisine: American
Nutrition
- Serving Size: 8
- Calories: 200 kcal
- Sugar: 15 g
- Sodium: 250 mg
- Fat: 8 g
- Saturated Fat: 3 g
- Unsaturated Fat: 4 g
- Trans Fat: 0 g
- Carbohydrates: 30 g
- Fiber: 1 g
- Protein: 2 g
- Cholesterol: 5 mg
Lucas Bennett
Founder & Recipe Creator
Expertise
Simple Everyday Recipes, Sustainable Cooking Practices, Creative Meal Planning, Recipe Testing and Improvement
Education
Fox Valley Technical College, Appleton, Wisconsin
Lake Superior College, Duluth, Minnesota
Lucas Bennett’s cooking journey started in his parents’ kitchen, where he learned to prepare tasty, no-fuss meals from scratch. His culinary passion led him to Fox Valley Technical College, where he gained practical cooking skills.
He then expanded his focus on sustainability at Lake Superior College. Today, Lucas shares easy, approachable recipes designed to make cooking enjoyable and stress-free for everyone.