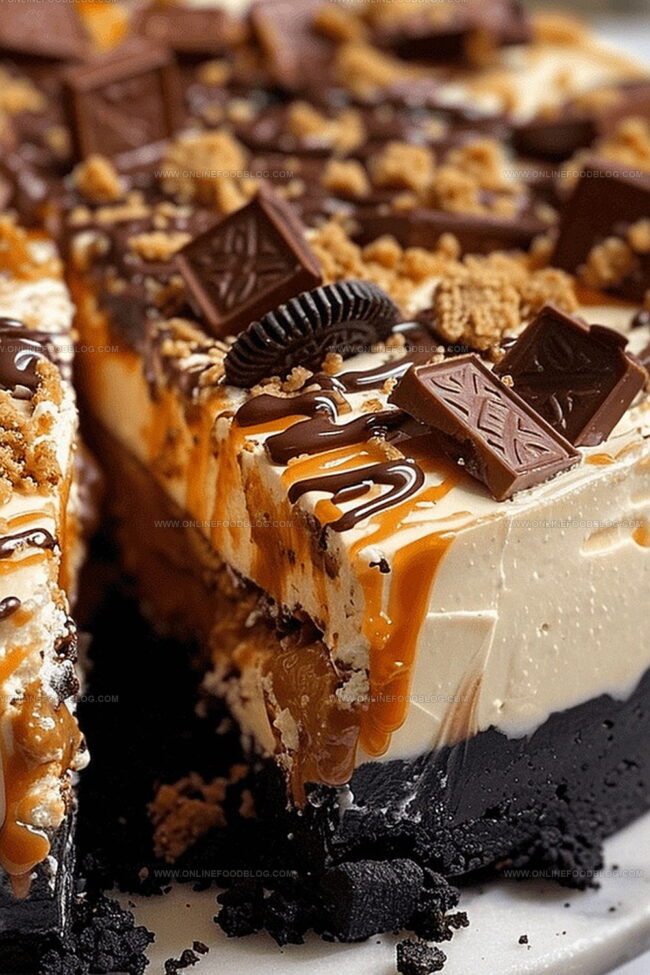
Butterfinger cheesecake reimagines ordinary dessert into an epic indulgence that promises pure decadence.
Sweet and salty notes dance across a luxurious canvas of creamy potential.
Crunchy candy pieces promise delightful texture within every single bite.
Rich layers of flavor contrast magnificently, creating a dessert experience that transcends traditional expectations.
Chocolate and caramel undertones weave through dense, velvety filling that melts instantly on your tongue.
Sophisticated yet playful, this recipe combines nostalgic candy memories with professional pastry techniques.
Each slice represents a celebration of culinary creativity and indulgent comfort.
What You’ll Love About Butterfinger Cheesecake
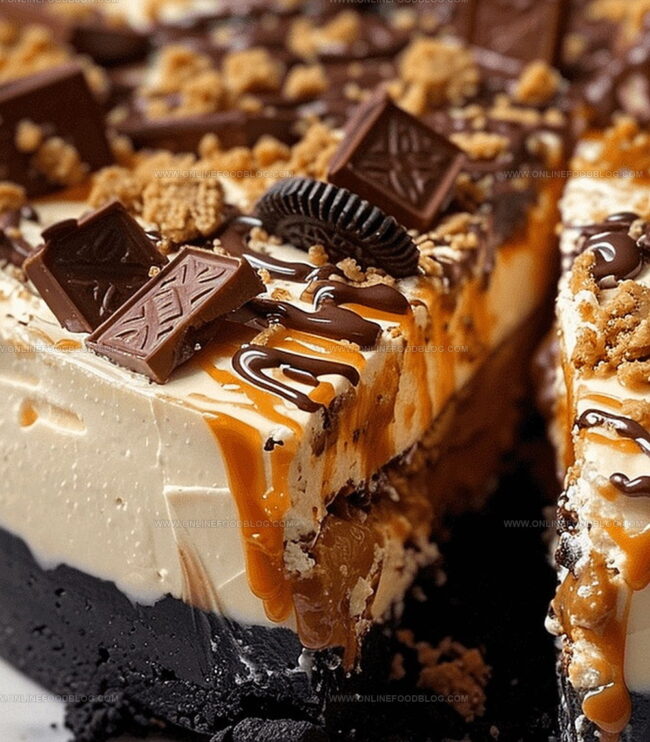
Craft Irresistible Flavor Layers: This Butterfinger Cheesecake delivers an incredible taste explosion by combining creamy cheesecake, rich chocolate ganache, and crunchy candy pieces that dance together in perfect harmony.
Elevate Dessert Complexity: The multi-step preparation creates a gourmet experience with professional-level techniques like water bath baking, smooth ganache making, and precise whipped cream decoration that feels sophisticated yet approachable.
Transform Ordinary Candy into Extraordinary Dessert: Butterfingers aren’t just a topping – they become an integral ingredient, transforming a classic cheesecake into a decadent masterpiece that turns a simple treat into a showstopping dessert perfect for special celebrations or intense chocolate-peanut butter cravings.
Design Textural Wonderland: Each bite offers incredible contrast between silky smooth cheesecake, crisp Oreo crust, crunchy candy pieces, and luxurious whipped cream, creating a sensory experience that keeps your taste buds engaged and excited.
Must-Have Ingredients for Butterfinger Cheesecake
Crust Ingredients:
Oreo Cookies: Classic chocolate sandwich cookies that create a rich, crumbly base for the cheesecake.
Filling Ingredients:
Cream Cheese: Smooth, tangy base that provides the classic cheesecake texture and rich flavor.
Sugar: Sweetens the filling and balances the cream cheese’s tanginess.
All-Purpose Flour: Helps stabilize the cheesecake and prevent cracking.
Sour Cream: Adds moisture and a slight tang to the cheesecake filling.
Peanut Butter: Introduces a creamy, nutty flavor that complements the Butterfinger.
Vanilla Extract: Enhances the overall flavor profile with its warm, sweet notes.
Eggs: Bind the ingredients and provide structure to the cheesecake.
Butterfinger Candy Bars: Crunchy, peanut buttery chocolate bars that add texture and signature flavor.
Topping Ingredients:
Heavy Cream: Used for both ganache and whipped cream, providing richness and smooth texture.
Chocolate Chips: Create a glossy, decadent ganache layer.
Powdered Sugar: Sweetens and stabilizes the whipped cream.
Additional Butterfinger Candy Bars: Garnish that adds crunch and visual appeal.
Instructions for Layering the Perfect Butterfinger Cheesecake
Step 1: Craft the Crunchy Oreo Base
Crush Oreo cookies into fine crumbs
Melt butter and mix with cookie crumbs
Press mixture firmly into a 9-inch springform pan
Bake at 325°F for 10 minutes
Prepare a water bath for later use
Step 2: Whip Up the Creamy Filling
Soften cream cheese at room temperature
Beat cream cheese until silky smooth
Gradually add sugar and flour
Mix in sour cream, peanut butter, and vanilla extract
Add eggs one at a time, mixing gently
Chop Butterfingers into small pieces
Fold chopped Butterfingers into the mixture
Pour filling over the prepared crust
Place pan in the prepared water bath
Step 3: Bake to Perfection
Preheat oven to 300°F
Bake cheesecake for 1 hour and 25 minutes
Check for slight jiggle in the center
Remove from oven and let cool completely
Step 4: Create Luxurious Chocolate Ganache
Heat heavy cream until steaming
Pour hot cream over chocolate chips
Let sit for 3-4 minutes
Stir until smooth and glossy
Spread evenly over cooled cheesecake
Step 5: Whip Up Dreamy Topping
Chill mixing bowl and whisk
Combine heavy cream, powdered sugar
Add peanut butter and vanilla
Whip until stiff peaks form
Pipe or spread over ganache layer
Step 6: Final Flourish
Sprinkle additional chopped Butterfingers on top
Refrigerate for at least 4 hours
Best served chilled
Store in refrigerator for up to 5 days
Serving Tip: Allow cheesecake to sit at room temperature for 15 minutes before serving for the best texture and flavor.
Tips for a Silky, Crunchy Butterfinger Cheesecake Finish
Crush Cookies Perfectly: Use a food processor or rolling pin to create fine, uniform Oreo crumbs for a smooth, compact crust that holds together beautifully.
Prevent Cheesecake Cracks: Beat cream cheese at room temperature and mix ingredients gently to avoid overmixing, which can cause unsightly surface cracks.
Master the Water Bath: Wrap the springform pan in aluminum foil to prevent water from seeping into the delicate cheesecake during baking, ensuring a creamy texture.
Chop Butterfingers Strategically: Cut candy bars into small, uniform pieces to distribute evenly throughout the filling and create delightful flavor bursts in every bite.
Whip Cream Like a Pro: Chill your mixing bowl and whisk beforehand to help heavy cream whip faster and reach stiff, gorgeous peaks more easily.
The Right Way to Store Butterfinger Cheesecake Slices
Refrigeration: Wrap the cheesecake tightly with plastic wrap or store in an airtight container. Keep refrigerated for up to 5 days to maintain freshness and prevent flavor absorption from other foods.
Freezing: Slice the cheesecake before freezing for easier portioning. Wrap individual slices in plastic wrap, then place in a freezer-safe container. Freeze for up to 2 months, preserving its delicious texture and flavor.
Reheating: Thaw frozen cheesecake in the refrigerator overnight. For the best taste and texture, enjoy chilled or let sit at room temperature for 15-20 minutes before serving. Avoid microwaving, which can make the cheesecake soggy and compromise its creamy consistency.
Pairing Suggestions to Serve with Butterfinger Cheesecake
Boost Flavor with Chocolate Stout: Pair this rich Butterfinger Cheesecake with a robust chocolate stout beer. The deep, malty notes complement the sweet peanut butter and chocolate flavors, creating a decadent dessert experience.
Elevate with Caramel Espresso: Serve alongside a smooth caramel latte or espresso. The coffee’s bitter undertones cut through the cheesecake’s sweetness, while the caramel enhances the Butterfinger’s butterscotch-like essence.
Refresh with Nutty Red Wine: Choose a full-bodied red wine with nutty undertones, like a Tawny Port or Madeira. These wines echo the peanut butter and chocolate notes, providing a sophisticated contrast to the creamy cheesecake.
Cool Down with Vanilla Bourbon: Enjoy a chilled vanilla bourbon cocktail that matches the dessert’s indulgent profile. The bourbon’s warmth and vanilla complexity beautifully highlight the cheesecake’s rich, creamy texture.
Fresh Variations to Try with Butterfinger Cheesecake
Peanut Butter Cup Paradise: Replace Butterfingers with chopped Reese’s Peanut Butter Cups, maintaining the same creamy texture and rich chocolate-peanut butter flavor profile.
Caramel Crunch Carnival: Drizzle salted caramel sauce between ganache layers and sprinkle crushed pretzels for added crunch and sweet-salty contrast.
No-Bake Butterscotch Blast: Transform the recipe into a no-bake version using gelatin, replacing baking with chilling, and incorporating butterscotch chips for a different sweet undertone.
Chocolate Lover’s Dream: Substitute regular chocolate for dark chocolate in the ganache, add cocoa powder to the cheesecake base, and garnish with chocolate shavings for intense chocolate lovers.
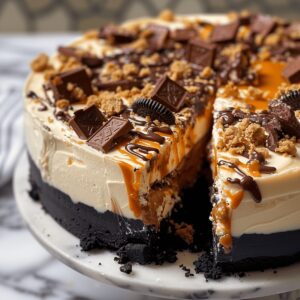
Butterfinger Cheesecake delivers rich peanut butter and chocolate indulgence with a creamy texture that melts in your mouth. Chocolate graham cracker crust and crushed Butterfinger bars provide irresistible crunch, making this dessert a perfect treat for chocolate and cheesecake enthusiasts.
Ingredients
Scale
Butterfinger Cheesecake Ingredients:
Main Ingredients:
24 ounces (680 grams) cream cheese, room temperature
1 cup (200 grams) sugar
4 large eggs, room temperature
1 ½ cups chopped Butterfingers
Crust Ingredients:
2 ¼ cups (280 grams) Oreo crumbs
4 tablespoons (60 grams) salted butter, melted
Additional Filling and Topping Ingredients:
½ cup (120 grams) peanut butter
¾ cup (180 grams) sour cream, room temperature
3 tablespoons (24 grams) all-purpose flour
1 teaspoon vanilla extract
6 ounces (170 grams) semi-sweet chocolate chips
½ cup (120 milliliters) heavy whipping cream
¾ cup (180 milliliters) heavy whipping cream
½ cup (60 grams) powdered sugar
2 tablespoons (30 grams) peanut butter
¼ teaspoon vanilla extract
Chopped Butterfingers (for garnish)
Instructions
Craft a crisp foundation by pulverizing Oreo cookies into fine crumbs, then merge with melted butter, pressing firmly into a 9-inch springform pan. Bake the crust at 325°F (163°C) for 10 minutes to create a sturdy base, then prepare a water bath for the subsequent baking process.
In a spacious mixing bowl, whip cream cheese until silky smooth, gradually incorporating granulated sugar and all-purpose flour. Gently fold in sour cream, creamy peanut butter, and pure vanilla extract until thoroughly combined.
Introduce eggs one at a time, stirring minimally to maintain a velvety texture. Carefully fold in roughly chopped Butterfinger candy bars, ensuring even distribution throughout the cheesecake batter.
Transfer the luscious filling into the pre-baked crust, situating the springform pan within the prepared water bath. Bake at 300°F (149°C) for approximately 1 hour and 25 minutes, until the center remains slightly jiggly but set.
After baking, remove from the oven and allow the cheesecake to cool completely at room temperature. Meanwhile, create a luxurious ganache by heating heavy cream until steaming, then pouring over premium dark chocolate chips, stirring until glossy and smooth.
Drizzle the ganache evenly across the cooled cheesecake, allowing it to cascade gracefully over the surface. Whip an additional heavy cream with powdered sugar, a dollop of peanut butter, and vanilla extract until stiff peaks form.
Artfully pipe the whipped cream around the cheesecake’s perimeter, then generously sprinkle crushed Butterfinger pieces for a dramatic, tempting garnish.
Refrigerate the assembled cheesecake for a minimum of 4 hours, preferably overnight, to allow flavors to meld and texture to set perfectly. Slice with a warm knife and serve chilled for maximum indulgence.
Notes
Crush Oreos finely for a smooth, even crust that provides a delicious chocolate base for the creamy cheesecake.
Use room temperature ingredients to ensure a silky, lump-free filling that blends perfectly and bakes evenly.
Create a water bath by wrapping the springform pan in aluminum foil to prevent water seepage and ensure gentle, even baking.
Chop Butterfingers into small pieces so they distribute evenly throughout the cheesecake, creating bursts of candy flavor in every bite.
Cool the cheesecake completely before adding ganache to prevent melting and ensure a smooth, glossy chocolate topping.
Refrigerate for at least 4 hours to allow the cheesecake to set completely and develop rich, harmonious flavors.
Degree: Associate of Applied Science in Culinary Arts
Focus: Practical culinary training, fundamental cooking techniques, meal planning, and using fresh, local ingredients.
Lake Superior College, Duluth, Minnesota
Program: Certificate in Sustainable Food Systems
Focus: Cooking methods that promote sustainability, farm-to-table practices, and eco-friendly meal creation.
Lucas Bennett’s cooking journey started in his parents’ kitchen, where he learned to prepare tasty, no-fuss meals from scratch. His culinary passion led him to Fox Valley Technical College, where he gained practical cooking skills.
He then expanded his focus on sustainability at Lake Superior College. Today, Lucas shares easy, approachable recipes designed to make cooking enjoyable and stress-free for everyone.

Lucas Bennett
Founder & Recipe Creator
Expertise
Simple Everyday Recipes, Sustainable Cooking Practices, Creative Meal Planning, Recipe Testing and Improvement
Education
Fox Valley Technical College, Appleton, Wisconsin
Lake Superior College, Duluth, Minnesota
Lucas Bennett’s cooking journey started in his parents’ kitchen, where he learned to prepare tasty, no-fuss meals from scratch. His culinary passion led him to Fox Valley Technical College, where he gained practical cooking skills.
He then expanded his focus on sustainability at Lake Superior College. Today, Lucas shares easy, approachable recipes designed to make cooking enjoyable and stress-free for everyone.