Air Fryer Yaki Onigiri Recipe

Crispy Air Fryer Yaki Onigiri Recipe: Quick Japanese Rice Treat

Japanese culinary traditions spark excitement when air fryer yaki onigiri crafts humble ingredients into crispy, golden delights.

Rice balls capture the essence of comfort food with their simple yet satisfying profile.

Crisp exteriors give way to soft, warm centers that tantalize taste buds and spark memories of street food adventures.

Traditional techniques meet modern kitchen technology in this delightful fusion preparation.

The magic happens when carefully seasoned rice meets high-heat cooking, creating a perfect balance of textures and flavors.

Crispy edges and tender interiors make these rice parcels irresistible to anyone seeking a quick, delicious snack.

Get ready to elevate your cooking game with this straightforward yet impressive recipe.

What Sets Air Fryer Yaki Onigiri Apart

  • Crisp and Caramelized Delight: Air frying transforms plain rice into a golden-brown, crispy exterior with deliciously charred edges that add incredible depth of flavor and an exciting crunch.
  • Foolproof Japanese Comfort: This recipe offers an easy method to create restaurant-style yaki onigiri without complicated techniques, making traditional Japanese street food accessible to home cooks of all skill levels.
  • Quick Weeknight Culinary Adventure: Requiring just 20 minutes from start to finish, this dish delivers a satisfying meal or snack that's perfect for busy individuals craving something exciting and authentic without spending hours in the kitchen.
  • Versatile Sauce-Coated Goodness: Multiple coatings of soy sauce create layers of umami and glazed texture, allowing you to control the intensity of flavor and level of caramelization to match your personal taste preferences.

Ingredients for Air Fryer Yaki Onigiri

Rice and Seasoning:
  • Cooked Rice: Short-grain white rice that forms the base of the onigiri, ideal for authentic Japanese texture.
  • Soy Sauce: Provides rich umami flavor and helps create a delicious caramelized exterior.
Coating and Flavor Enhancers:
  • Mirin, Sake: Traditional Japanese seasonings that add depth and sweetness to the soy sauce mixture.
  • Sesame Oil: Adds a nutty aroma and enhances overall flavor profile.
Optional Garnish:
  • Furikake, Nori Seaweed: Offers additional seasoning and traditional Japanese garnish for extra flavor and visual appeal.

How to Cook Air Fryer Yaki Onigiri

Step 1: Collect Ingredients

Gather all necessary items for creating delicious yaki onigiri.

  • Cooked hot rice
  • Soy sauce
  • Optional seasonings
  • Air fryer
  • Cooking spray

Step 2: Prepare Your Hands

Moisten hands with water to prevent rice from sticking during shaping.

Step 3: Shape Rice Triangles

Take of hot cooked rice and form into triangular onigiri shapes.

  • Use hands or onigiri mold
  • Create 3 distinct triangles

Step 4: Prep Air Fryer

Lightly spray air fryer basket with cooking spray to prevent sticking.

Step 5: First Air Frying Round

Place rice triangles in air fryer basket.

  • Cook at 400°F
  • Fry for 15 minutes
  • Flip triangles halfway through cooking

Step 6: Coat With Soy Sauce

Brush both sides of onigiri with soy sauce mixture.

Step 7: Final Crispy Frying

Return soy-coated triangles to air fryer.

  • Cook for 2 minutes
  • Repeat coating and frying process 2 more times
  • Total additional cooking time: 6 minutes

Step 8: Check Doneness

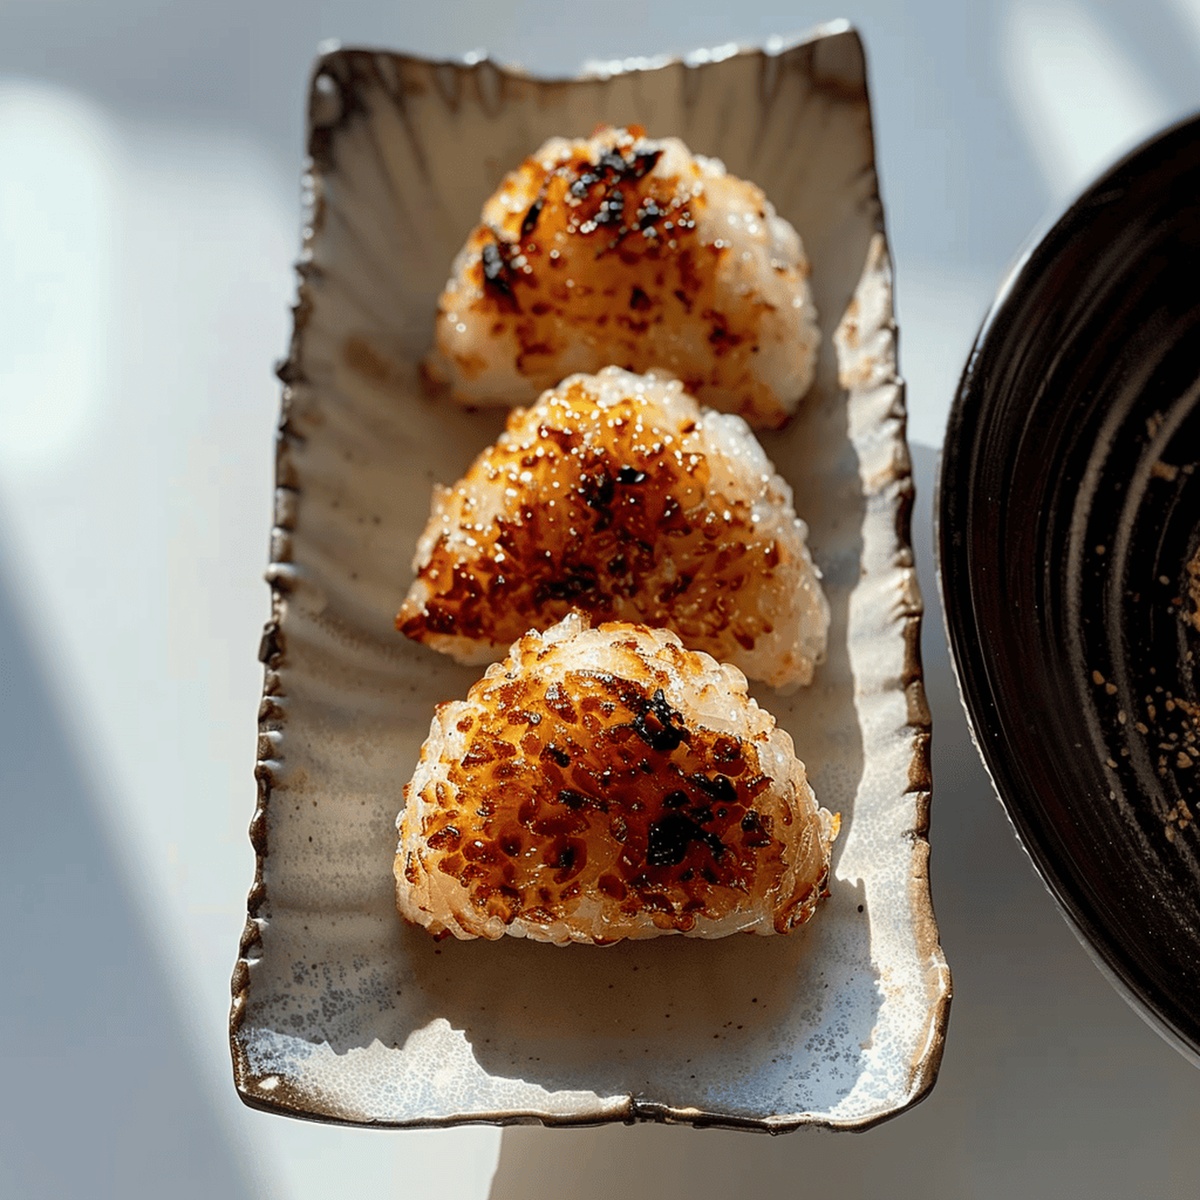
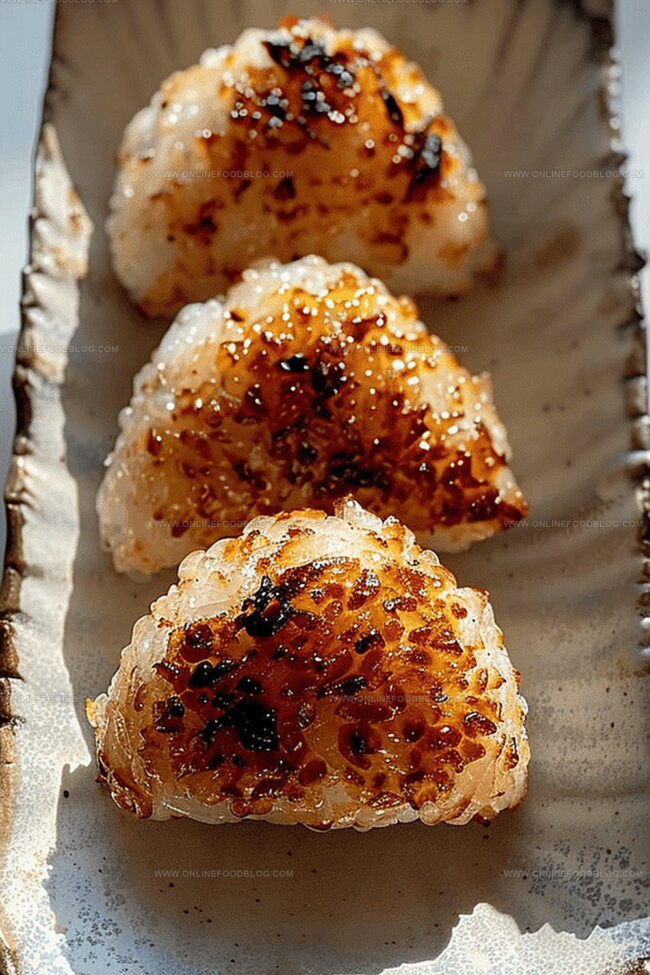
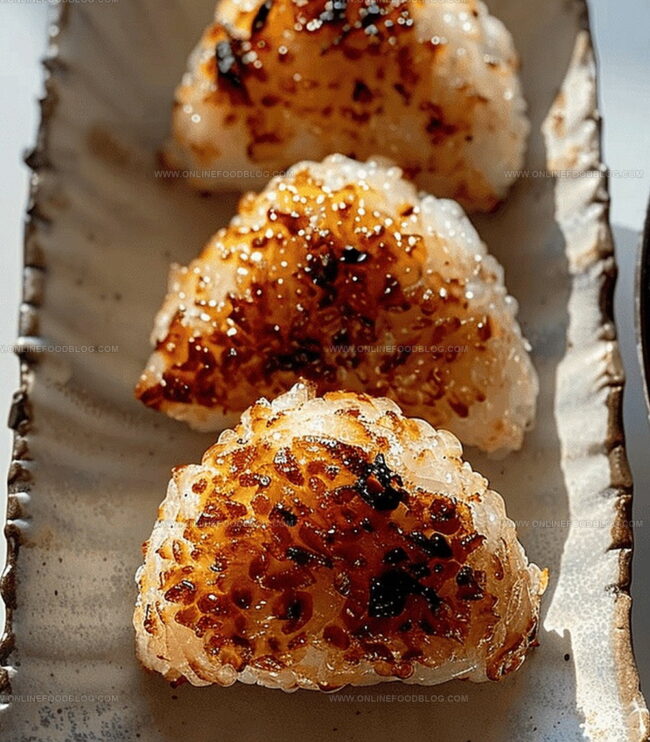
Ensure onigiri have some charred areas for authentic flavor.

Step 9: Serve and Enjoy

Plate hot yaki onigiri immediately and savor the crispy, saucy treat.

Tips for Crispy Air Fryer Yaki Onigiri

  • Moisture Magic: Keep hands slightly damp with water when shaping rice to prevent sticky buildup and create smooth, compact onigiri shapes.
  • Rice Temperature Matters: Use hot, freshly cooked rice for easier molding and better texture, ensuring each triangle holds its form perfectly.
  • Careful Coating Technique: Brush soy sauce mixture gently and evenly to achieve balanced flavor without oversaturating the rice surface.
  • Watch Charring Closely: Monitor air fryer closely during final coating stages to create delicious crispy edges without burning the onigiri.
  • Sauce Balance: Adjust soy sauce coating frequency based on your preferred level of caramelization and personal taste preferences.

How to Store and Reheat Air Fryer Yaki Onigiri

  • Store Leftovers
  • Refrigerate cooled yaki onigiri in an airtight container for up to 3 days. Wrap each onigiri individually in plastic wrap to prevent drying out and preserve moisture. Keep the soy sauce mixture separate in a sealed container.
  • Reheat Methods
  • Air Fryer Reheat: Warm at 350F for 3-4 minutes until crispy and heated through. Brush with reserved soy sauce mixture halfway through reheating to restore original flavor and texture. Microwave briefly as a quick alternative, but the texture might become slightly softer compared to air frying.
  • Freezing Option
  • Freeze uncooked or cooked onigiri wrapped tightly in freezer-safe plastic wrap for up to 1 month. Thaw overnight in the refrigerator before reheating.

Pairing Guide for Air Fryer Yaki Onigiri

  • Pair with Crisp Sake: Let a chilled, light Japanese sake complement the savory, crispy texture of yaki onigiri, cutting through its rich soy sauce glaze.
  • Match with Miso Soup: Serve alongside a warm, comforting bowl of traditional miso soup to balance the crispy rice's intensity and add depth to the meal.
  • Create a Fresh Side Salad: Toss a quick cucumber and seaweed salad with rice vinegar dressing to provide a refreshing, light contrast to the hot, charred onigiri.
  • Enjoy with Green Tea: Brew a hot cup of sencha green tea to cleanse the palate and enhance the umami flavors of the yaki onigiri.

Creative Spins on Air Fryer Yaki Onigiri

  • Seafood Fusion: Add small pieces of cooked shrimp or crab meat inside the rice before molding, creating a protein-packed maritime version that enhances the traditional onigiri flavor profile.
  • Vegetarian Herb: Mix chopped fresh herbs like cilantro, basil, or green onions into the rice before shaping, providing a fresh and aromatic alternative for plant-based eaters.
  • Umami Cheese: Incorporate a small cube of mozzarella or mild cheddar cheese in the center of each onigiri, which melts during air frying and creates a creamy, savory interior.
  • Spicy Korean: Blend gochujang or kimchi paste into the soy sauce mixture for coating, adding a bold and fiery kick that transforms the traditional Japanese recipe with Korean-inspired flavors.
Print
clock clock iconcutlery cutlery iconflag flag iconfolder folder iconinstagram instagram iconpinterest pinterest iconfacebook facebook iconprint print iconsquares squares iconheart heart iconheart solid heart solid icon
Air Fryer Yaki Onigiri Recipe

Air Fryer Yaki Onigiri Recipe


5 Stars 4 Stars 3 Stars 2 Stars 1 Star

4.8 from 28 reviews

  • Total Time: 33 minutes
  • Yield: 2 1x

Description

Japanese rice balls crisp up beautifully in an air fryer, creating a golden exterior with a tender center. Savory soy glaze and buttery texture make these onigiri an irresistible snack you’ll crave again and again.


Ingredients

Scale

Main Ingredients:

  • 300 grams (10.6 ounces) Cooked rice
  • 1 slice Mozzarella cheese

Seasonings:

  • 1 tablespoon Sugar
  • 2 tablespoons Soy Sauce
  • 1 tablespoon Mirin
  • 1 tablespoon Sake

Additional Ingredient:

  • Water (small bowl for wetting hands when shaping onigiri)

Instructions

  1. Thoroughly rinse hands with cool water to create a moisture barrier, preventing rice from adhering to fingers during shaping.
  2. Carefully mold approximately of freshly cooked, steaming rice into a triangular shape using either manual techniques or a dedicated onigiri mold.
  3. Craft exactly three triangular rice formations, ensuring uniform size and compact structure.
  4. Arrange the rice triangles inside the air fryer basket, maintaining sufficient spacing between each piece.
  5. Configure the air fryer to 400 degrees Fahrenheit (204 degrees Celsius) and initiate cooking for 15 minutes.
  6. Midway through the cooking cycle, delicately rotate each rice triangle to guarantee even browning and crisp exterior.
  7. Remove the onigiri and generously brush both surfaces with prepared soy sauce mixture, ensuring complete coverage.
  8. Return the coated rice triangles to the air fryer and continue cooking for an additional 2 minutes to develop caramelization.
  9. Repeat the coating and brief air frying process two more times, creating layers of flavor and developing characteristic charred regions.
  10. Monitor the onigiri closely to prevent excessive burning, adjusting cooking time if necessary.
  11. Plate the yaki onigiri immediately while maintaining optimal temperature and crisp texture.
  12. Serve and savor the delectable Japanese-inspired rice delicacy.

Notes

  • Wet hands with water before shaping rice to prevent sticking and create smooth onigiri surfaces.
  • Use hot, freshly cooked rice for best texture and easier molding when forming triangular shapes.
  • Aim for consistent triangle sizes around 100g each to ensure even cooking in the air fryer.
  • Flip onigiri halfway through initial cooking to achieve golden-brown crispy exterior on all sides.
  • Carefully brush soy sauce mixture multiple times for deep caramelization and rich umami flavor without burning.
  • Watch closely during final coating stages to prevent excessive charring while developing delicious crispy edges.
  • Prep Time: 10 minutes
  • Cook Time: 23 minutes
  • Category: Snacks, Lunch, Dinner
  • Method: Air Frying
  • Cuisine: Japanese

Nutrition

  • Serving Size: 2
  • Calories: 250 kcal
  • Sugar: 5 g
  • Sodium: 480 mg
  • Fat: 3 g
  • Saturated Fat: 1.5 g
  • Unsaturated Fat: 1 g
  • Trans Fat: 0 g
  • Carbohydrates: 48 g
  • Fiber: 1 g
  • Protein: 6 g
  • Cholesterol: 10 mg
Lucas Bennett

Lucas Bennett

Founder & Recipe Creator

Expertise

Simple Everyday Recipes, Sustainable Cooking Practices, Creative Meal Planning, Recipe Testing and Improvement

Education

Fox Valley Technical College, Appleton, Wisconsin

  • Degree: Associate of Applied Science in Culinary Arts
  • Focus: Practical culinary training, fundamental cooking techniques, meal planning, and using fresh, local ingredients.

Lake Superior College, Duluth, Minnesota

  • Program: Certificate in Sustainable Food Systems
  • Focus: Cooking methods that promote sustainability, farm-to-table practices, and eco-friendly meal creation.

Lucas Bennett’s cooking journey started in his parents’ kitchen, where he learned to prepare tasty, no-fuss meals from scratch. His culinary passion led him to Fox Valley Technical College, where he gained practical cooking skills.
He then expanded his focus on sustainability at Lake Superior College. Today, Lucas shares easy, approachable recipes designed to make cooking enjoyable and stress-free for everyone.

Leave a Reply

Your email address will not be published. Required fields are marked *

Recipe rating 5 Stars 4 Stars 3 Stars 2 Stars 1 Star