
Crispy Air Fryer PB&J: A Nostalgic Twist on a Classic Recipe
Crispy air fryer peanut butter and jelly sandwiches craft a childhood classic into a golden, crunchy delight.
Nostalgia meets culinary innovation with this simple yet delectable twist on a beloved comfort food.
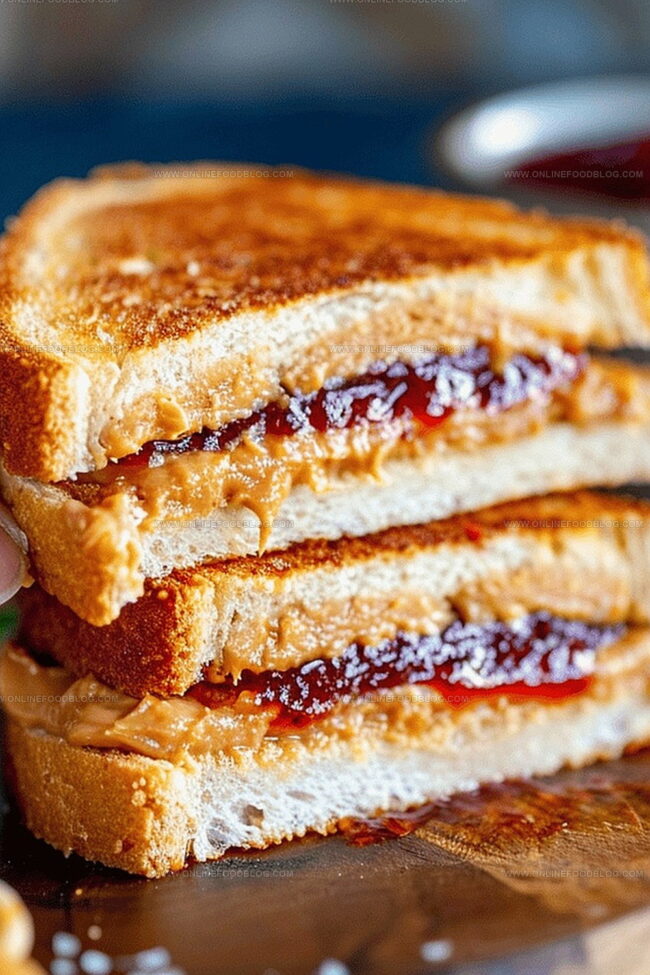
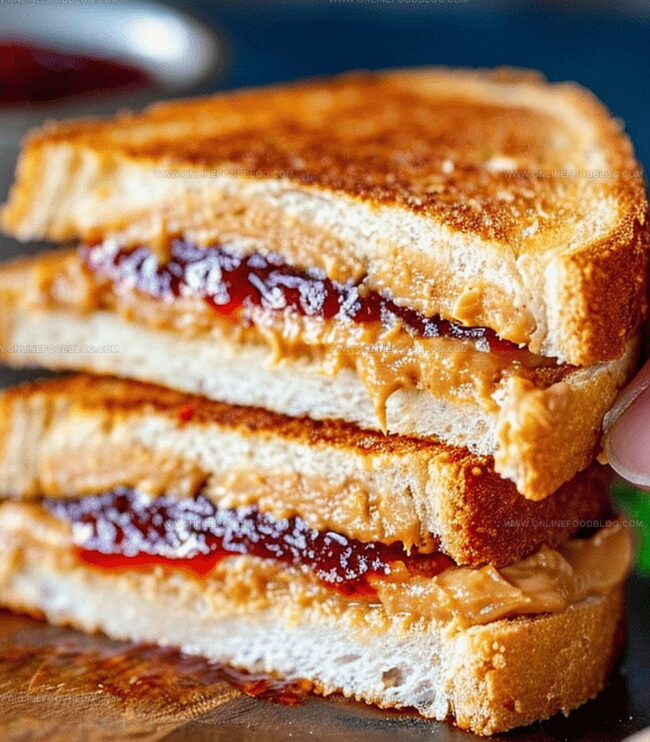
Perfectly toasted bread wraps around smooth, melty peanut butter and sweet, gooey jelly for an irresistible combination.
The air fryer works its magic, creating a crunch that elevates the traditional sandwich experience to new heights.
Minimal ingredients and quick preparation make this recipe a game-changer for busy home cooks seeking a quick, satisfying meal.
Unexpected textures and enhanced flavors await those ready to upgrade their sandwich game.
The result promises a mouthwatering treat that balances childhood memories with grown-up cooking techniques.
Why Air Fryer PB&J Sandwiches Are a Fun Surprise
Ingredients for Air Fryer PB&J Sandwich
Bread:Spread Ingredients:Coating Ingredients:Easy Instructions for Air Fryer PB&J Sandwich
Step 1: Prepare Sandwich Base
Lay out 2 bread slices on a clean cutting board. Spread a smooth layer of peanut butter on one slice and an even layer of jelly on the other slice.
Step 2: Combine Sandwich Layers
Press the two slices together, ensuring the peanut butter and jelly sides are facing each other.
Step 3: Butter the Exterior
Carefully spread butter on the outside of both bread slices, creating a golden crispy surface.
Step 4: Prepare Air Fryer
Preheat the air fryer to 350°F, ensuring the basket is clean and dry.
Step 5: Cook First Side
Place the prepared sandwich in the air fryer basket. Cook for 3-5 minutes until the top turns a light golden brown.
Step 6: Flip and Finish Cooking
Carefully flip the sandwich. Increase air fryer temperature to 380°F. Cook for an additional 5 minutes until both sides are crispy and golden.
Step 7: Cool and Serve
Remove the sandwich from the air fryer. Let it cool for a few minutes to prevent burning your mouth. Slice diagonally and enjoy your crispy, warm PB&J!
Tips for a Crispy Air Fryer PB&J
How to Reheat and Store Air Fryer Sandwiches
Best Pairings for Peanut Butter and Jelly Sandwiches
Flavorful Spins on the Classic PB&J
Print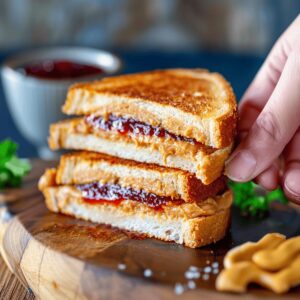
Air Fryer Peanut Butter And Jelly Sandwich Recipe
- Total Time: 15 minutes
- Yield: 1 1x
Description
Classic comfort meets modern cooking with this air fryer peanut butter and jelly sandwich. Crispy golden exterior gives way to a warm, gooey center that brings childhood memories straight to your plate.
Ingredients
Main Ingredients:
- 2 slices of bread
- 2 tablespoons (30 milliliters) peanut butter
- 2 tablespoons (30 milliliters) jelly or jam
Optional Toppings:
- Powdered sugar (optional)
Cooking Equipment:
- Air fryer
Instructions
- Arrange two bread slices on a clean cutting board, creating a workspace for sandwich assembly.
- Apply a uniform, even spread of peanut butter across the surface of one bread slice, ensuring complete coverage.
- Spread a complementary layer of jelly on the second bread slice, maintaining an equal thickness to the peanut butter.
- Carefully press the two bread slices together, aligning the peanut butter and jelly sides to face each other internally.
- Generously coat the exterior sides of the sandwich with softened butter, promoting a golden and crispy texture.
- Activate the air fryer and set the temperature precisely to 350°F (177°C), allowing it to preheat for optimal cooking conditions.
- Gently position the prepared sandwich into the air fryer basket, ensuring it sits centrally for even heat distribution.
- Cook the sandwich for 3-4 minutes, monitoring the top surface for initial browning and caramelization.
- Carefully flip the sandwich using tongs, then increase the air fryer temperature to 380°F (193°C) for enhanced crispiness.
- Continue cooking for an additional 4-5 minutes, vigilantly checking to prevent potential burning.
- Remove the sandwich from the air fryer and allow it to rest for 2-3 minutes, enabling the internal temperature to stabilize.
- Slice diagonally and serve warm, enjoying the melted, gooey peanut butter and jelly interior.
Notes
- Crispy transformation awaits your classic PB&J with this air fryer method, turning a simple sandwich into a golden, crunchy delight.
- Buttering the outside creates a perfectly crisp, restaurant-style exterior that elevates the homemade sandwich experience.
- Precise temperature control is crucial: start at 350°F, then boost to 380°F for ultimate browning without burning.
- Monitoring the sandwich closely prevents potential scorching, ensuring a perfectly toasted result every time.
- Letting the sandwich rest briefly after cooking allows the melted filling to settle and prevents potential burns from hot jelly.
- Prep Time: 5 minutes
- Cook Time: 10 minutes
- Category: Breakfast, Snacks
- Method: Air Frying
- Cuisine: American
Nutrition
- Serving Size: 1
- Calories: 350 kcal
- Sugar: 12 g
- Sodium: 350 mg
- Fat: 18 g
- Saturated Fat: 4 g
- Unsaturated Fat: 12 g
- Trans Fat: 0 g
- Carbohydrates: 35 g
- Fiber: 3 g
- Protein: 12 g
- Cholesterol: 0 mg
Lucas Bennett
Founder & Recipe Creator
Expertise
Simple Everyday Recipes, Sustainable Cooking Practices, Creative Meal Planning, Recipe Testing and Improvement
Education
Fox Valley Technical College, Appleton, Wisconsin
Lake Superior College, Duluth, Minnesota
Lucas Bennett’s cooking journey started in his parents’ kitchen, where he learned to prepare tasty, no-fuss meals from scratch. His culinary passion led him to Fox Valley Technical College, where he gained practical cooking skills.
He then expanded his focus on sustainability at Lake Superior College. Today, Lucas shares easy, approachable recipes designed to make cooking enjoyable and stress-free for everyone.